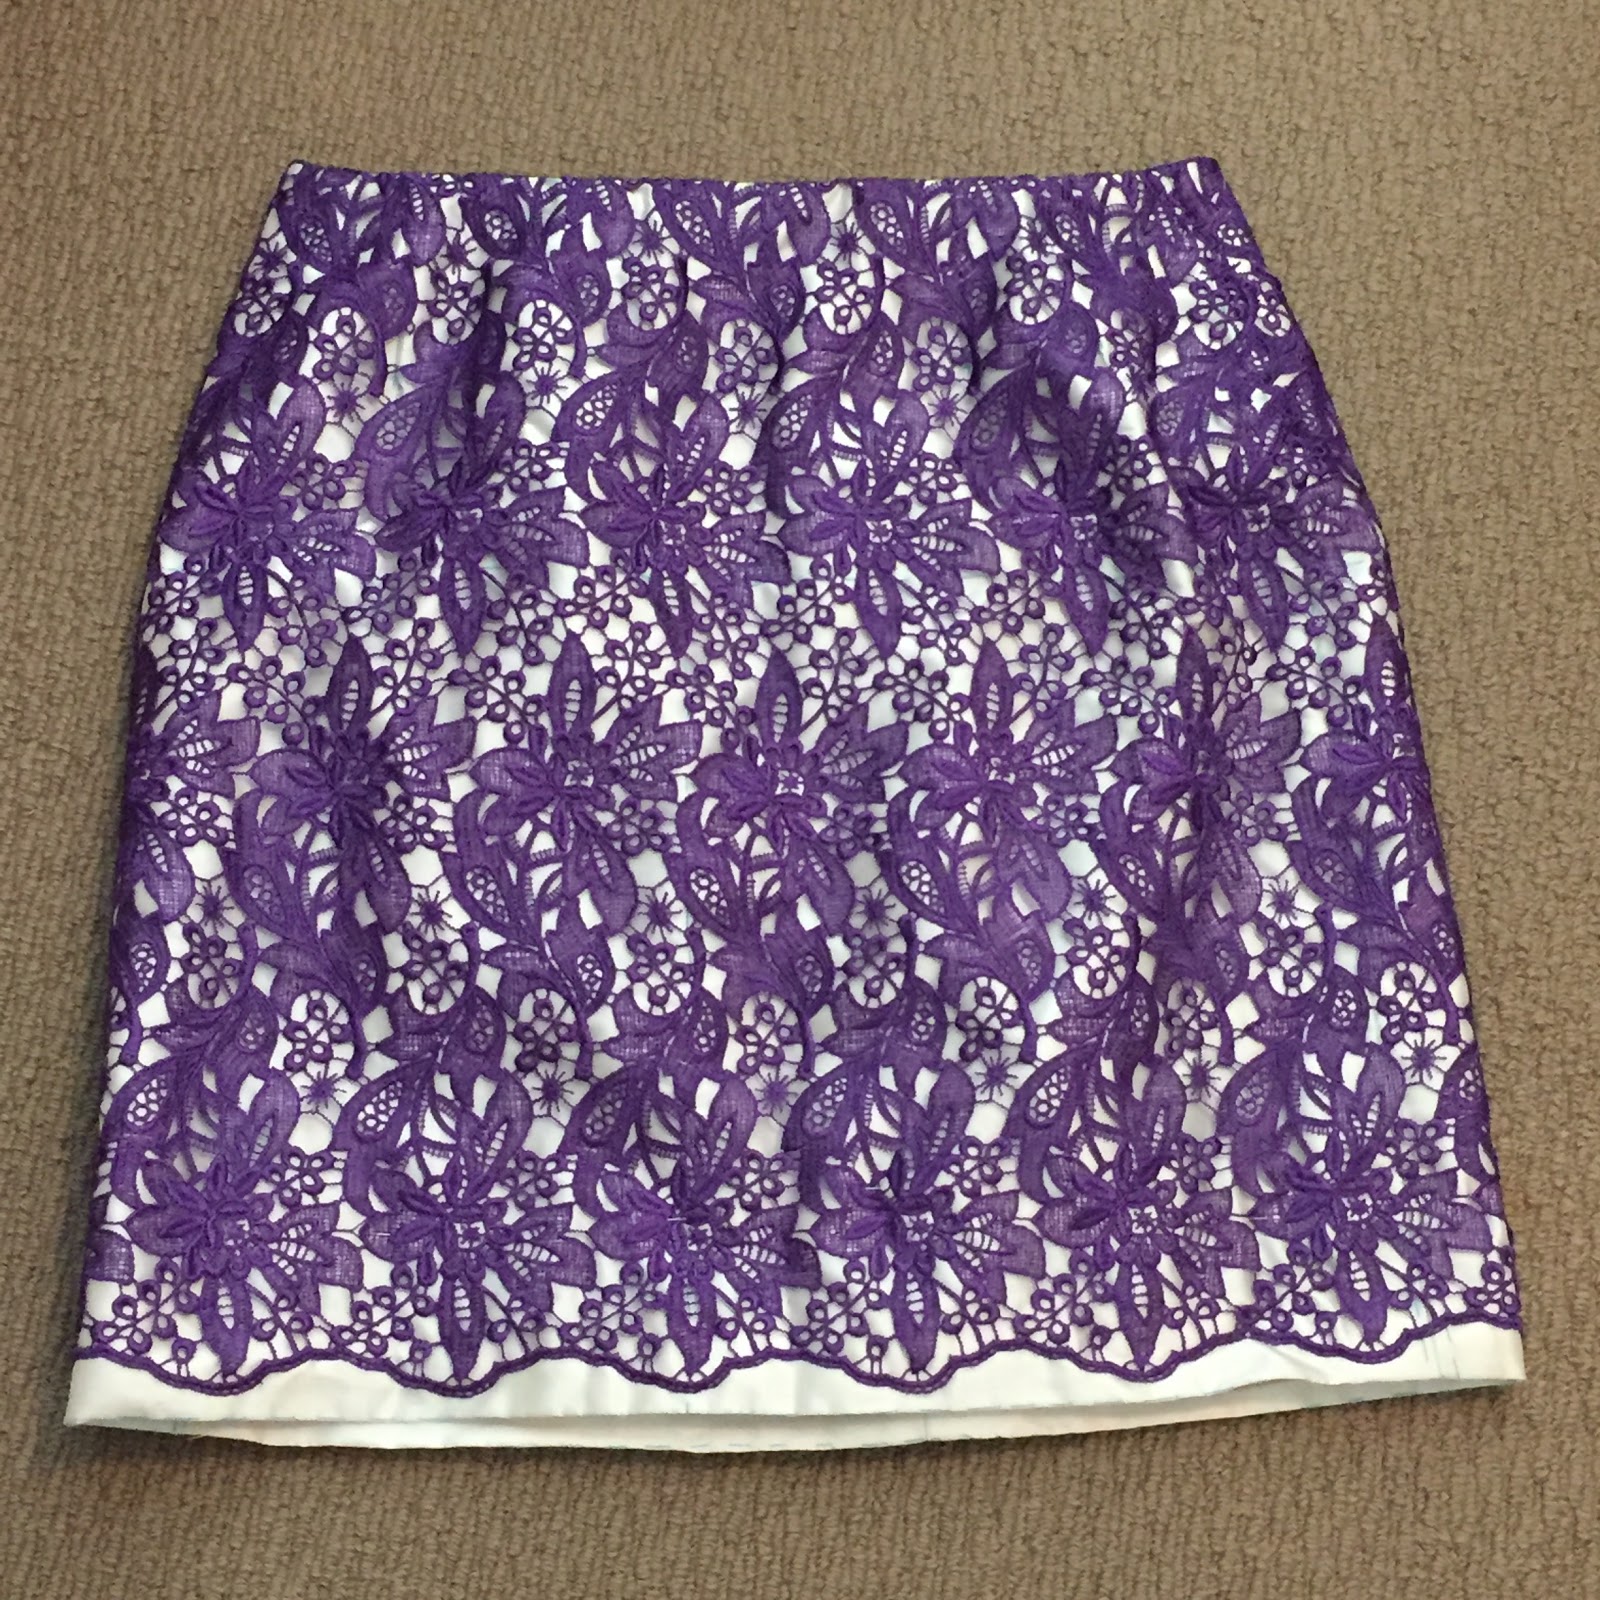
Here’s the finished guipure lace skirt I made at Susan Khalje’s 3 day guipure lace skirt workshop in Brisbane using fabric from Minerva Crafts. I’m now hooked on making anything ‘guipure’.
While this project is a bit formal I couldn’t pass up the opportunity to learn more skills. Now I’m thinking of more ‘urban’ ways to use guipure lace.
Any straight skirt pattern can be used for a guipure skirt so I used Simplicity 1460. Tapered skirts are my fav but I had to learn about shaping lace first at the waist before attempting shaping lace at the hem as well ie learn to walk before you learn to run.
Can I just say that it doesn’t matter what your skill level is, everyone at this workshop created a guipure lace skirt and used a straight skirt pattern that worked for them. Please don’t think you have to be super skilled to do this type of sewing. You only need to be open-minded and patient with yourself. Everyone in the class was really focused but also amazed they could learn these skills and build on their existing skills. That’s enough encouragement to try new skills from me for now.
What I learnt
I enjoyed seeing how Susan worked on everyone else’s skirts to get a better fit, including getting a better fit for my skirt.
Jigsaw puzzles have always been a favourite past time of mine so watching Susan piece guipure lace to get your body shaping was mesmerising.
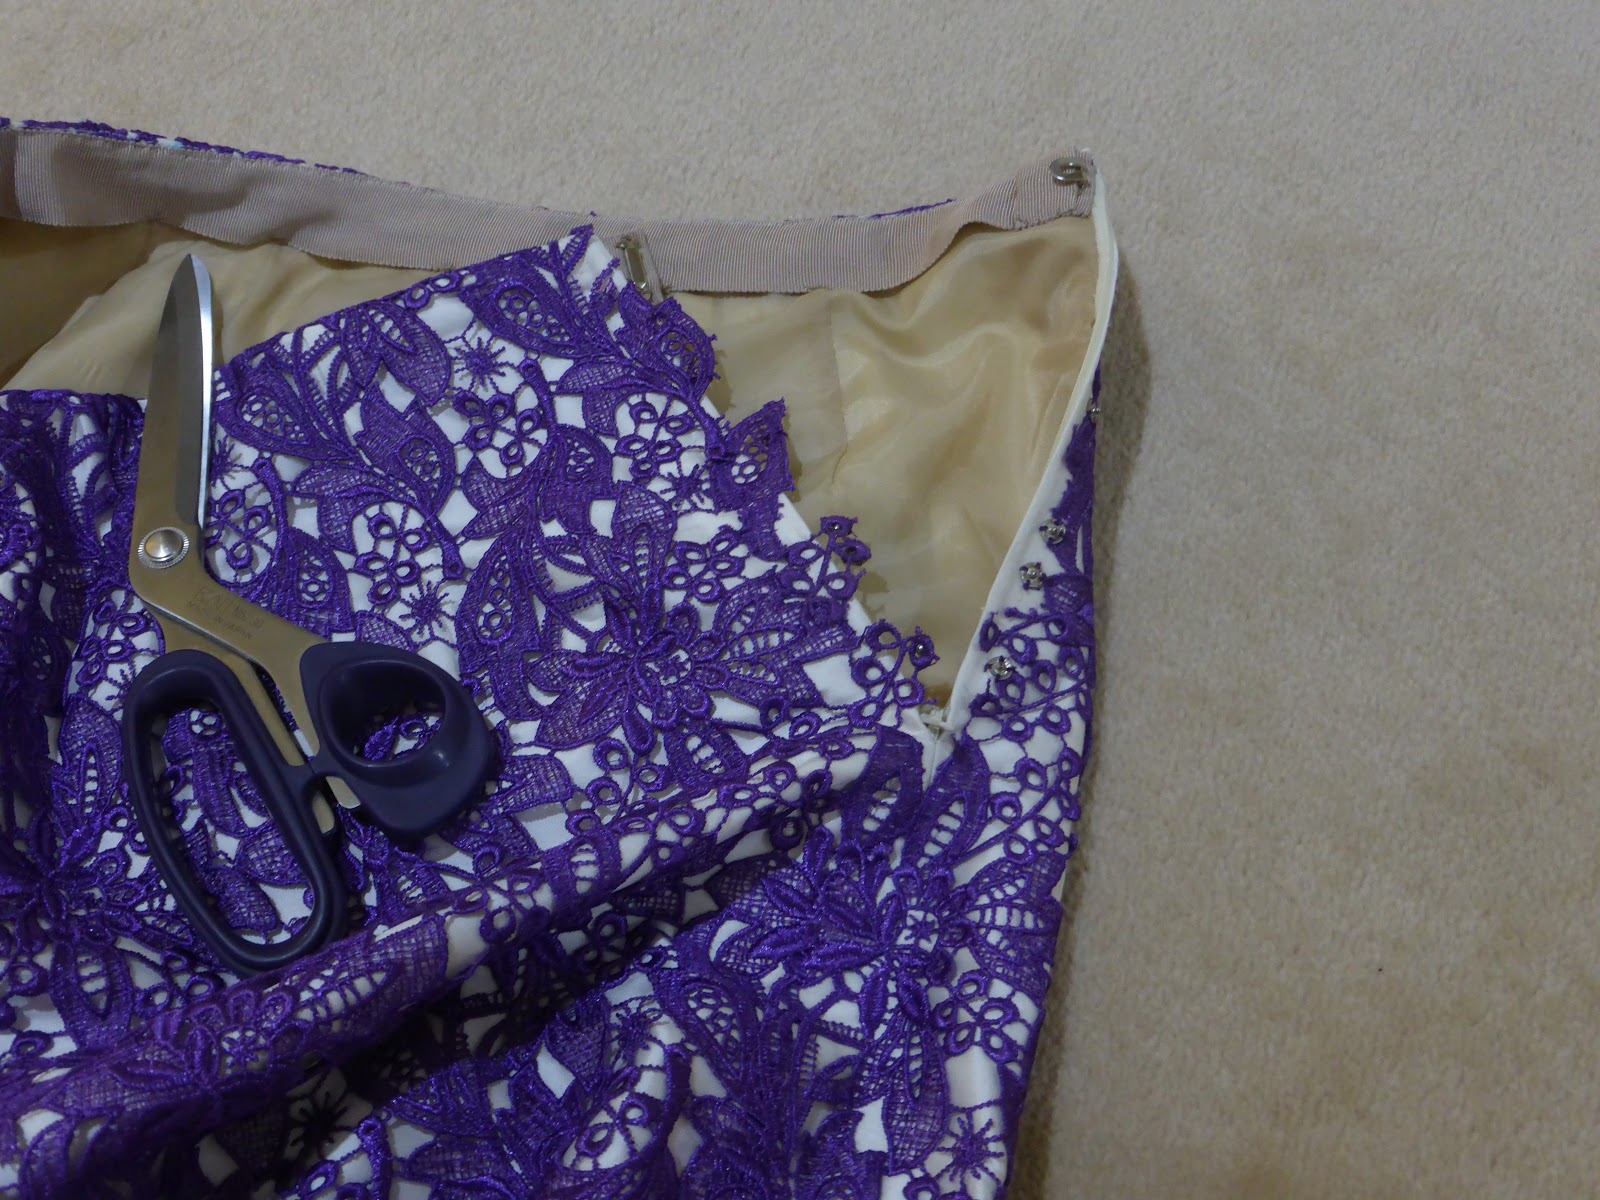
Sewing a hand -picked zipper takes very little time so I’m sold on this technique. Applying an inner grosgrain waist facing is really only limited by the Petersham tape you use.
Fabric
I picked these fabrics from the website. I didn’t get samples beforehand and I was really pleased with these choices.
The descriptions on Minerva Crafts website and their photography are spot on. I’m happy with my website choices when the fabric arrives at my door step.
Packaging
Vicki now processes the Network Blogger orders through their normal order system and the beauty of this is you get to see the name of who packed each part of your order. It’s amazing to see how many people are involved in their packaging/mail service. I’ve always loved the personal side of Minerva Crafts and it just keeps getting better. Thanks guys.
Guipure lace
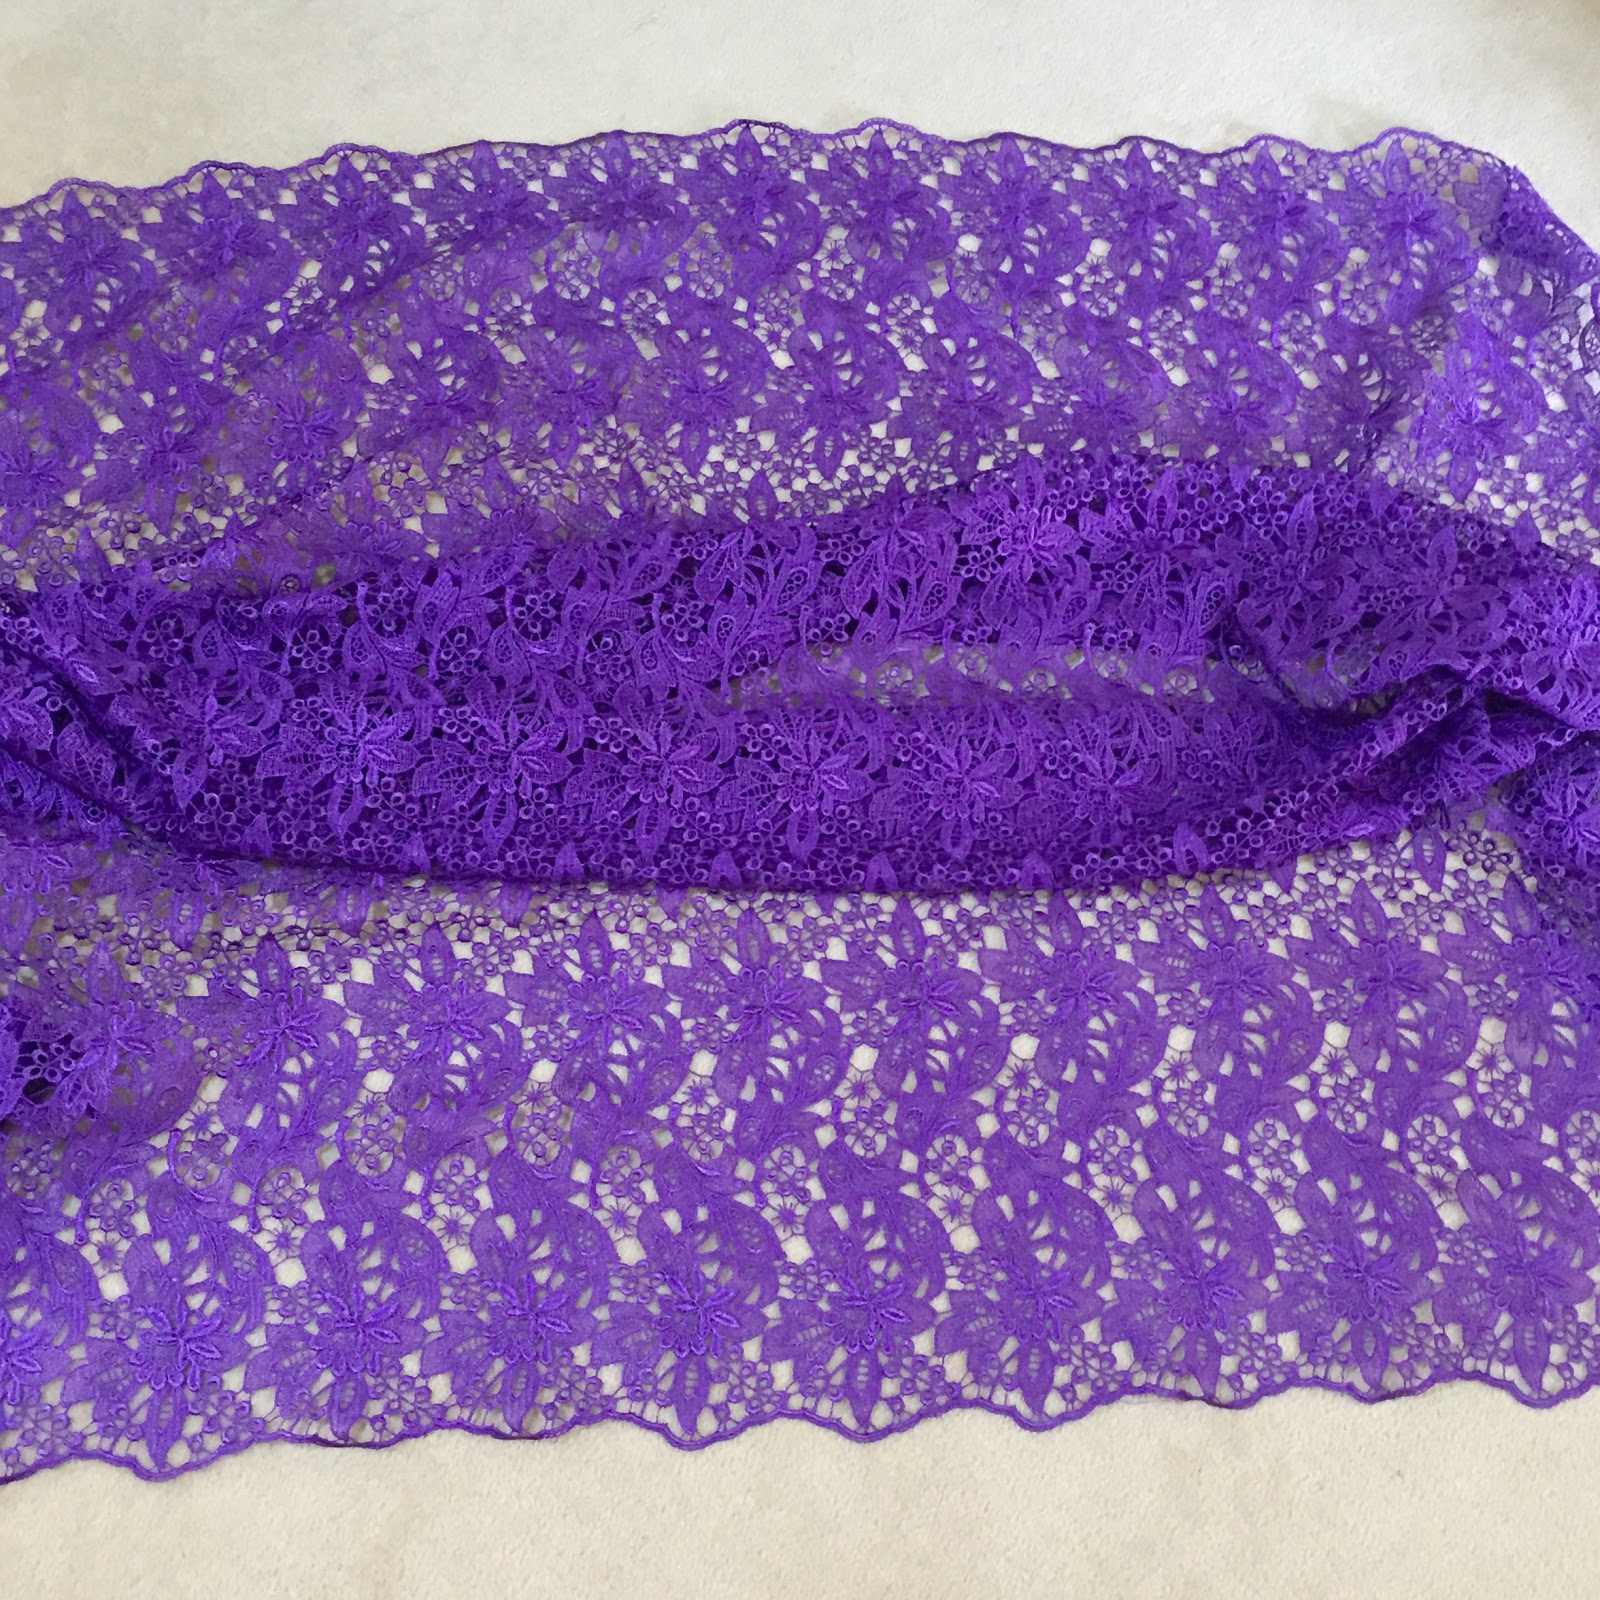
The course specified guipure and when I put guipure in the search criteria on their website, it brought up 11 types of guipure fabric options. The range of colours are extensive and the quality is exactly what I needed for this workshop.
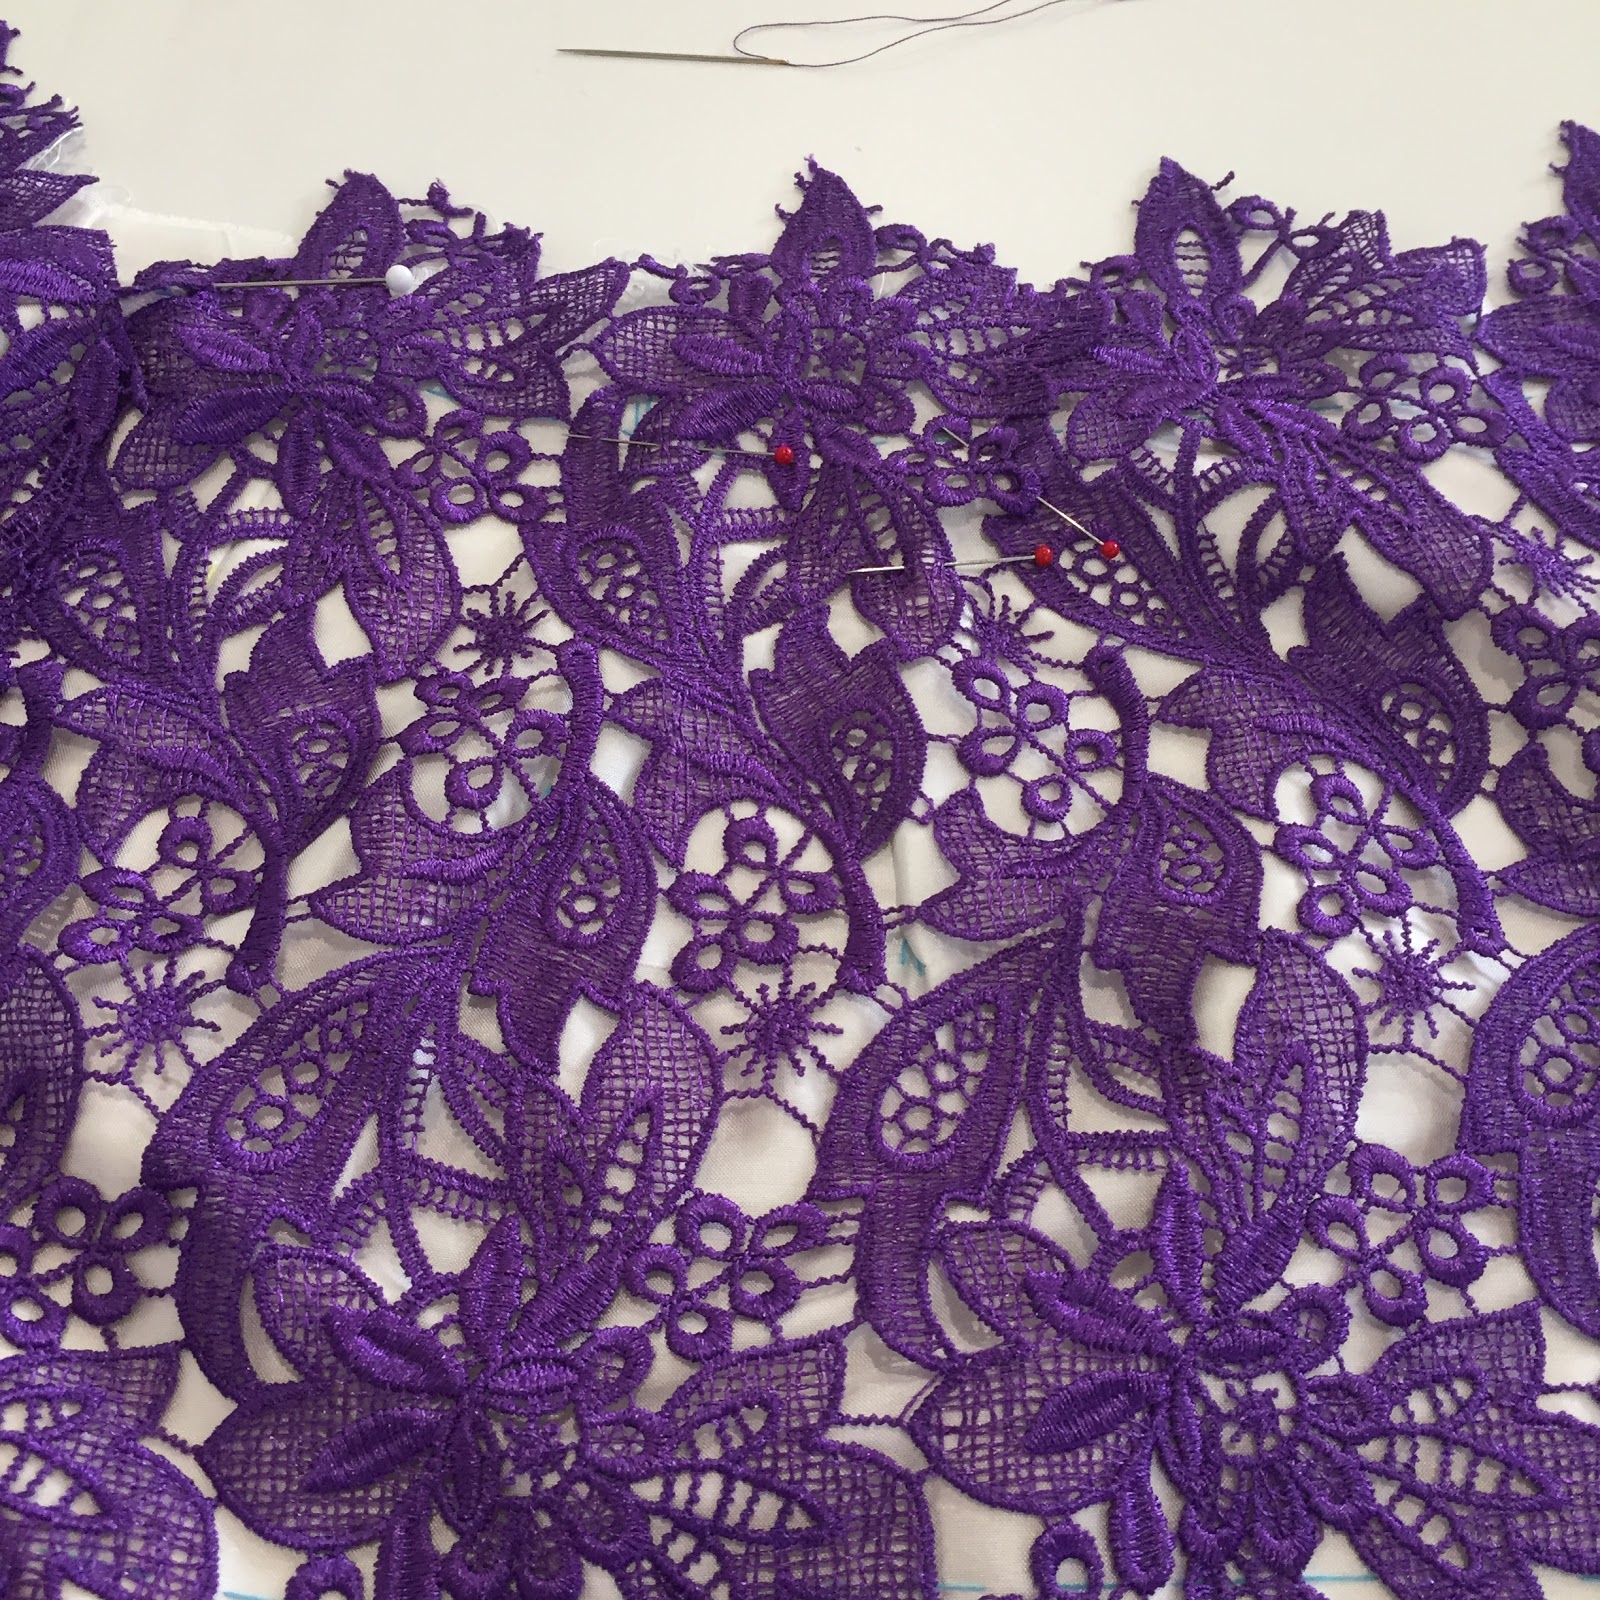
I chose this awesome purple because it’s a strong colour, scalloped on both sides and special. It looks special and flattering. You only need to purchase your length plus 10cm of this guipure lace for a skirt.
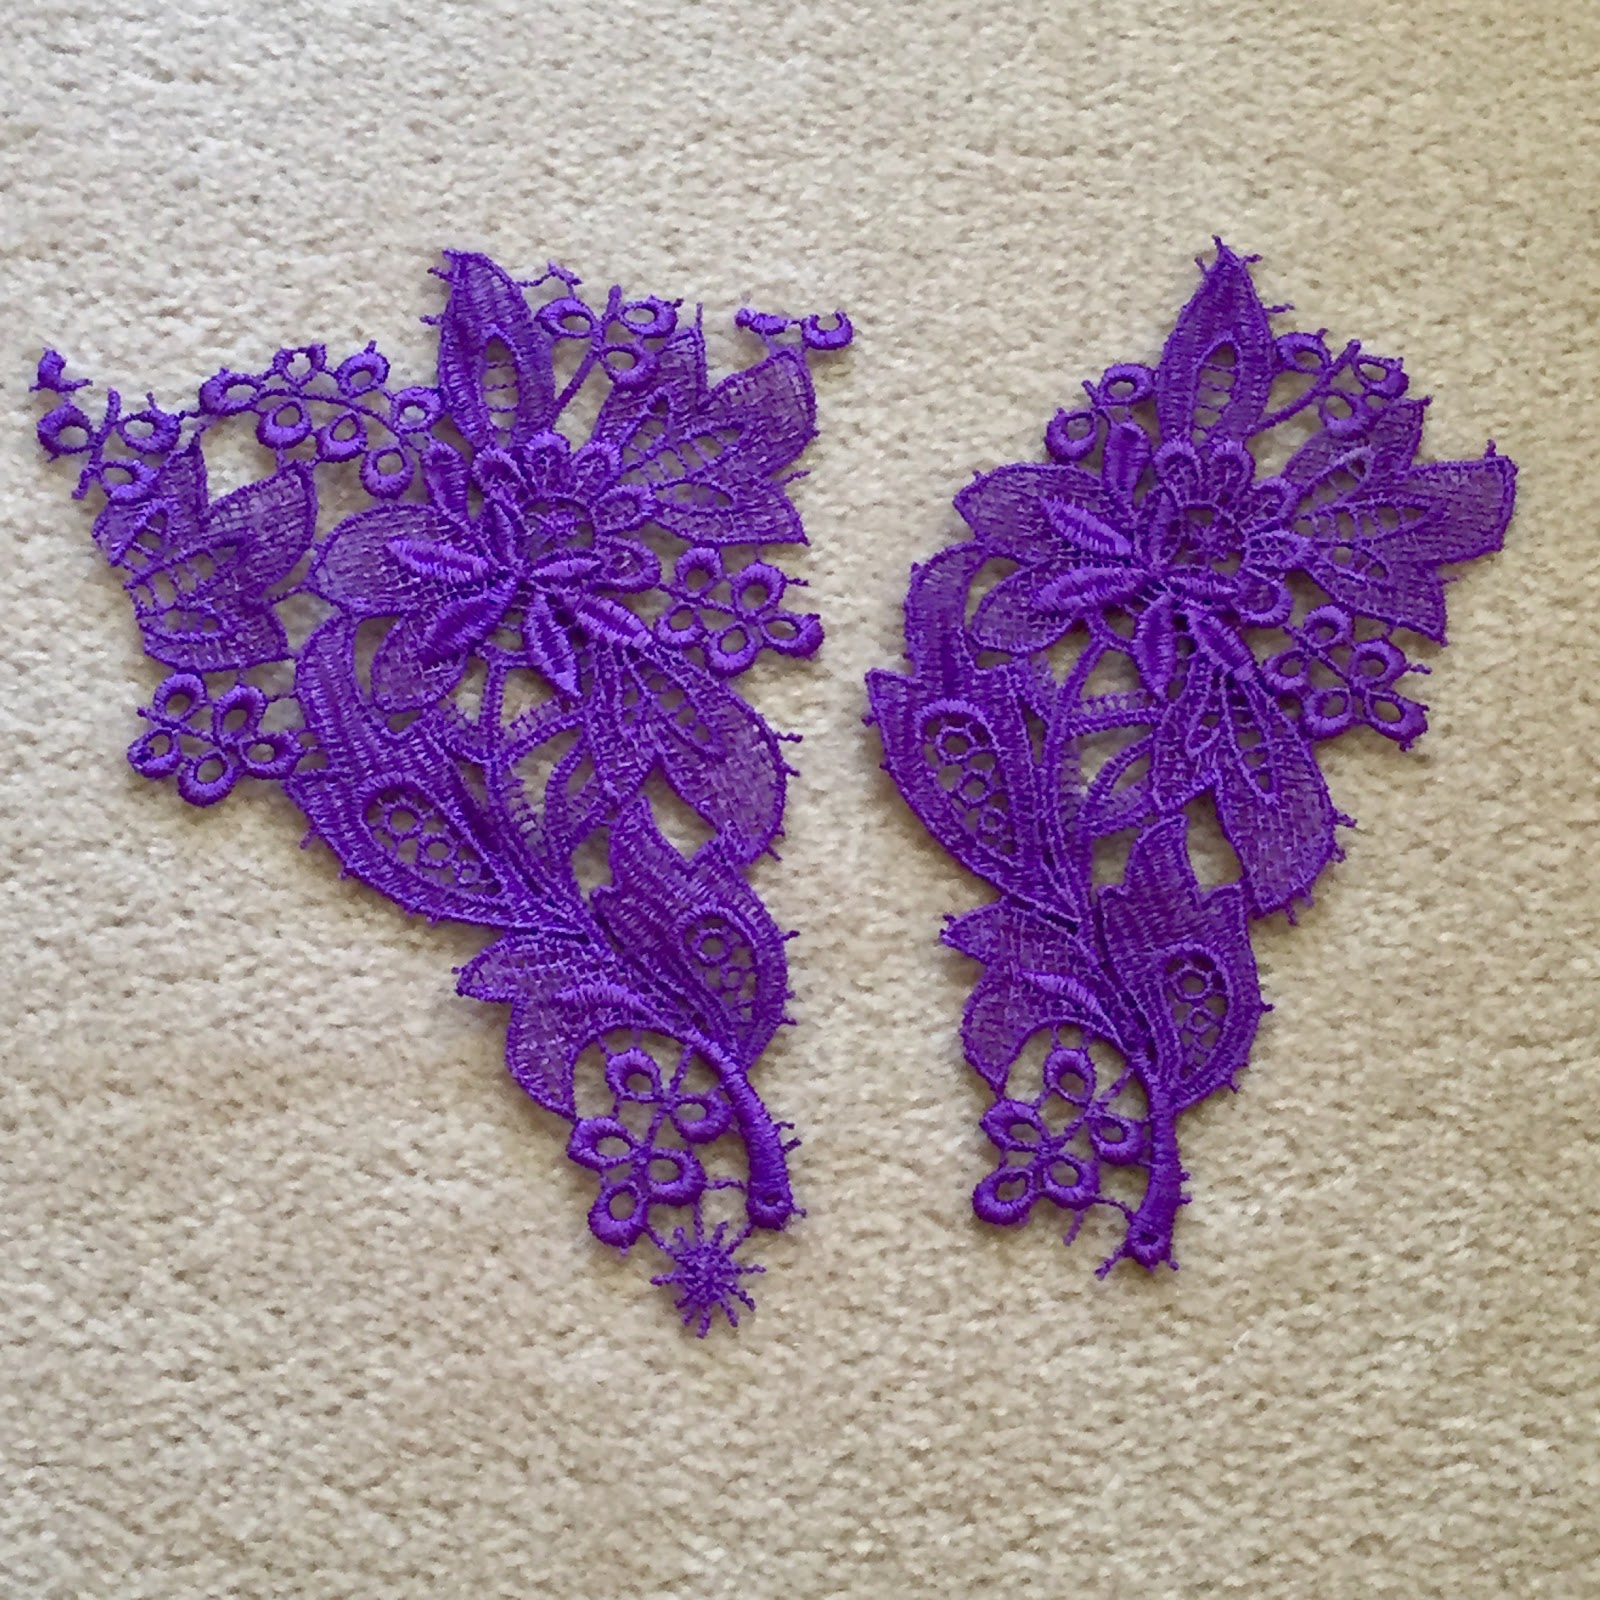
Guipure lace is tightly sewn together. This means you can safely cut out lace motifs by snipping through the lace connectors and place the motifs where you want. These lace motifs they don’t fray. That’s the lace quality you need.
Lace underlayer
The skirt required a contrasting colour as the under layer fabric. You can use a matching colour but the lacework won’t show up (pop) as well as a when you use contrasting base fabric.
I used this pearl white colour against the guipure lace. I could have used a warmer pale colour to add more impact to the purple guipure lace. There are so many options you can decide upon, it’s all based on your preferences.
Underlining
This skirt also uses calico or a reasonably-bodied cotton batiste as an underlining. The underlining is worthwhile doing as it helps the skirt hold its shape with guipure lace. Guipure lace is heavy and it needs a few strong layers so it doesn’t bag or sag.
Lining
A silk crepe de chine or similar measured the same length as the lace. I used an everyday lining so I could get used to the couture steps. This lining matched the petersham tape I bought.
 |
| You can see the Petersham tape and lining match. |
Notions
The detailing involved in creating this skirt requires a select few notions.
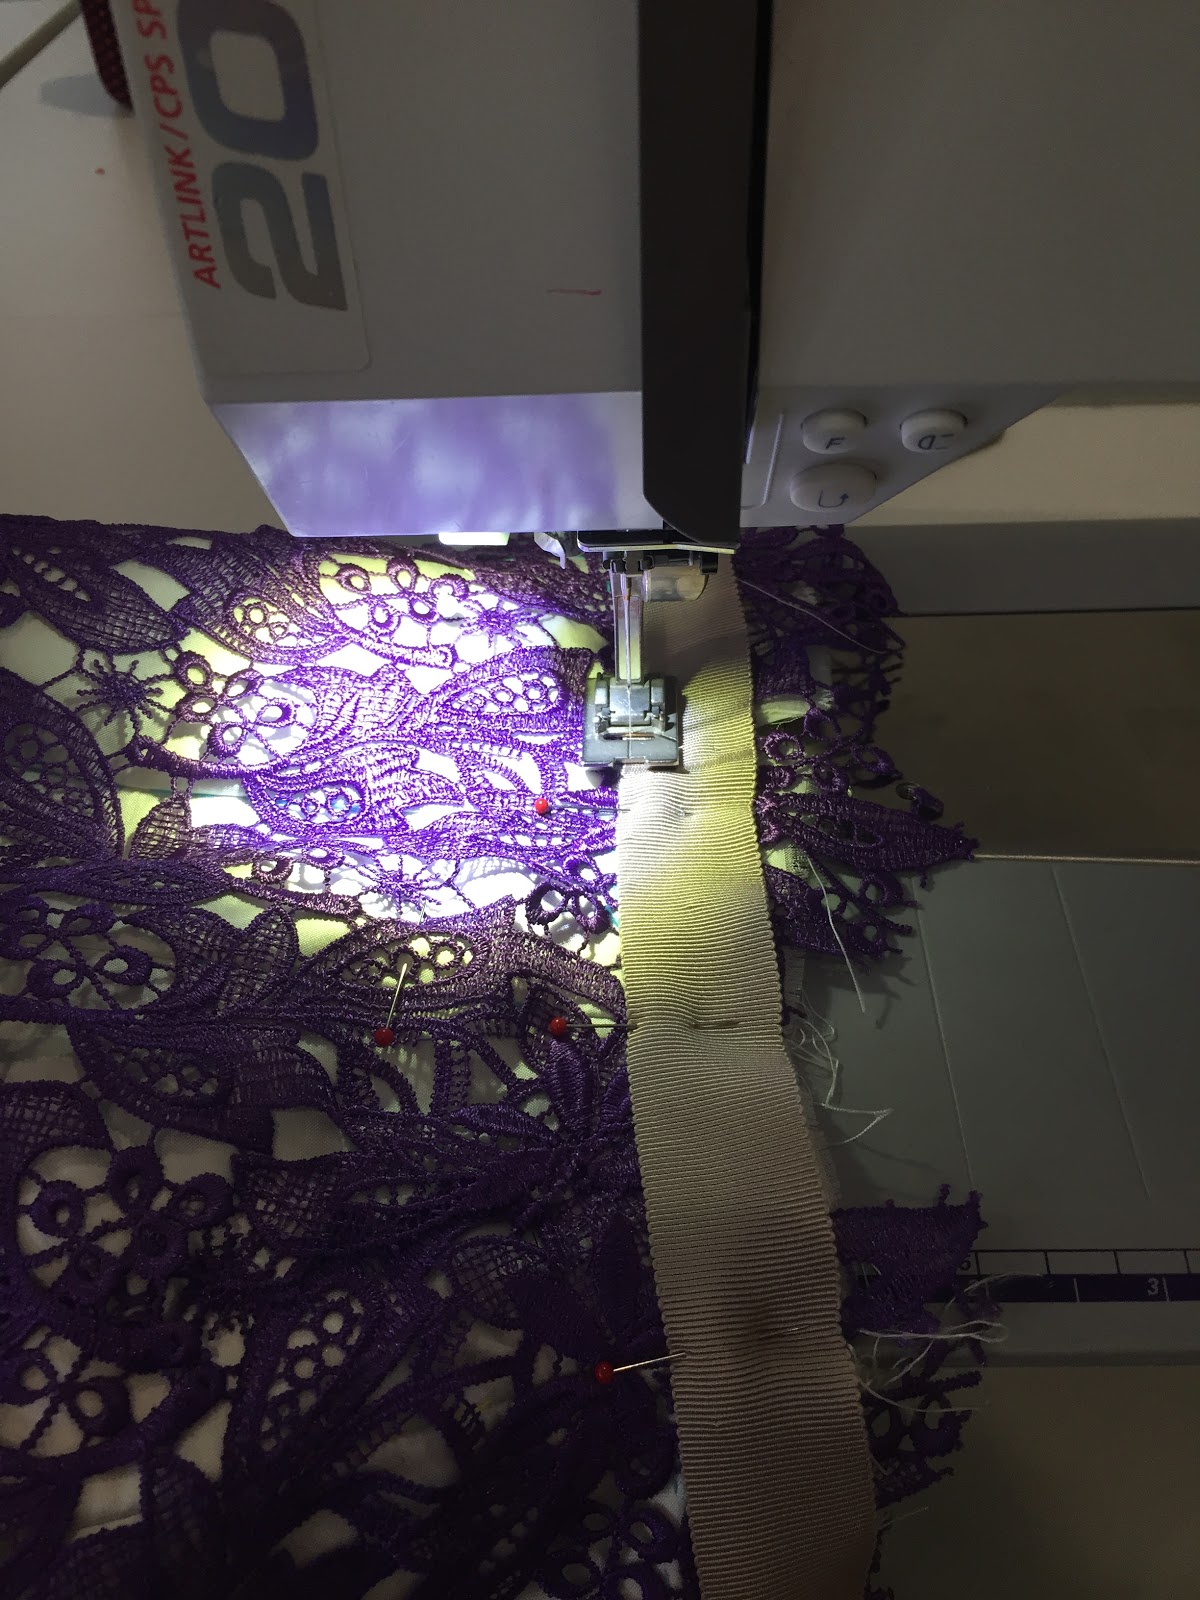
2.5cm wide grosgrain ribbon enough for the waist facing plus 10cm. The grosgrain ribbon should have the curved edges so you can shape it for your waistband.
A medium hook and eye is needed for the waistband. The grosgrain is used to cover up as much of the metal on the hook and eye as possible.
I used three thread colours for this skirt. White for the underlining. Purple for the lace and a coffee colour thread for the lining and waistband finishes.
The other tools I needed were long hand sewing needles, a ham, small very sharp scissors and large shears which I was able to use my Prym products for.
 |
| I used my Prym pins, shears and measuring tools for better accuracy. |
Day one
We fitted our skirt toiles. As with the previous workshop, the stitching lines were marked with carbon paper and machine stitched in a contrasting thread on calico. I machine basted the seams using another contrasting thread and long stitches.
Susan checked the fit of our toiles and I made the initial adjustments to the toile. The new stitching lines were hand basted to the toile.
We used this adjusted toile to cut out the fashion fabric and I marked the stitching lines on this with carbon tracing paper and then hand basted these lines.
Day two
A nail-biting day as we had to cut out our guipure lace.
An important part of this process was to mark (hand baste) the hip line on the fashion fabric. This line was critical to align our lace and help keep the skirt flat as initially thread basted the lace in one piece, across the width of the skirt.
A lot of time was spent hand basting the lace to the skirt so the lace didn’t create shadows.
Day three
We were all in a tizz doing our best to finish our skirts. There was an air of excitement among us all day even though we felt shattered in a happy way, to have achieved so much.
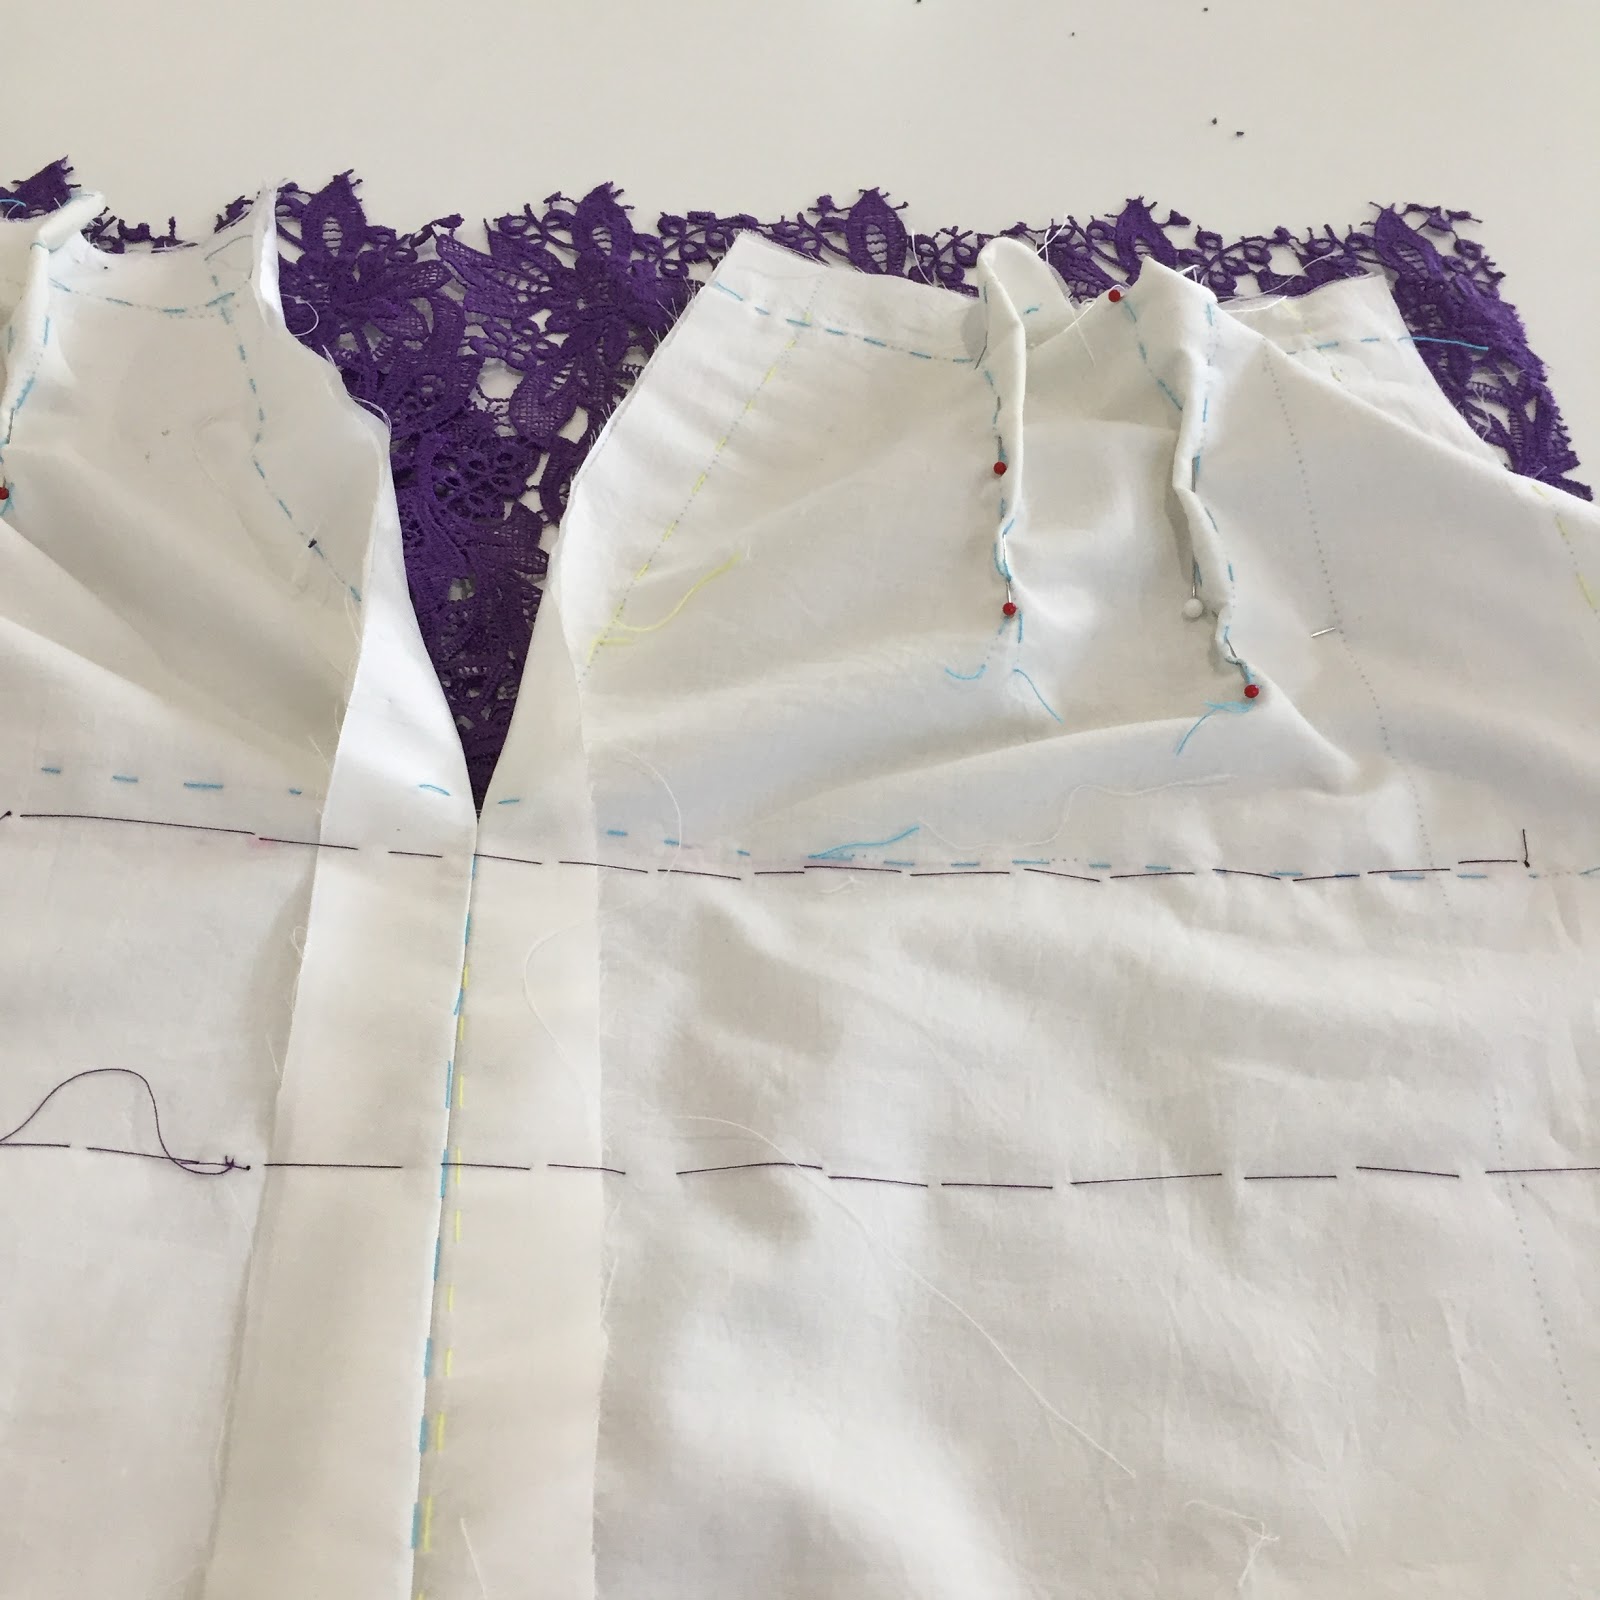
 |
| This shows the lace shaping I did for my waistline |
Post workshop
Three days after the workshop I finally sat down and got my act into gear to finish this skirt. I still had to piece the lace up the centre back seam so it looked seamless. I also needed to:
– Fuse part of the skirt front to stop it from bagging
– hand stitch more parts of the lace to avoid shadowing
– stitch press studs (snap) on the lace overlay covering the zipper
– resew the waistband grosgrain at the darts and seams in the same colour thread
– remove basting threads
– hand sew the lining to the skirt with a jump pleat
– sew on the hook and eye.
This took 5 hours to complete with breaks in between. Walking away from an intense project like this is a good way to pull away from the detail and assess if you’re getting the overall effect you want.
Doing this work at home, means I still needed to do my share of the housework but I could duck into the Craftsy course to relook at Susan’s part of the workshop I had to finish.
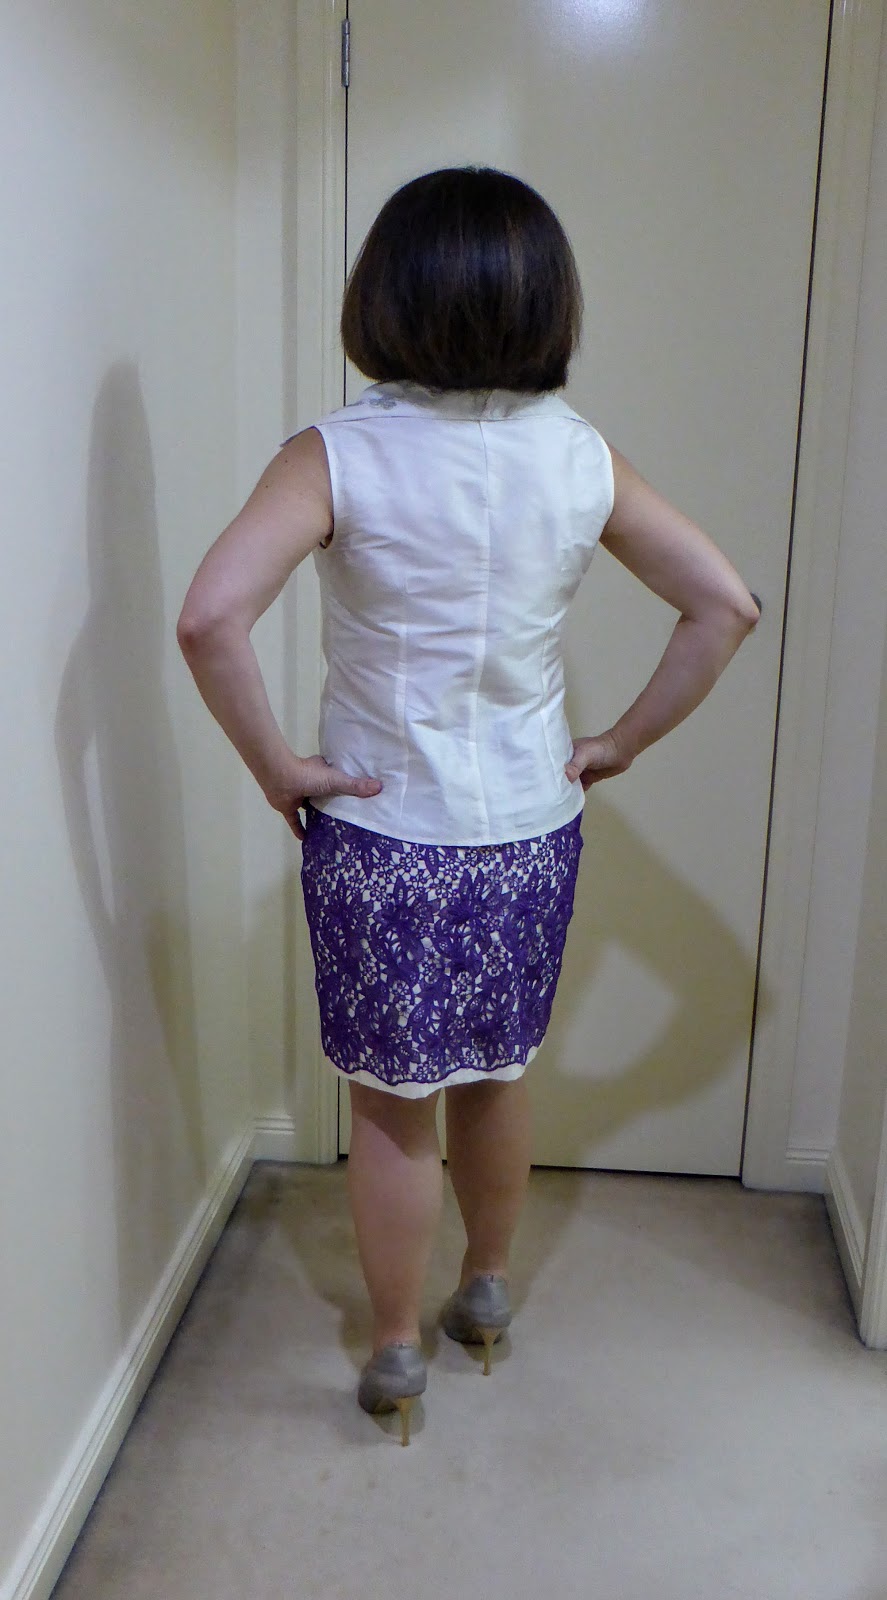
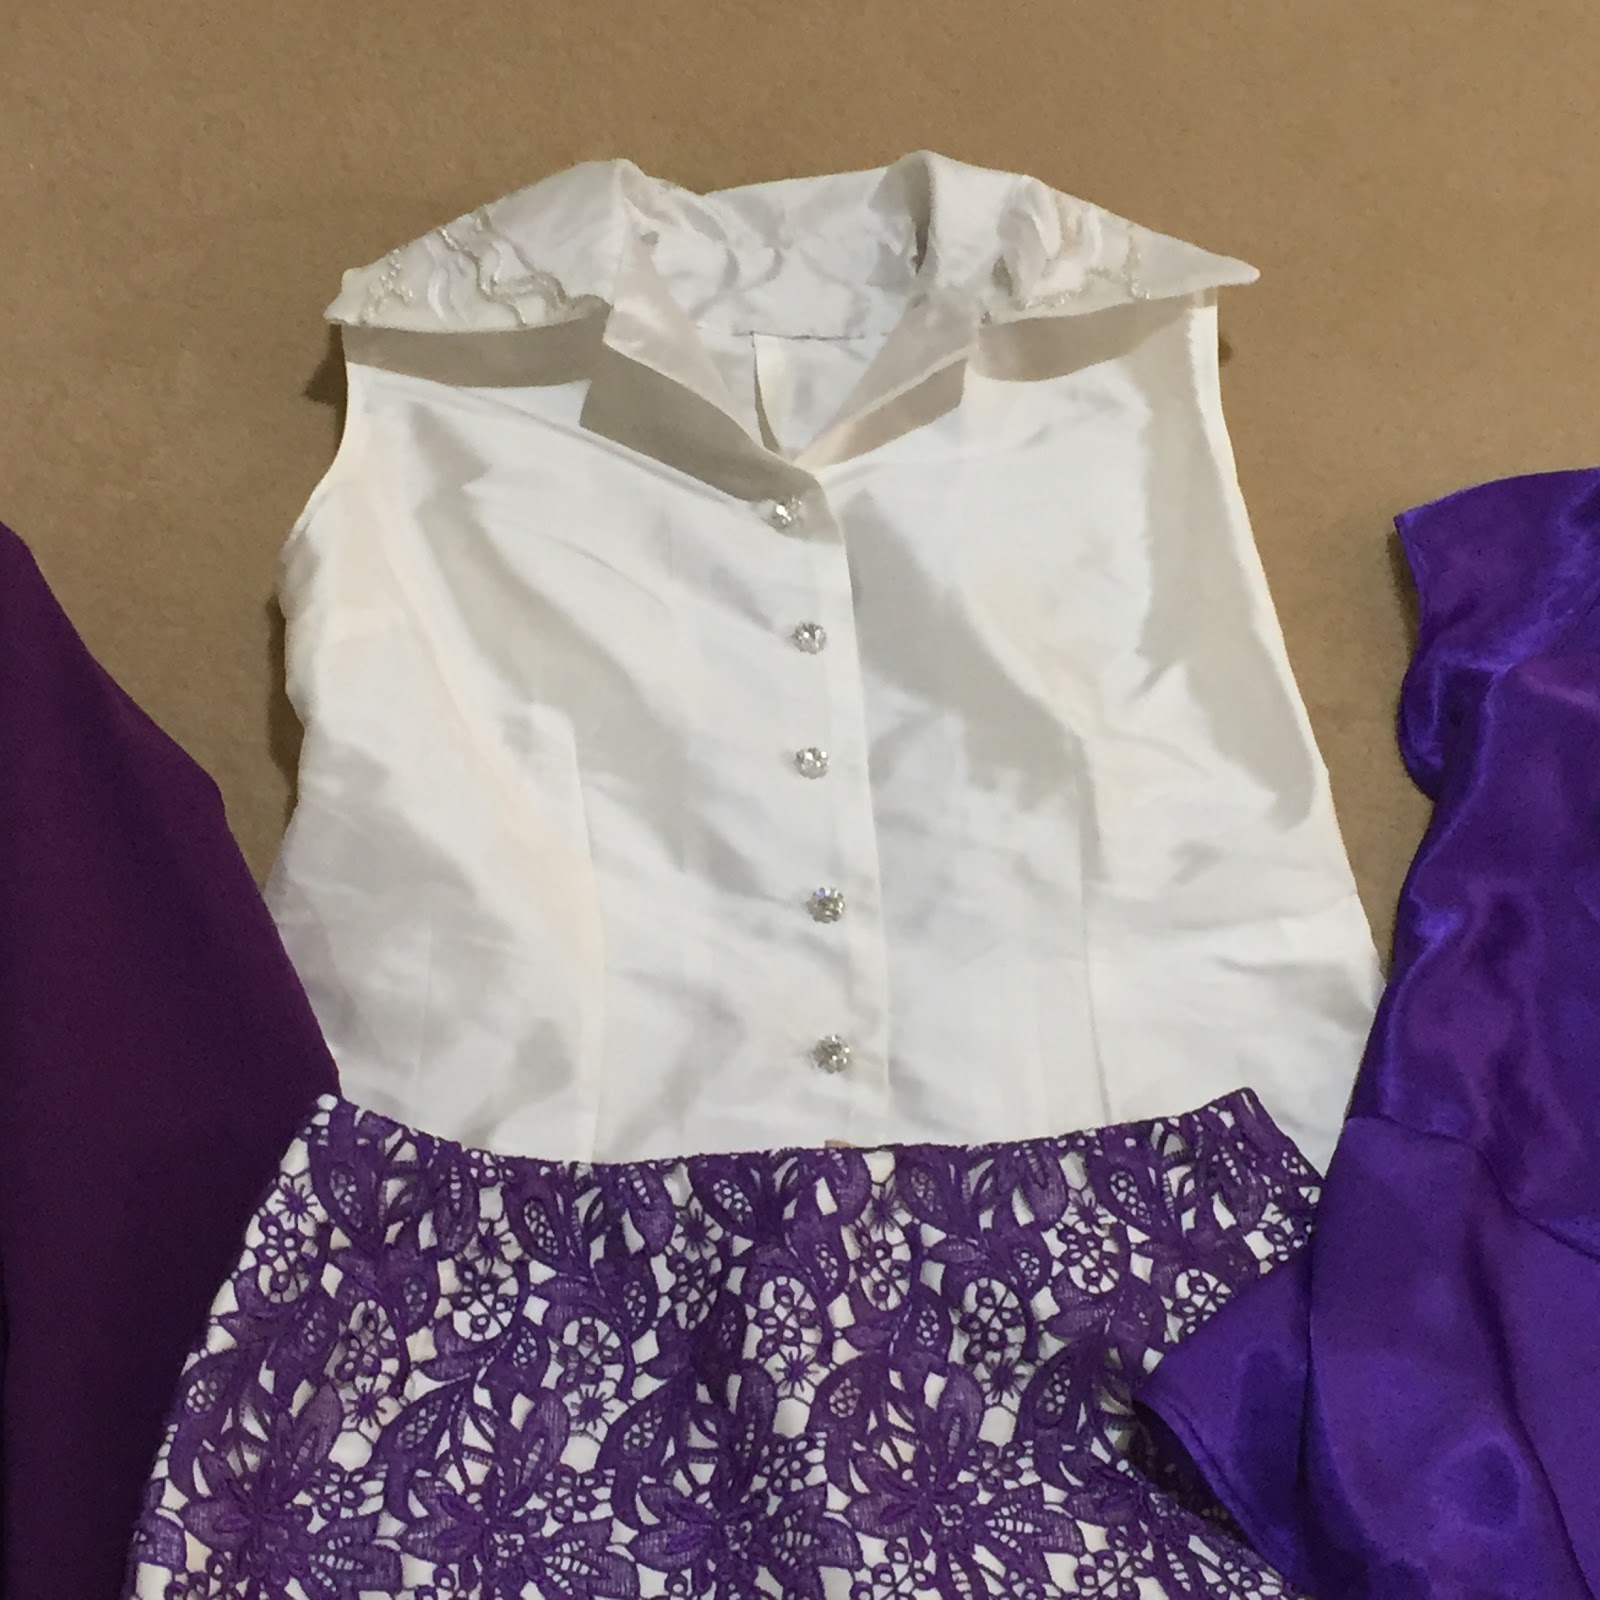
Blouse
Oh. Did I mention I made this blouse too?
I couldn’t not use the underlayer silk and not have a Summer blouse to wear with this skirt.I used Cynthia Rowley view D Simplicity 2215, from a previous Minerva Crafts project.
The collar has a lace overlay. It’s really light-weight lace and was in my stash. I decided this would negate the need to wear earrings.
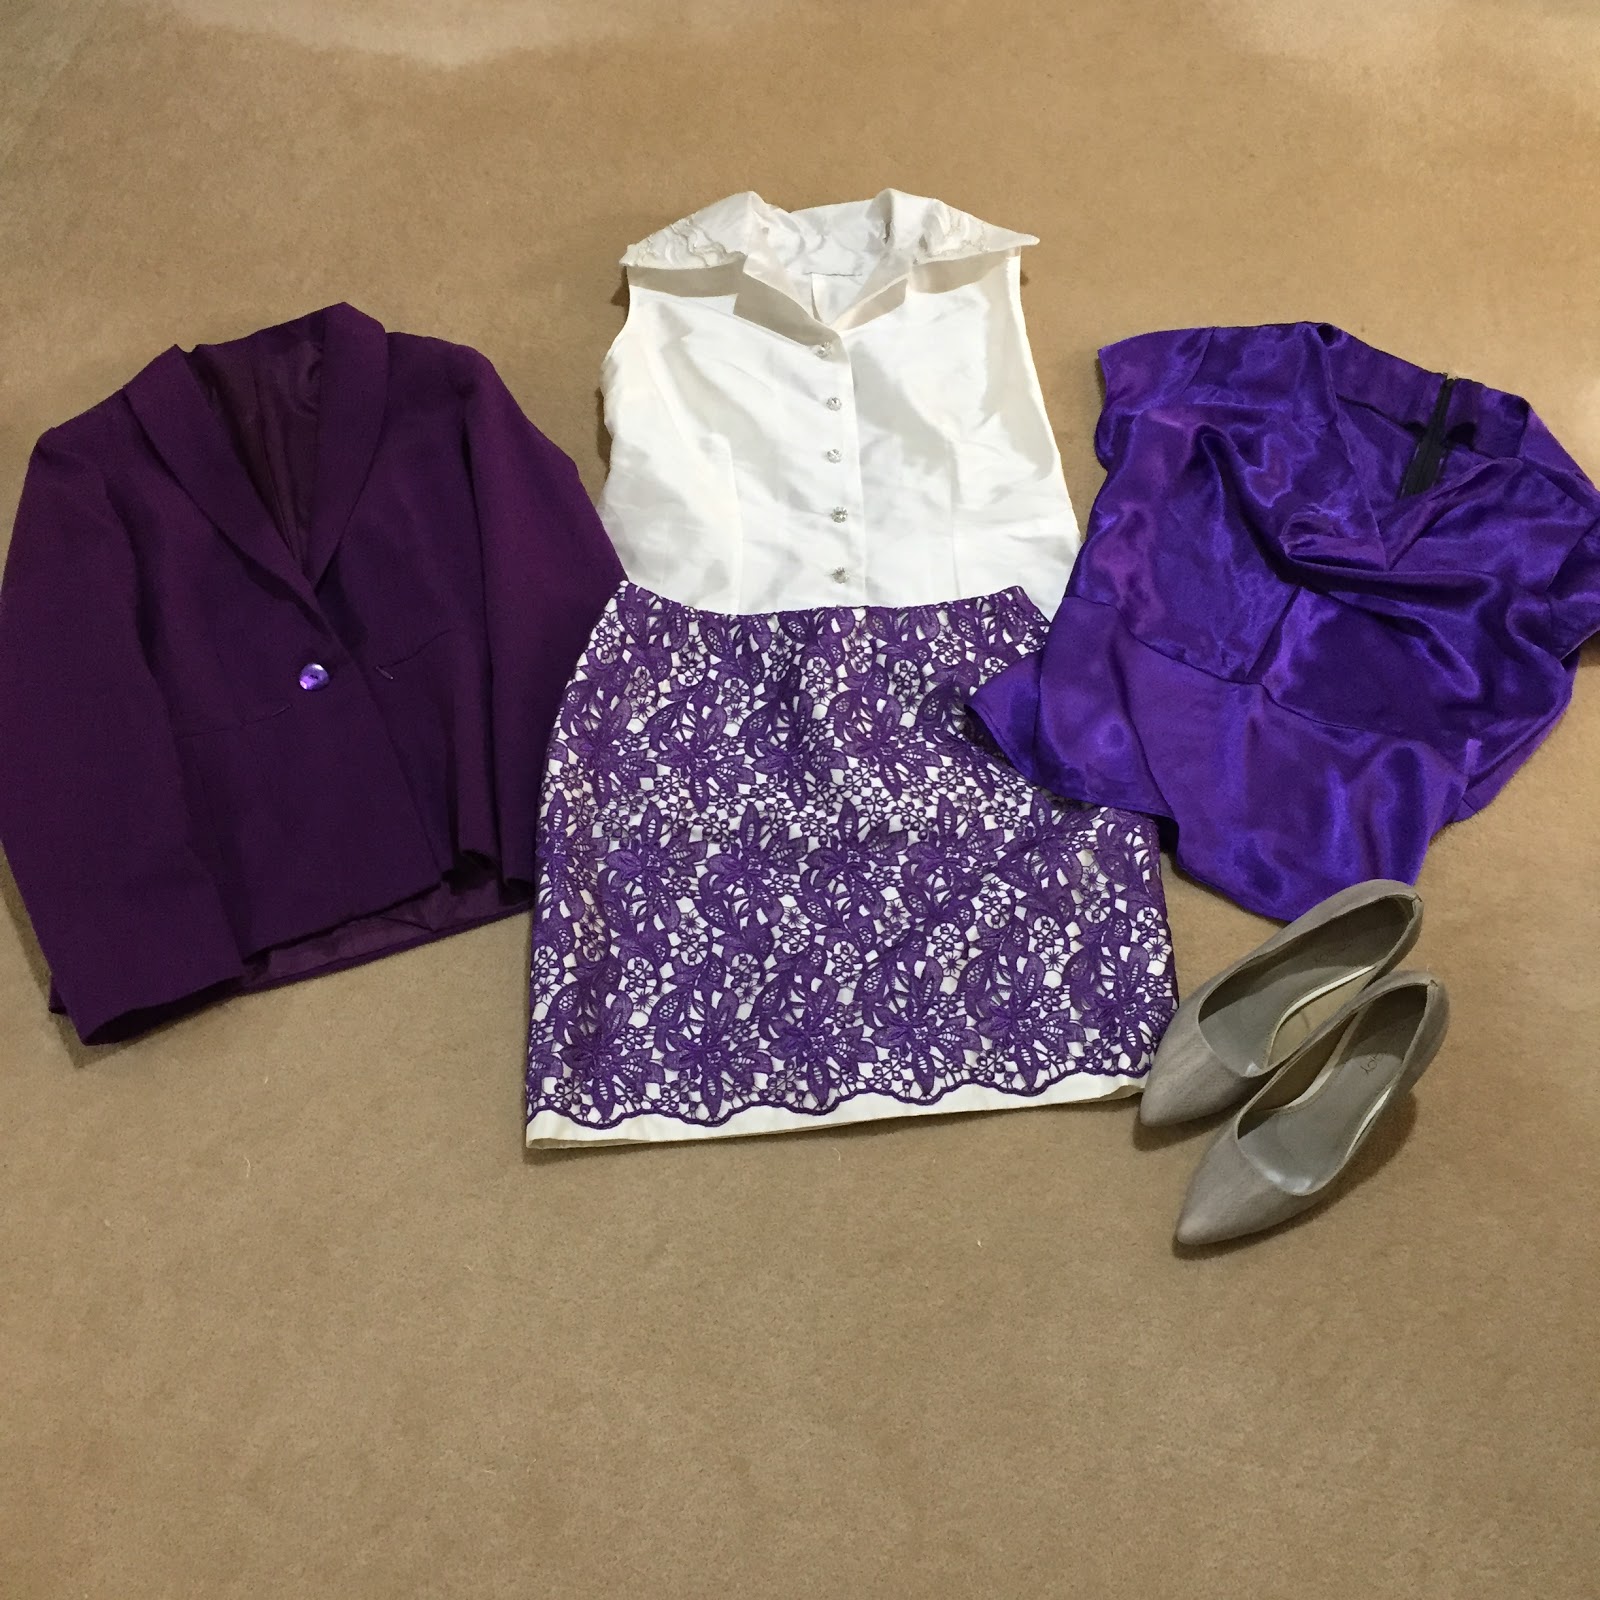
This skirt and blouse is now part of a cocktail capsule that I’ve made. The jacket is one of my first Minerva Craft makes from 2012.
I wore this outfit to a wedding dinner with friends on a hot humid night and I felt great.
Don’t forget to use the discount code ‘maria’ when you purchase any Prym products from Minerva Crafts website.
Now to research some more guipure projects!


