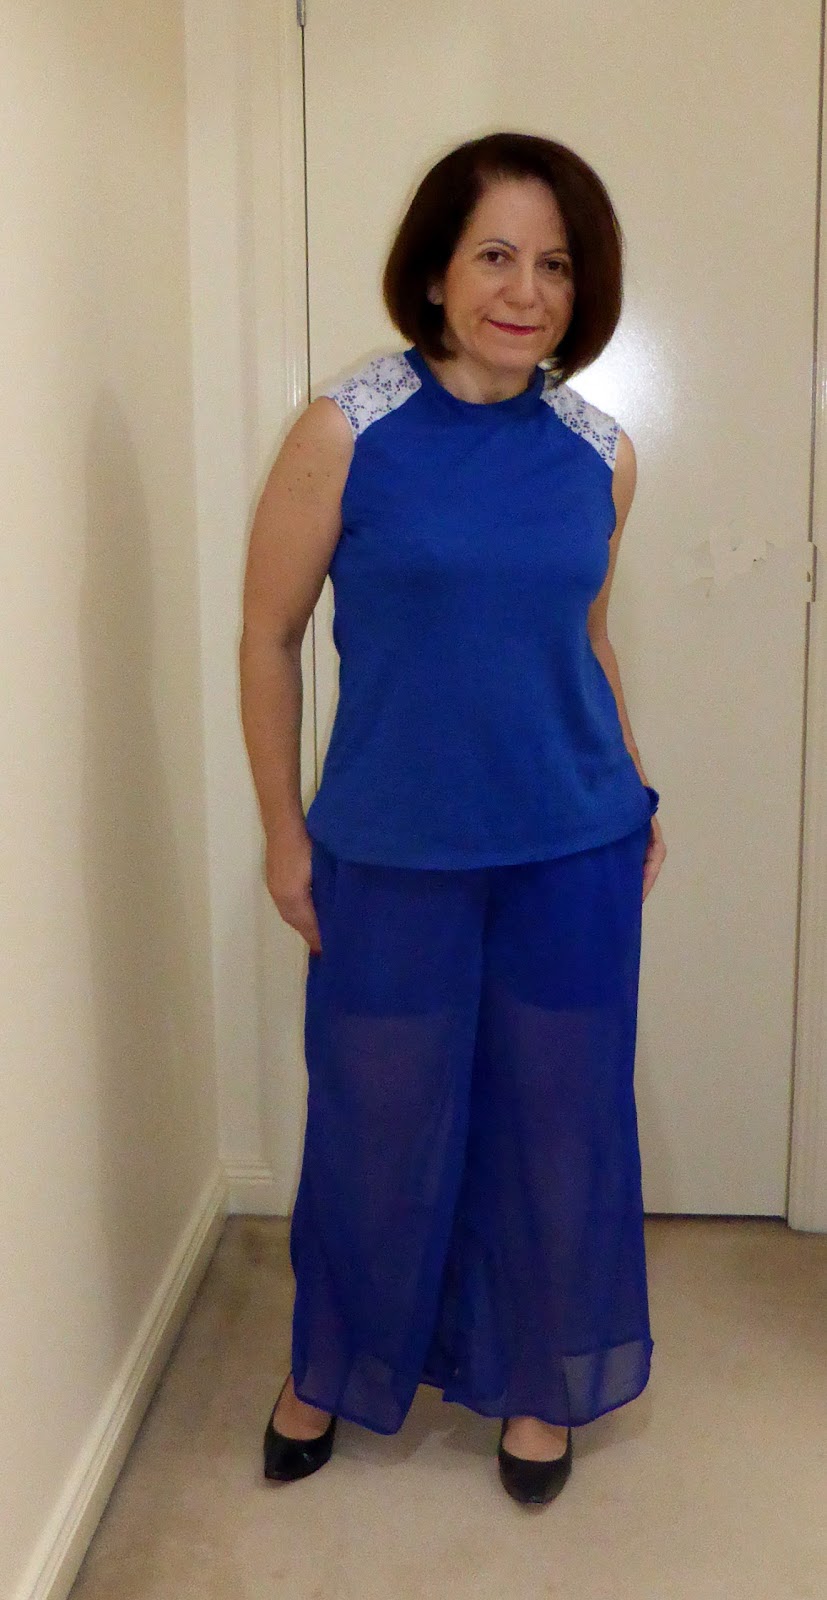
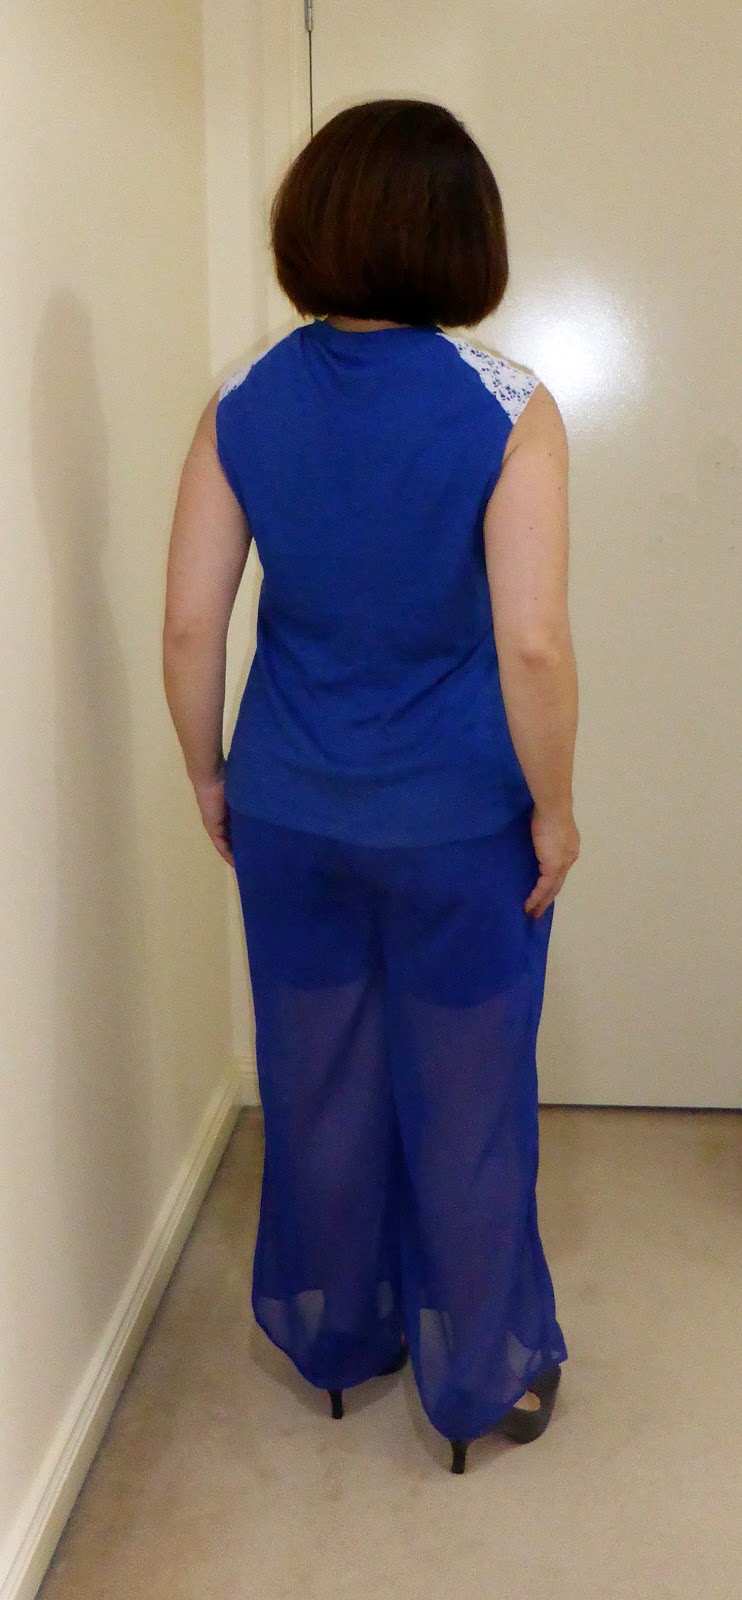
It’s the start of a new week so would palazzo trousers suit me?
Here’s a link to the chiffon I used for these trousers. White Tree Fabrics UK provided me with this fabric.
I also did a test version before making this pattern (for work) and they were brilliant. Comfortable. Elegant. Work appropriate.

Seam finishing techniques:
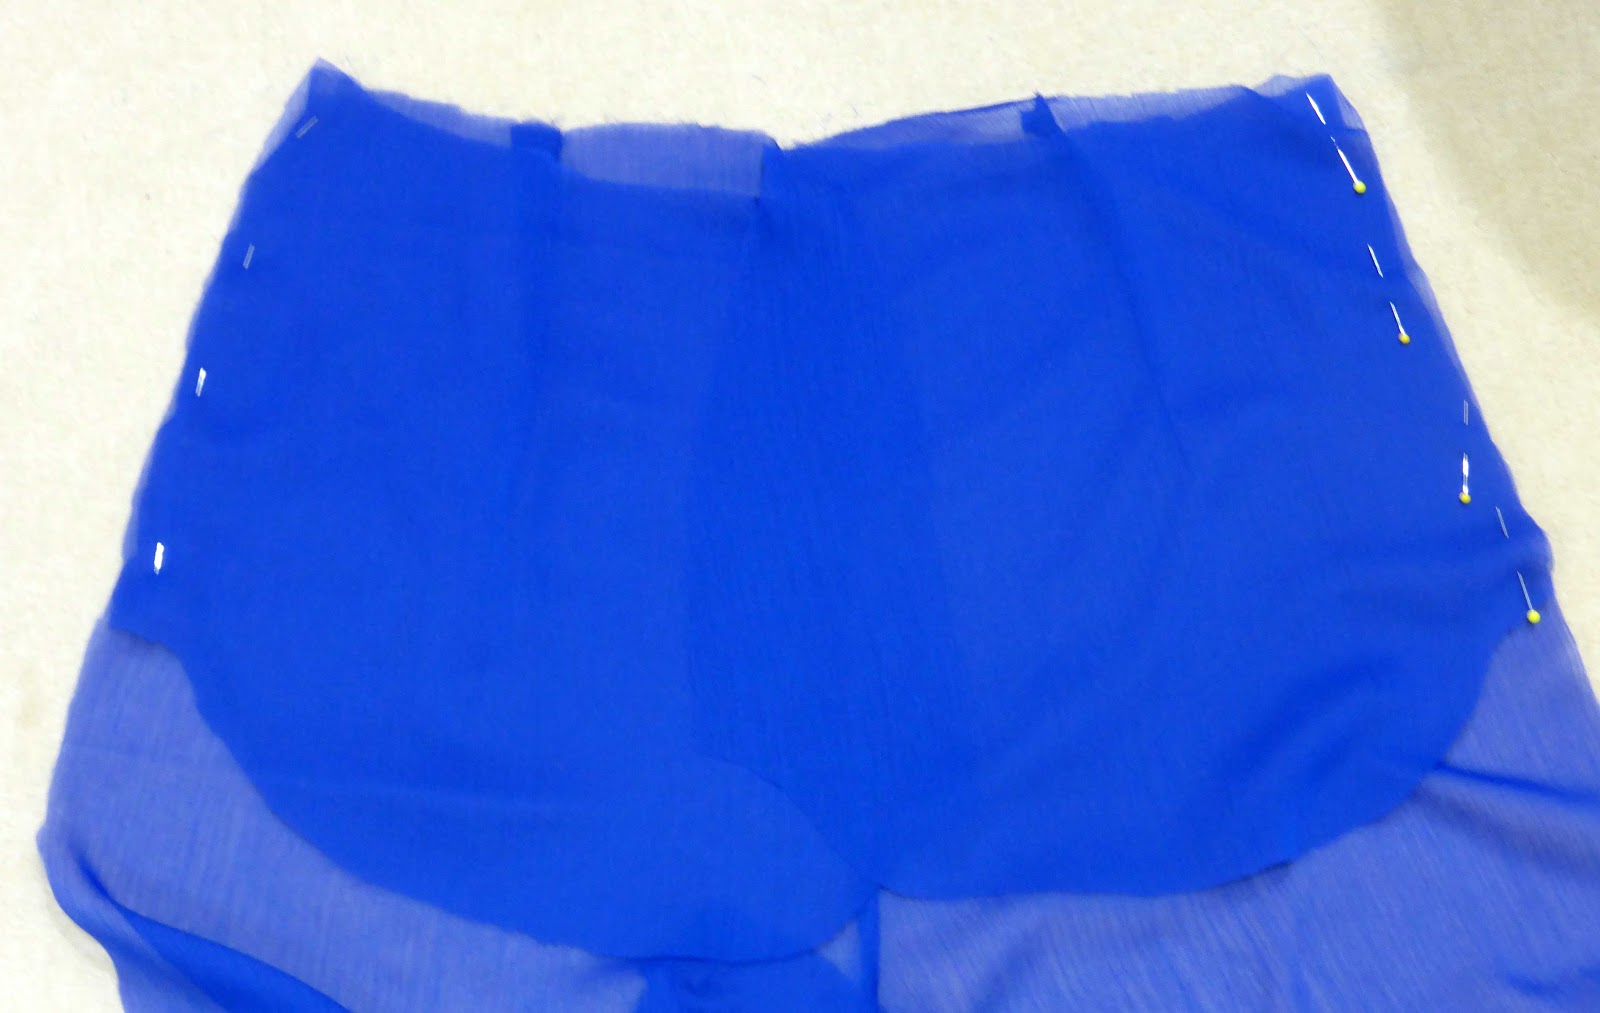
Chiffon is a fine, see-through fabric, and I chose this fabric because I wanted flowy trousers. I’ve used various seam finishes on these trousers:
– French seam finish
– Flat fell seam finish
– Turn and straight stitch seam finish
The other aspect I built into these trousers were shorts lining that are mid thigh length. They give these pants a 60s feel to them. I can also wear these out in public.

I love how sheer style clothes are coming back and while we’re now in Summer, I think these trousers will be perfect for all the celebrations we’re about to have.
Step 1 Prepare the waistband
Zigzag finish the bottom edge of the waistband. I’ve used a Birch white interfacing so it’s quite firm but light. This does make the waistband a lighter blue underneath this chiffon fabric.

When I looked at how to wear palazzo trousers, I’ll be wearing a tops over the waistband, so I’m fine with this finish.

With right sides together, sew the top and bottom waistbands together. Then trim off excess seam allowance for a flatter finish. Fold the right sides out and press the waistband.
Step 2: Darts
Stitch the darts on the back trousers and then press the darts towards the centre back seam.

You might notice the centre back seam is higher than the pattern. That’s deliberate to overcome my sway back shape. It works.

Step 3: Back trouser
With right sides together, stitch the back trousers together along the centre back seam from the waist to the crotch. Sew a shorter seam at the bottom of the crotch curve to reinforce this seam.
Press the crotch seam open.
I used a french seam finish on this seam.
Step 4: Front trouser
With right sides together, join front trousers at the crotch stopping just short of where the end of the zipper will be and press the seam open.
On the test version I took off 3cm at the centre front.

Step 5: Pockets
With right sides together, fold over the pocket bag and press. Then you need to stitch each side of the pocket mouth to the front and then the back trousers at the side seam, aligning pockets carefully. Stitch from upper to lower notch.
Stitch the bottom of the pocket back. Do not include the side seam of the trouser into the stitch. The pocket construction is quite clever.
Step 6: Trouser side seams
With right sides together, lay the front trouser on top of the back trouser. Keep the pockets outwards. Using a 1.5cm seam, start stitching from the top of the trouser waist and stitch a short distance down to the first notch.
Start stitching again from the second notch near the end of the pocket, all the way down to the hem.
Flip the pocket so it is lying across the trouser front and stitch across the top of the pockets to secure them in place.
With right sides together, sew front and back trousers together at the inseam. Start at the crotch down to the hem for both legs.
Step 7: Waistband
With right sides together, attach the bottom edge of the waistband to the trouser waist, sewing from centre front to centre front.
Step 8: Invisible zipper
With the trouser right sides out, flip waistband up and place left hand side of zip right side of fabric together with the trousers, place the top of the zipper at the halfway point of the waistband just under the seam line. Pin and then tack in place. Remove the pins and use an invisible zipper foot to stitch the zipper in place.
Repeat for the other side of the zipper. Fold the inside of the waistband over zipper so that it is right sides of fabric together with it.
Sew a small line of stitches over the edge of the waistband. You’ll be stitching through the zipper tape and both layers of waistband.
Snip through the corner of the zip and then turn the waistband back through so it is right sides out again. Press flat.
Now with the trousers inside out from the last stitch you sewed on the zipper, stitch down the centre front to close the seam.
Step 9: Hem
All you need to do now is to hem your trousers. Because I’ve used chiffon, I stitched each hem turn separately for a clean finish.

I could have used a 10cm hem to have a different hem effect, but I though this might be too much for my height.
What I changed
The inner shorts made this pair a bit more of a challenge until I realised, I simply needed to make them up as shorts but keep the seam on the inside of the trouser so you can’t see them through the trousers. I sewed french seams on the shorts.
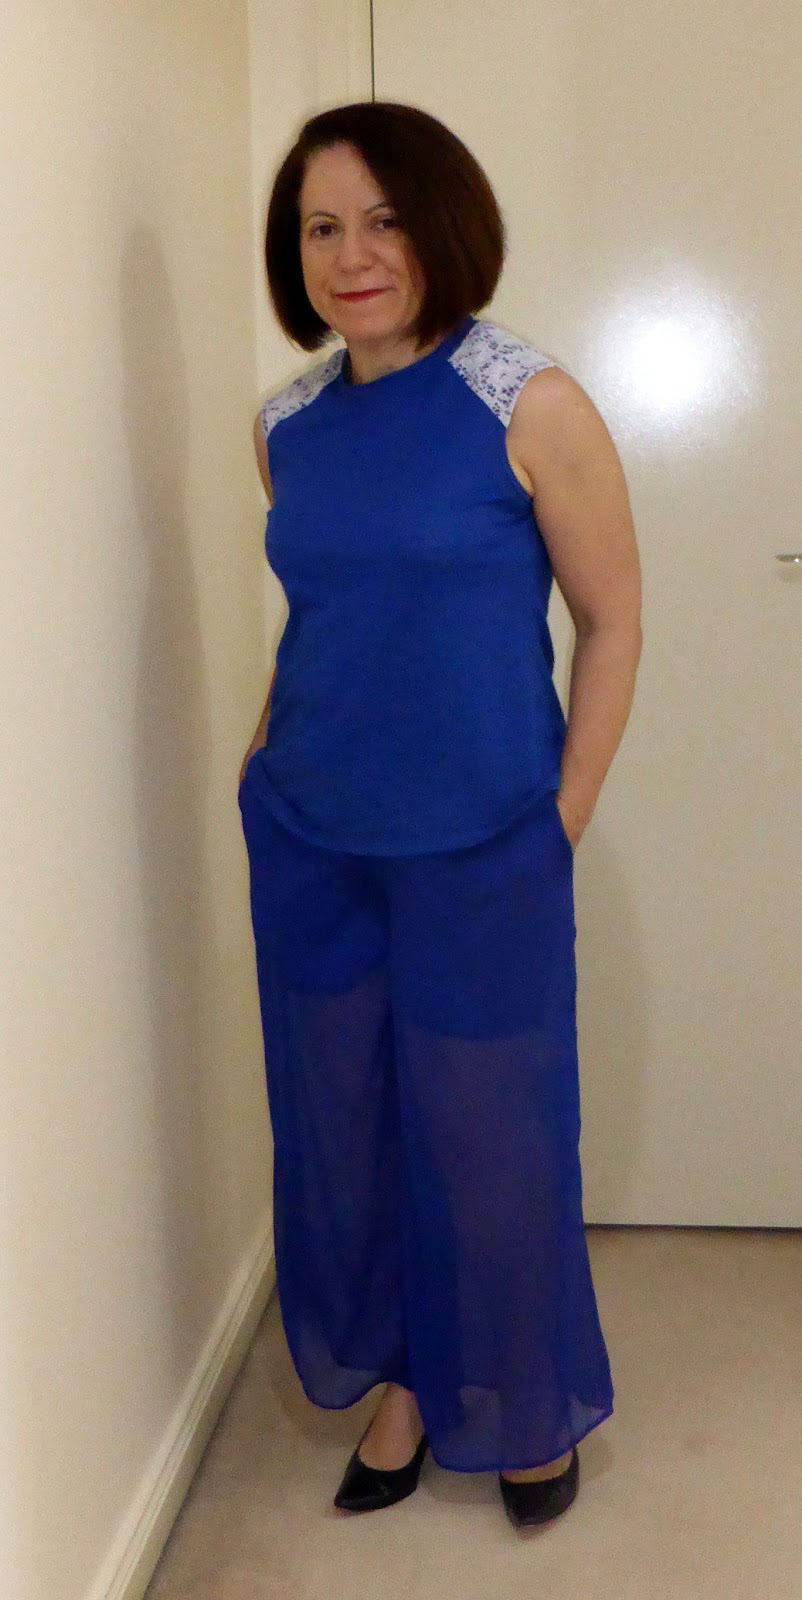 |
| I’ve used a New Look 6160 for this top. |
I also used an invisible zipper. This still worked well with a bit of hand stitching in place.

Thanks to White Tree Fabrics UK for this chiffon. It’s made these palazzo trousers from Simple Sew patterns easy to make and wear!
