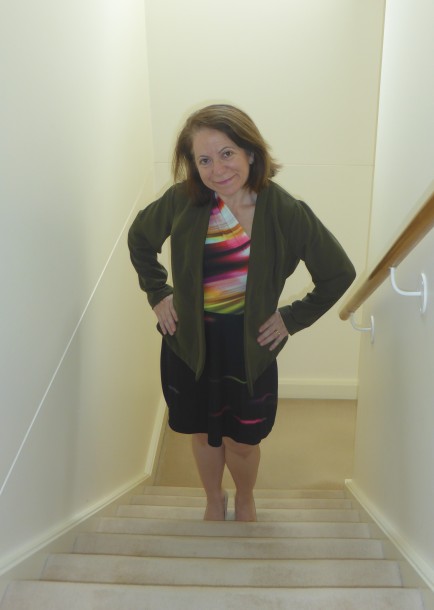
Last year when I participated in #BHMpatterndesigners, I discovered Style Sew Me patterns and fell for the Nikki Blazer. Myra of OneSewSweet drew my attention to this pattern.

Since that time I’ve now met Eryn, the design force behind Style Sew Me patterns, and I can clearly see how her patterns are very much a reflection of Eryn’s style aesthetic. For the month of March, all paper patterns are on sale for $5. No promo code neede!
Now I’m no where near as tall as Eryn so I was keen to see how easy making my version of Nikki blazer fit me. The Nikki blazer ticks all the boxes for me and being partially lined, there’s scope to be creative with the seam finishes.

As the pattern description says, it’s a collarless style with a tailored fit and has a slimming silhouette. I love slimming silhouettes!
The Nikki comes in sizes US 0-26. I cut out the 12 with some sizing changes because I do this for all patterns.

My regular readers will know that I make the same changes across all patterns for a better fit. I know what changes I have to make so this listing will seem repetitive.
– Sway back adjustment
– Shortened the bodice above the waist by 3cm
– Shortened the sleeve length by 4cm
When I did my first fitting, the side front bodice was too wide at the front armhole. When I pinched out the fullness from the side front bodice, I took out 3cm at the front armhole and zeroed it to 0cm at the top of the bust point. The bodice front sat nicely so the fullness had to come out of the side front bodice.

While I was looking in the mirror, I also pinned where my shoulder points were on the shoulder seams. Again, I do this for all patterns so the sleeves join is where it should be.
The next fit issue I check is the shoulder seam length. My shoulders are not the same so I do this fitting check at this point. I took out 3cm off the shoulder seam length of the right shoulder and 1.3cm off the length of the left shoulder seam length.
Honestly, the instructions are dead easy to follow. I sewed a few parts of the jacket at the same time. At the beginning, I sewed the sleeves together; then sewed the back and front bodices. After a quick iron, I sewed on the base of the front and back panels. Gave them another quick iron and sewed the front and backs together so I could do a quick fitting check.
I did these construction sewing steps before leaving for work in the morning.
I love the styling of this jacket. The construction is very straightforward and logical.
The features make this a jacket that you can make quickly when you ‘just need a jacket’.

I used a stretch woven for the body of the jacket and a smooth cotton for the ‘no-fuss’ partial lining that I bought from Pitt Trading.
The jacket fabric doesn’t fray so the seam allowances are unfinished. Shocking really, considering I’m all for couture sewing. When the fabric doesn’t fray, I leave the edges unfinished and make a judgement call once I wash the garment. If the fabric remains as is, I leave it. Don’t fix it if it’s not broken.
– Sway back adjustment
– Shortened the bodice above the waist by 3cm
– Shortened the sleeve length by 4cm
When I did my first fitting, the side front bodice was too long at the side seam because I forgot to fold out the excess length on that pattern piece. If you look at the fabric laid our above with the pattern, you can see it so clearly that I missed that piece out. It’s now fixed.

The whole point of buying this pattern was to make sure it was ready to go when I make a few more in quick succession…should I ever need them. The seam finishes are something I look forward to experimenting with in the future.
Go for it!