Then I decided to make a matching bag.

In this case a backpack that converts to a shoulder bag or a cross over bag. Finally I thought a the Art Gallery fabric could be made into shorts so these pieces become part of a Summer travel set.

Having some sewing knowledge was a good thing and was also a challenge. Let me explain.


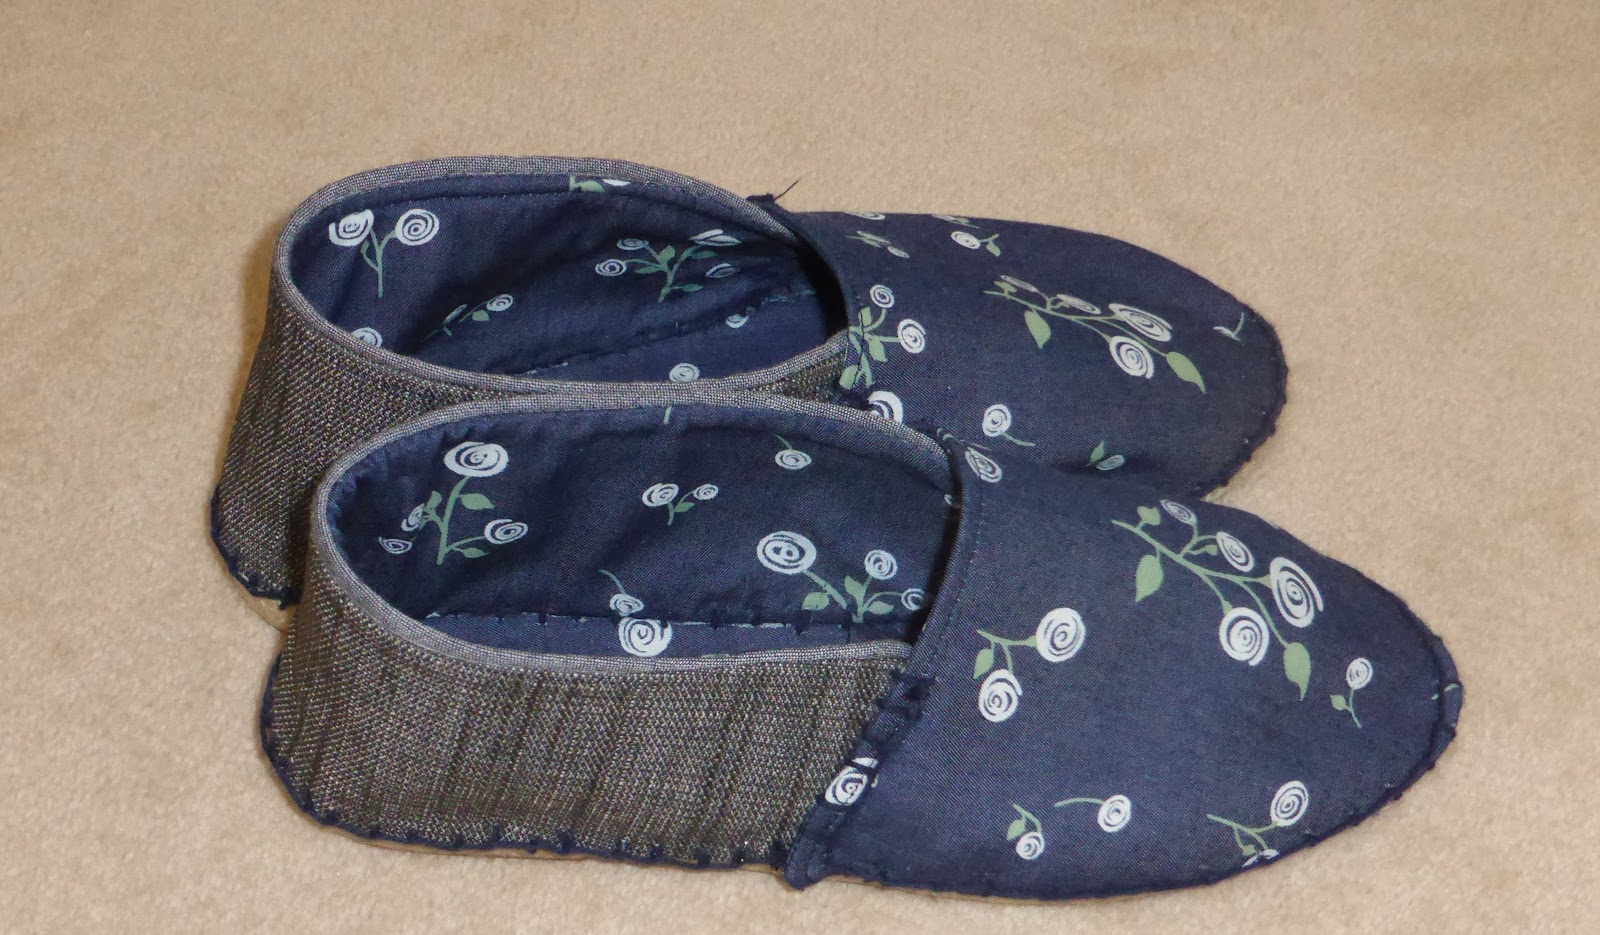
The type of espadrilles are really something you can create so I used their basic pattern. Prym provide the pattern for this basic espadrille. The Prym interfacing is really firm but light to hold.

The interfacing is really all you need to make a firm shoe and have minimal layers to stitch through. Adding another lining was a real ‘learning’.
The Prym thread is a three thread ‘wool’ so I learnt how to use a tapestry needle and an awl tool. My thimble wasn’t the right shape for my fingers so next time I’ll invest in a good thimble.


I decided to line the sole, hence the use of a spray glue to ensure the fabric stayed in place while I stitched up these espadrilles.

Prym have an easy espadrille video that shows you all the steps for making your own espadrilles. The pinning and sewing technique were easy to understand. The video suggest using a 110cm length thread which was perfect for this kit. I eventually waxed the threads as they sewed up more smoothly.

Oh. The piping was a leftover from a previous Minerva project. I’d love to try the Prym sneakers in a future post.
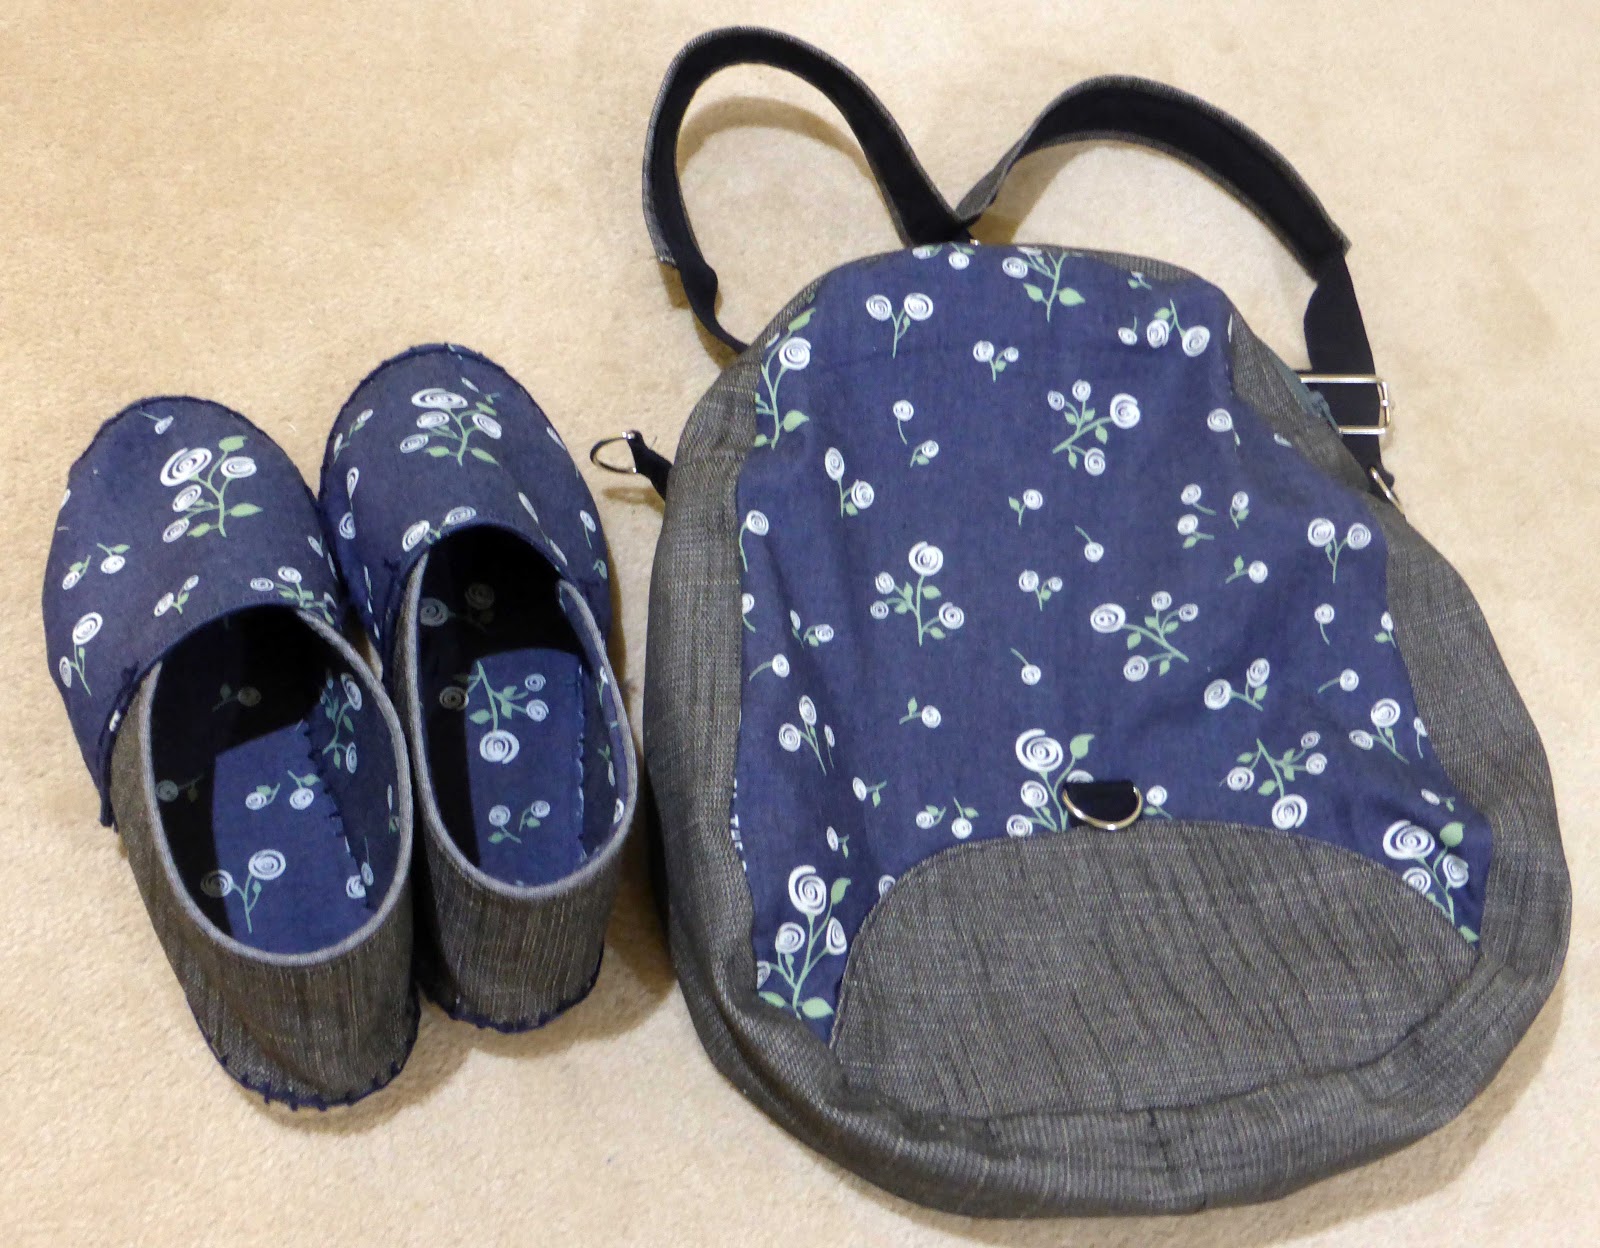
Onto the bag. I’ve been helping Vero of Sacotin Patterns proof the English translations of her French patterns so I knew her Limbo would be the perfect travel bag for Summer. This bag can be worn three ways.
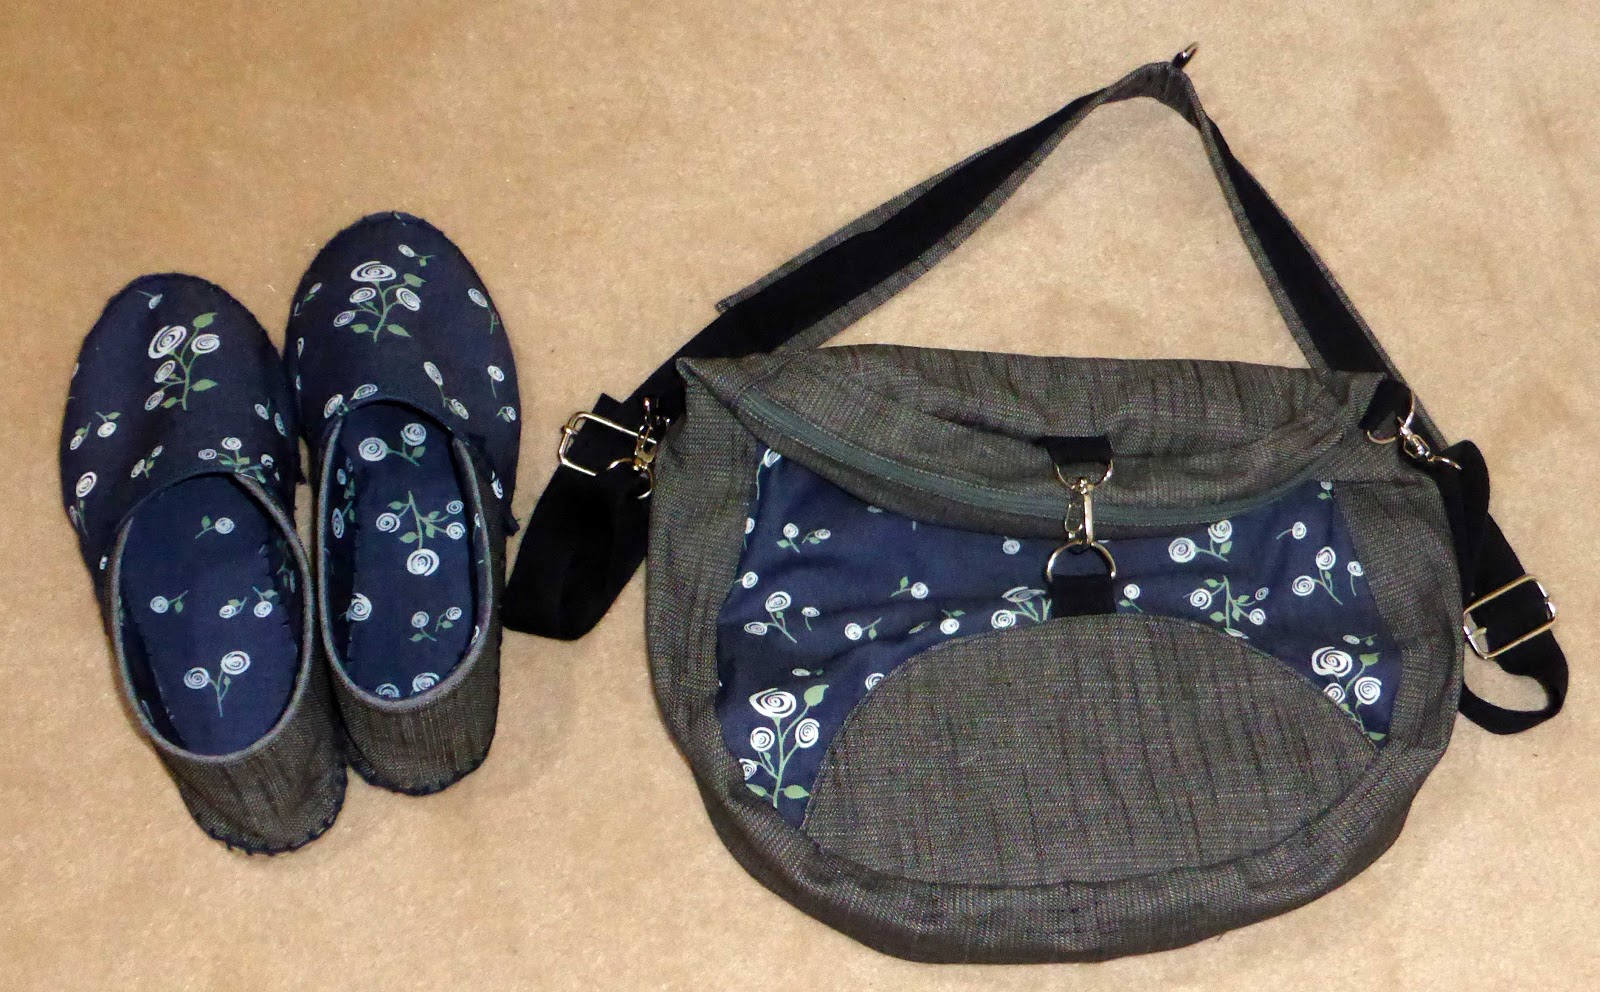
It was a quick and easy decision to choose this pattern so I stash dived for the handbag notions and only needed to buy 4 extra D-rings and a zipper.

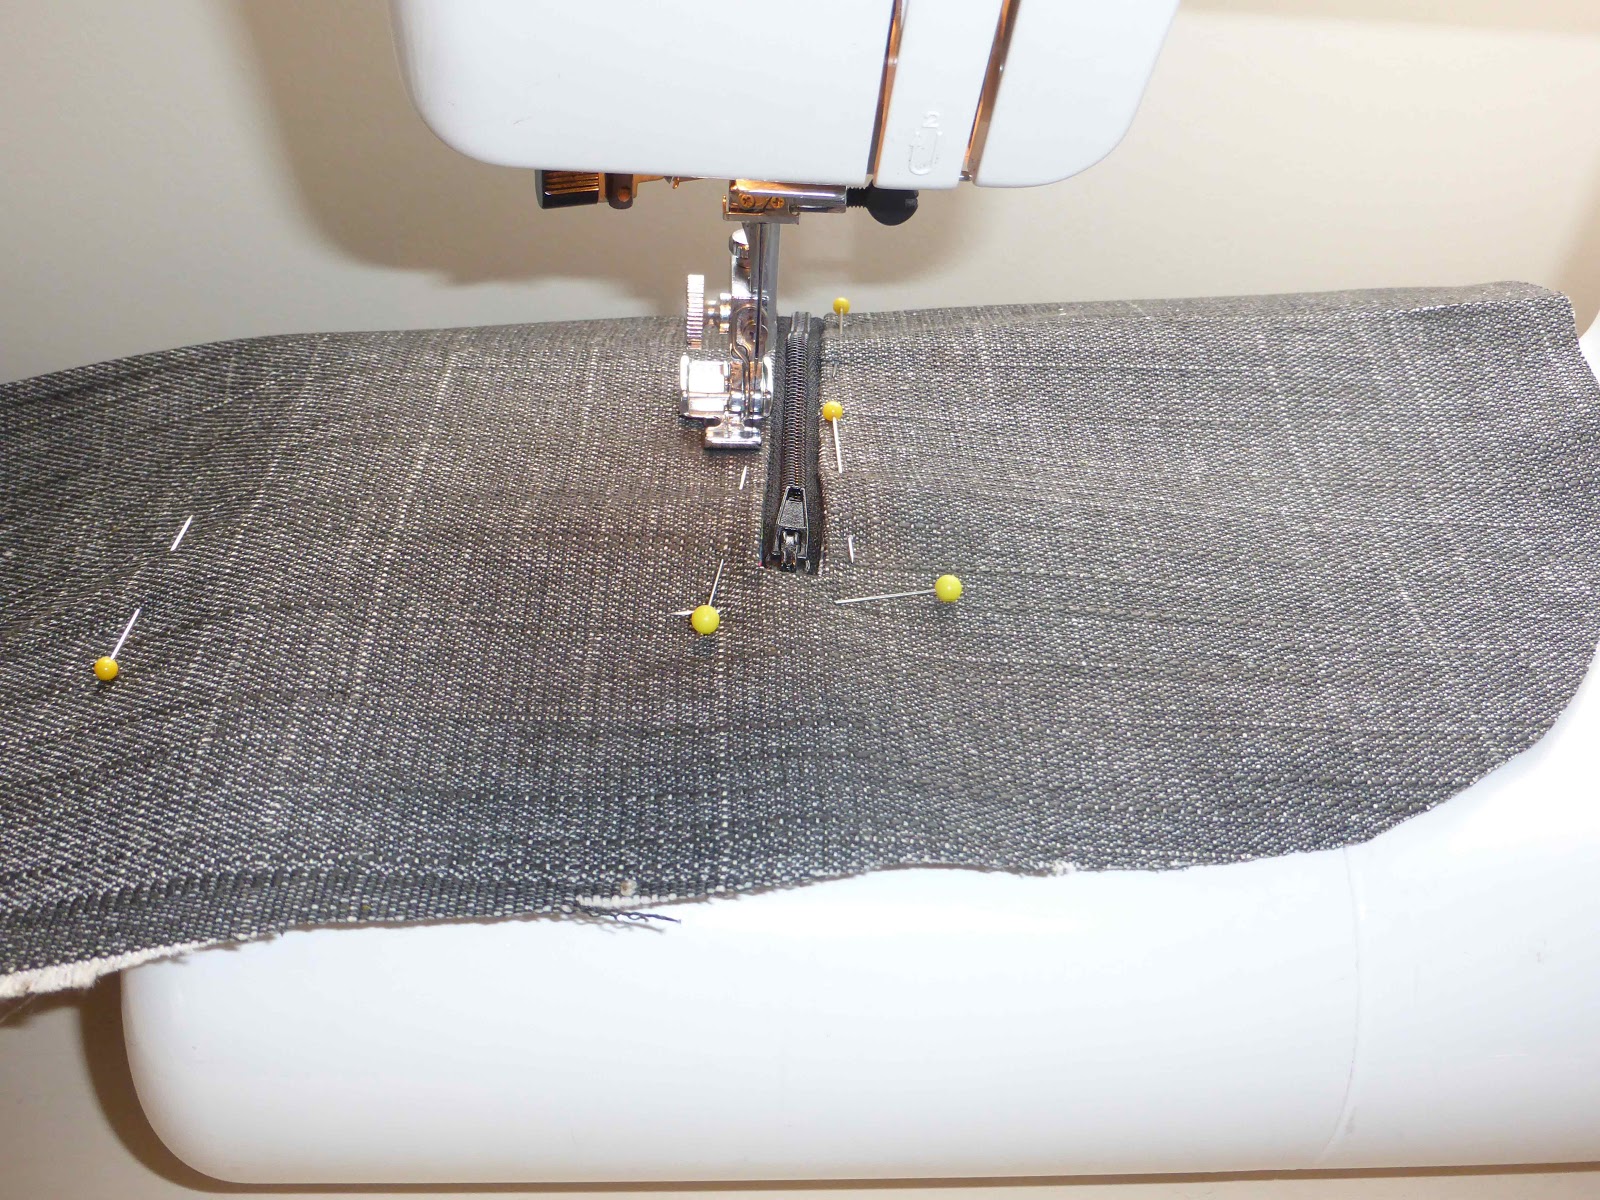

Yes…I had these two pink zippers in my stash and they matched this fabric.

The instructions to sew in these zippers was easy to follow and master.

This pattern also suggests adding a layer of fleece into the bag gusset and again, this made the bag a firmer shape.
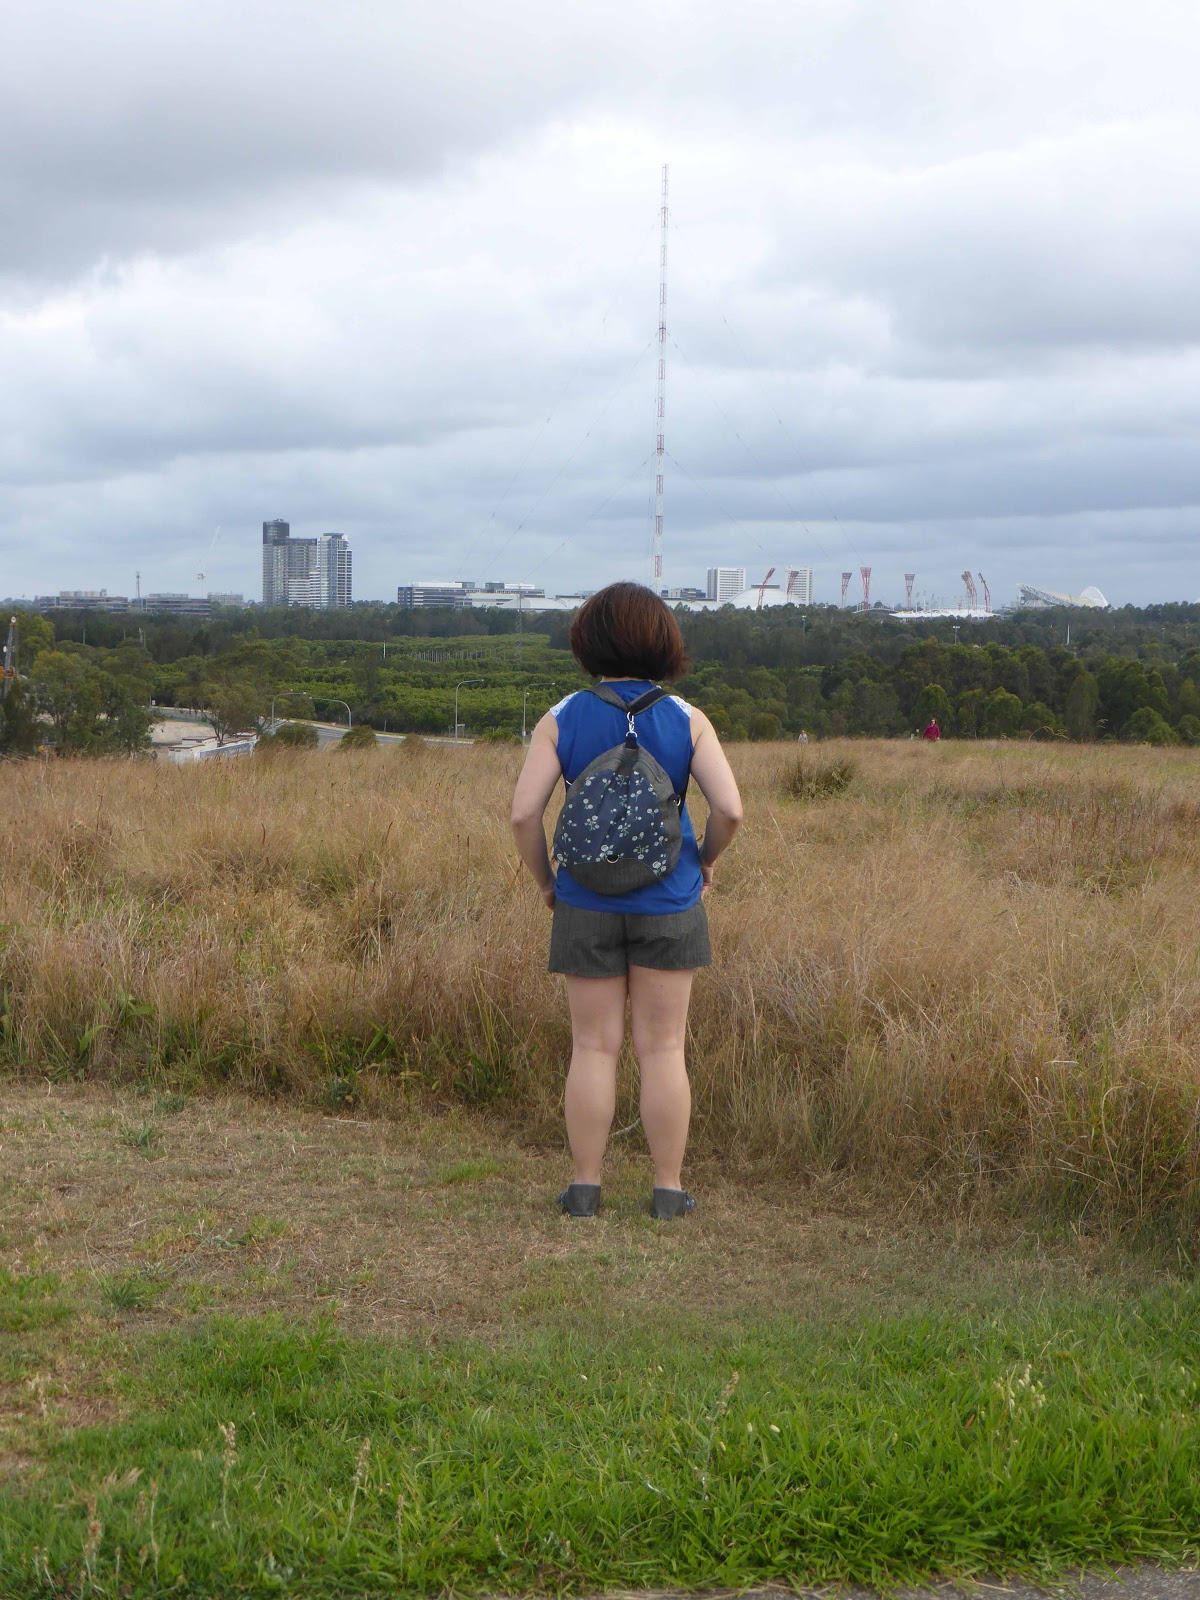
I made the largest version and it sits nicely on me.
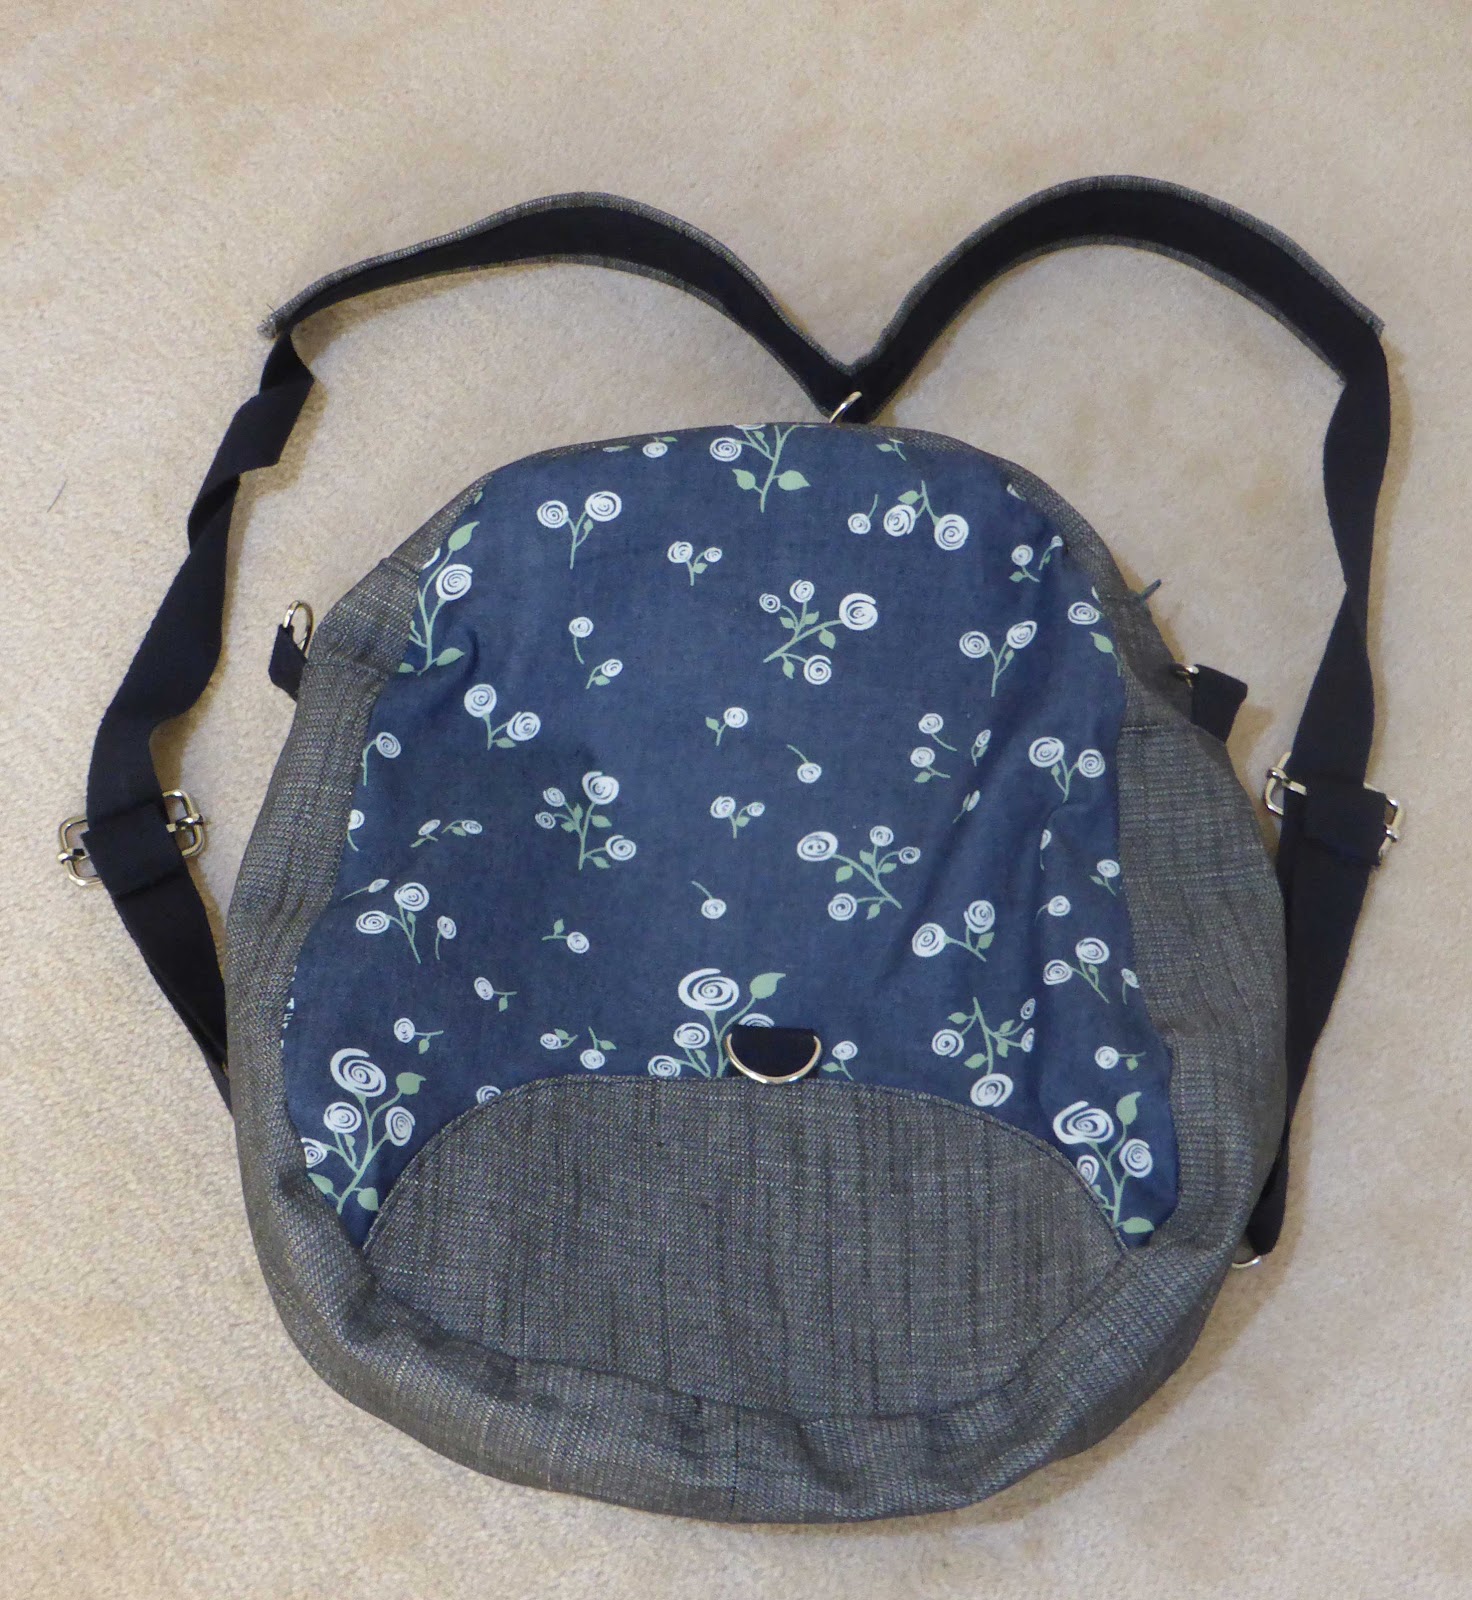
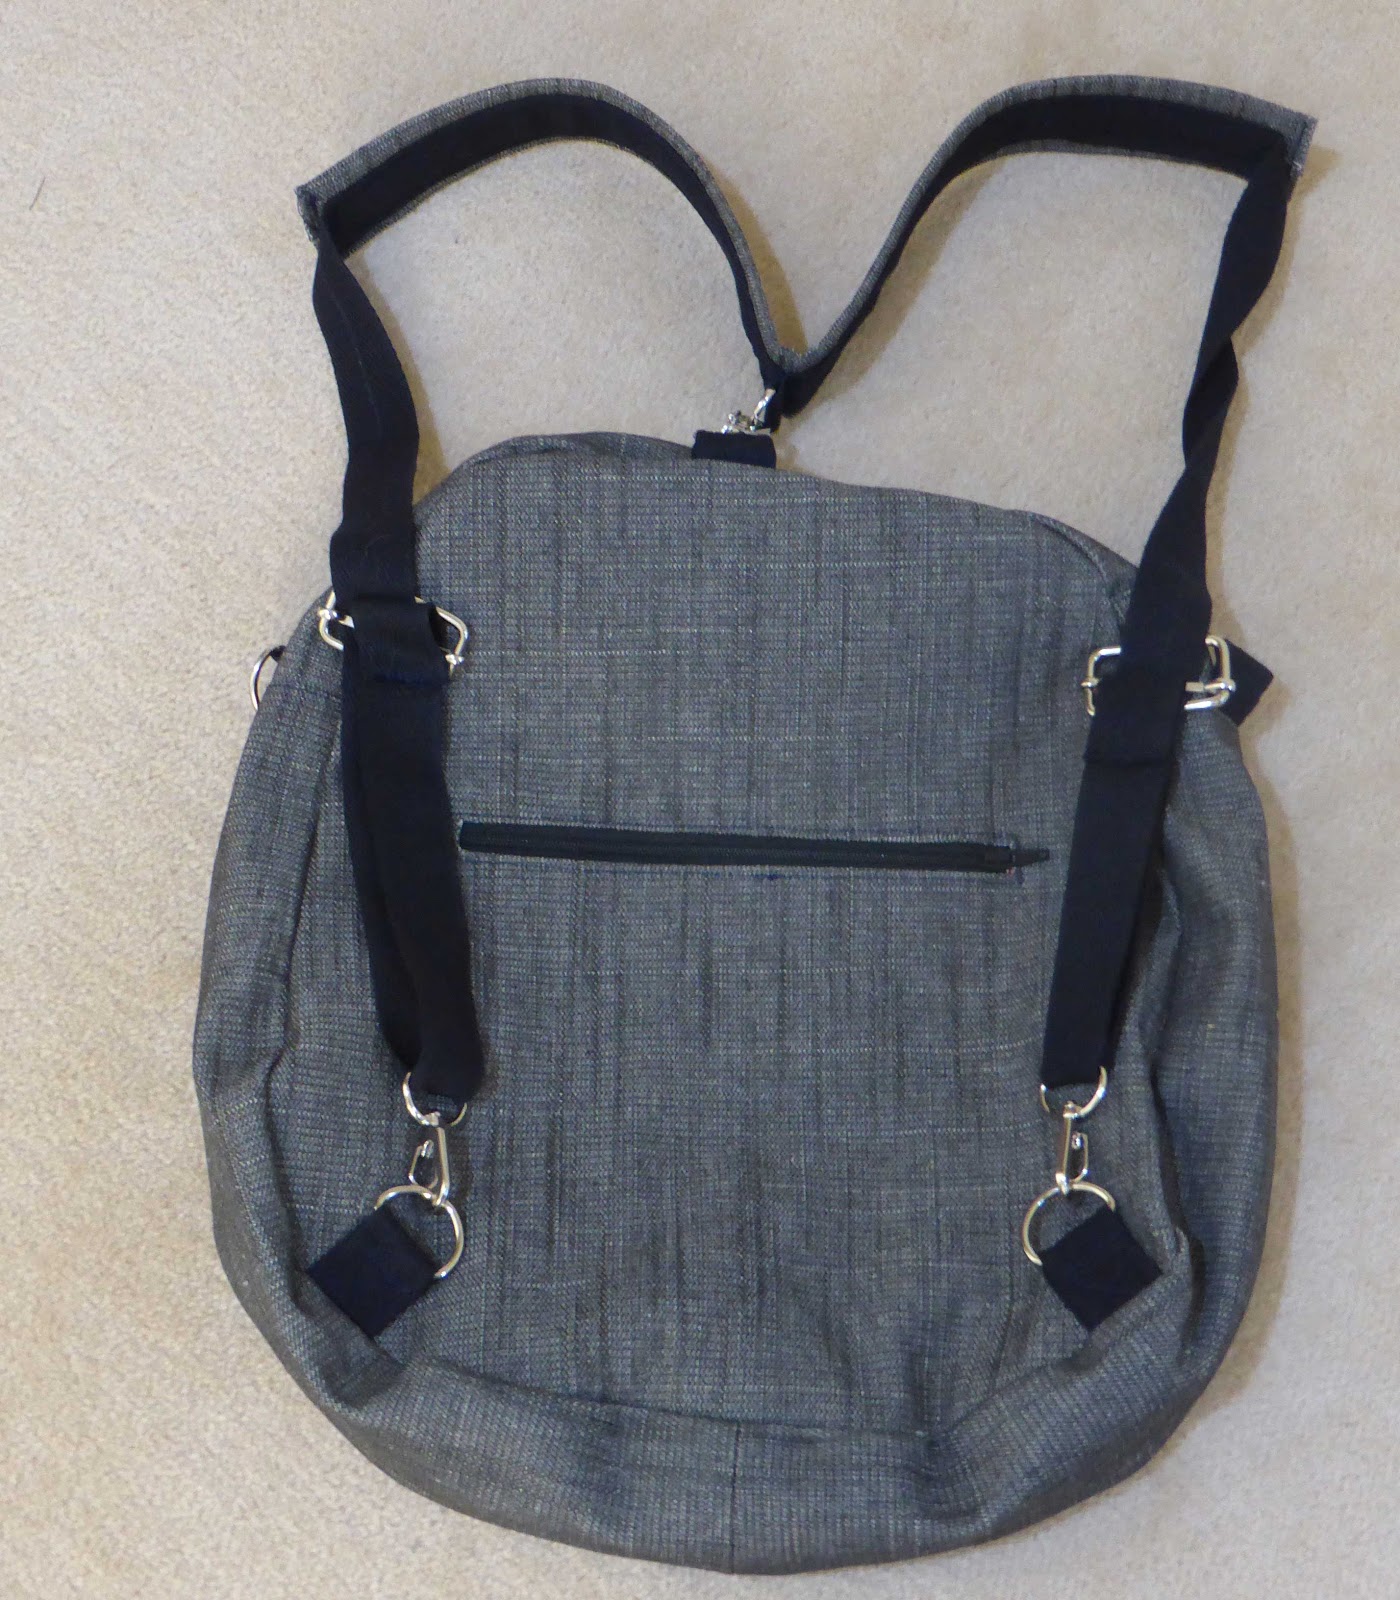
Above is the backpack style and below is the shoulder style or cross back style.
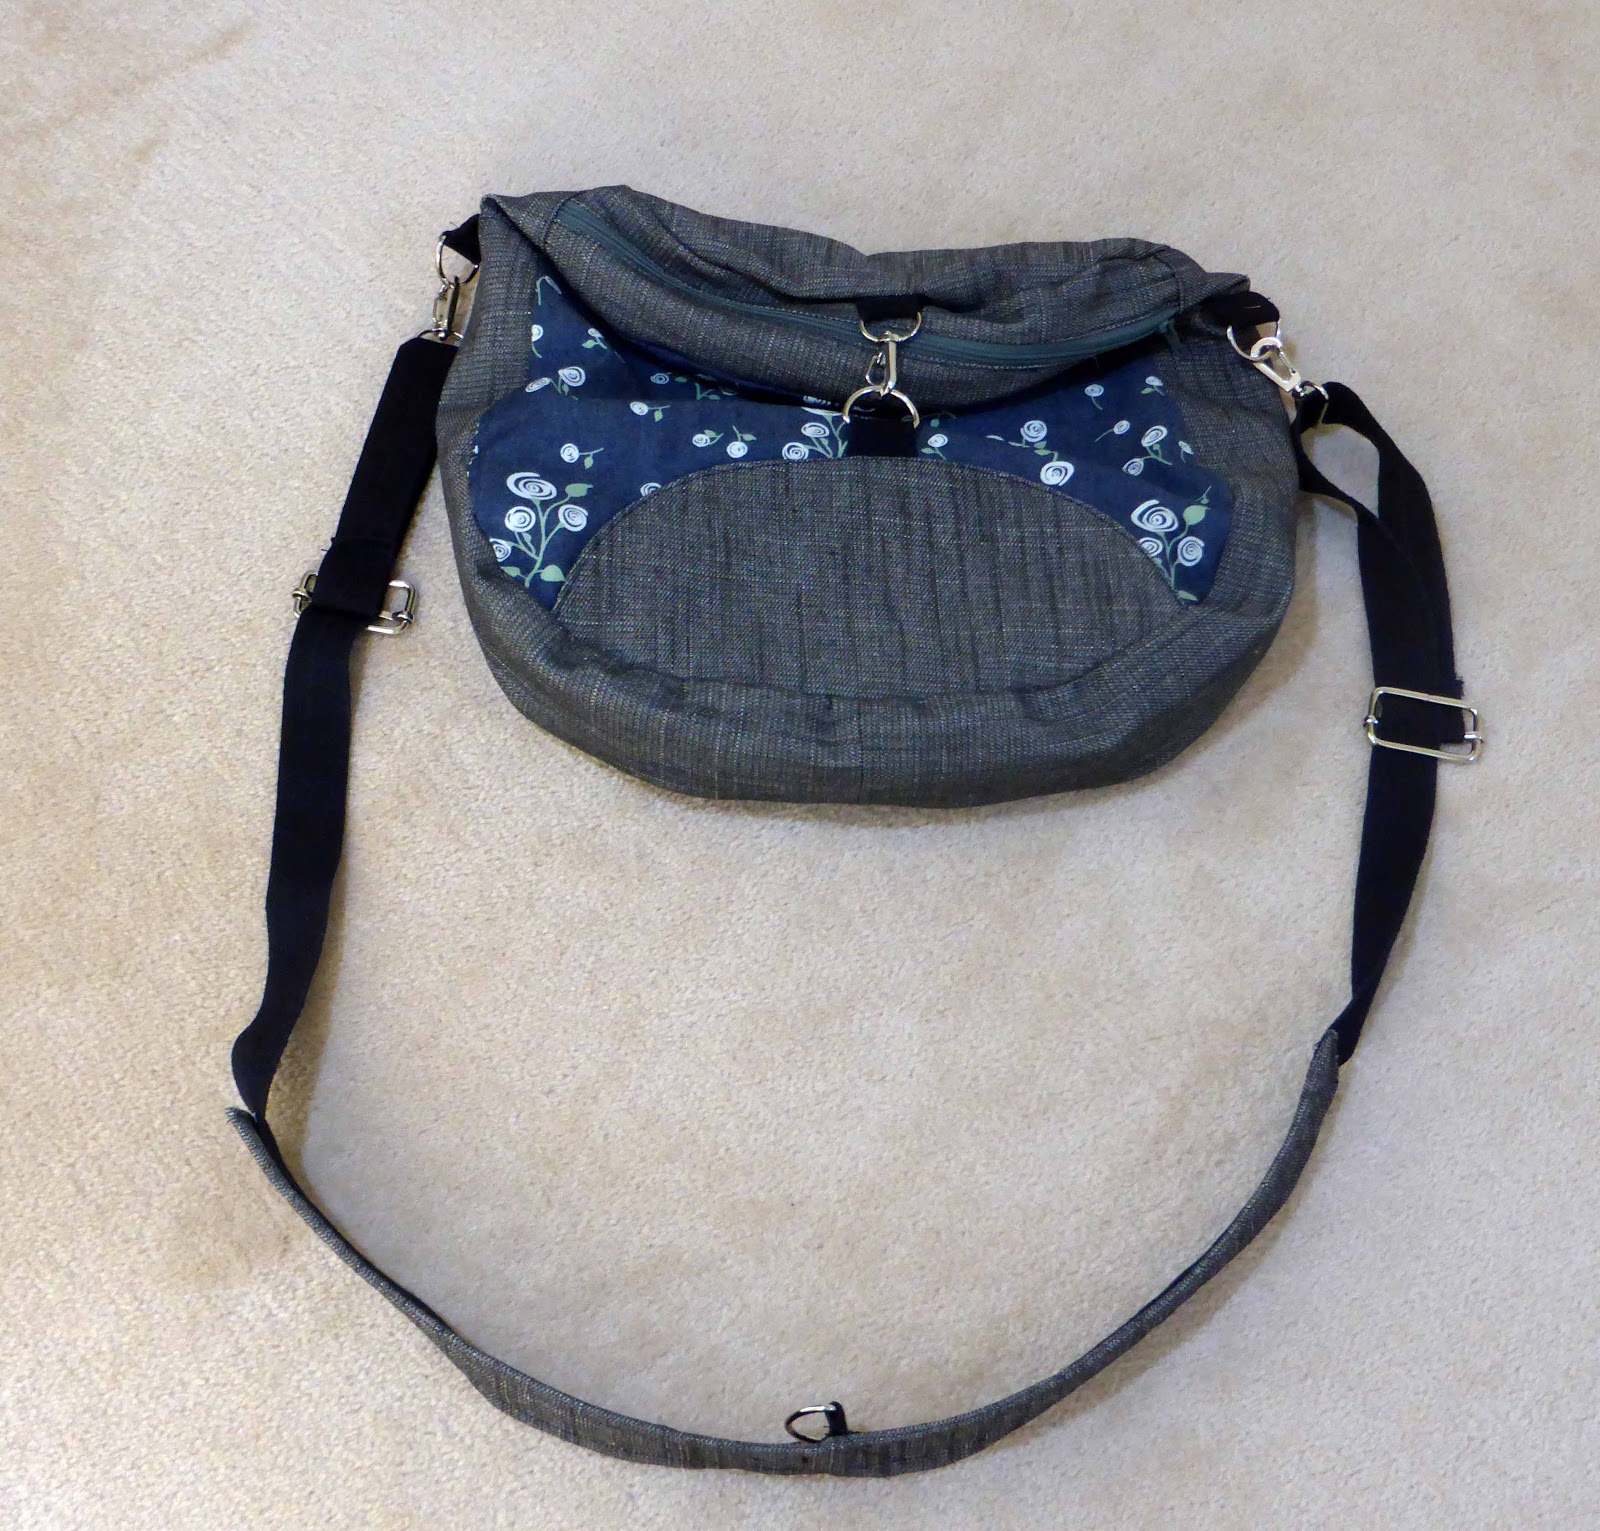
The external zipper works well for the shoulder style bag.
Lastly were the shorts. Summer has arrived and I when it’s hot I live in shorts and tees.
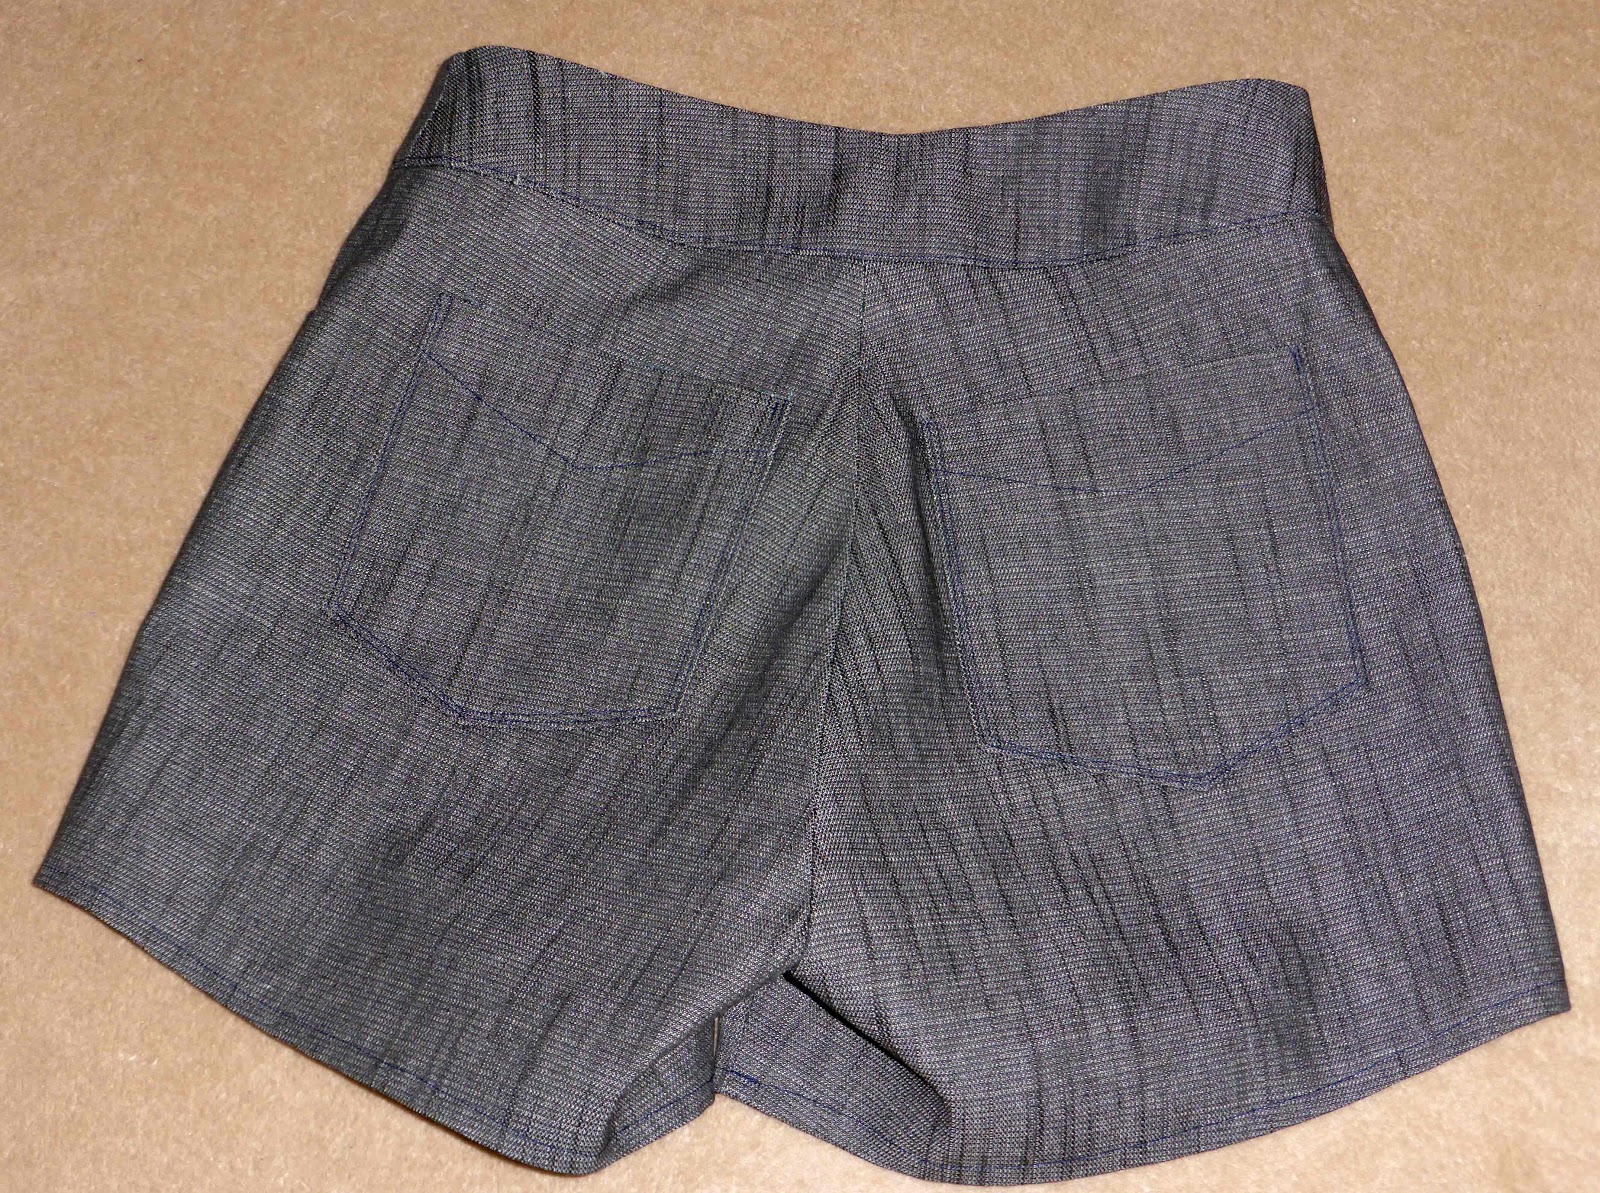
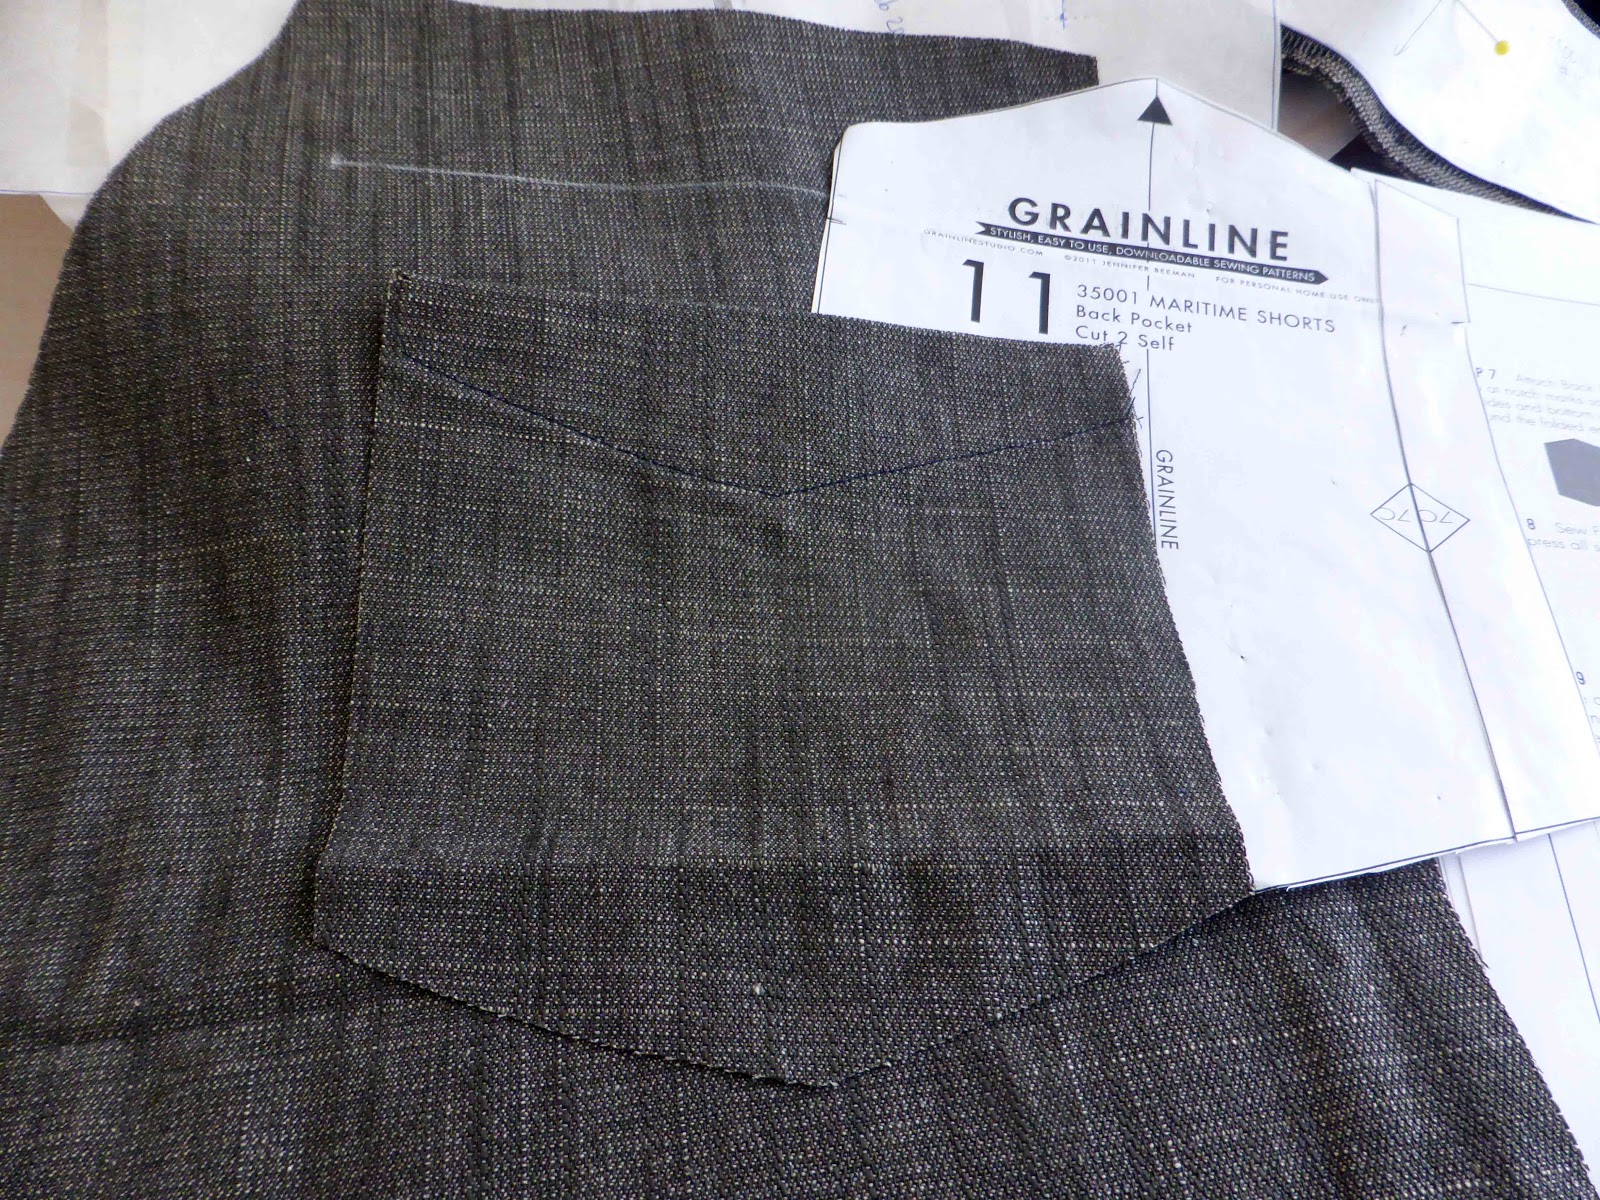
I made these Maritime shorts by Grainline patterns in 2014 so I knew this pattern works for my shape.

This pattern has a sway back adjustment and a lower centre back curve.
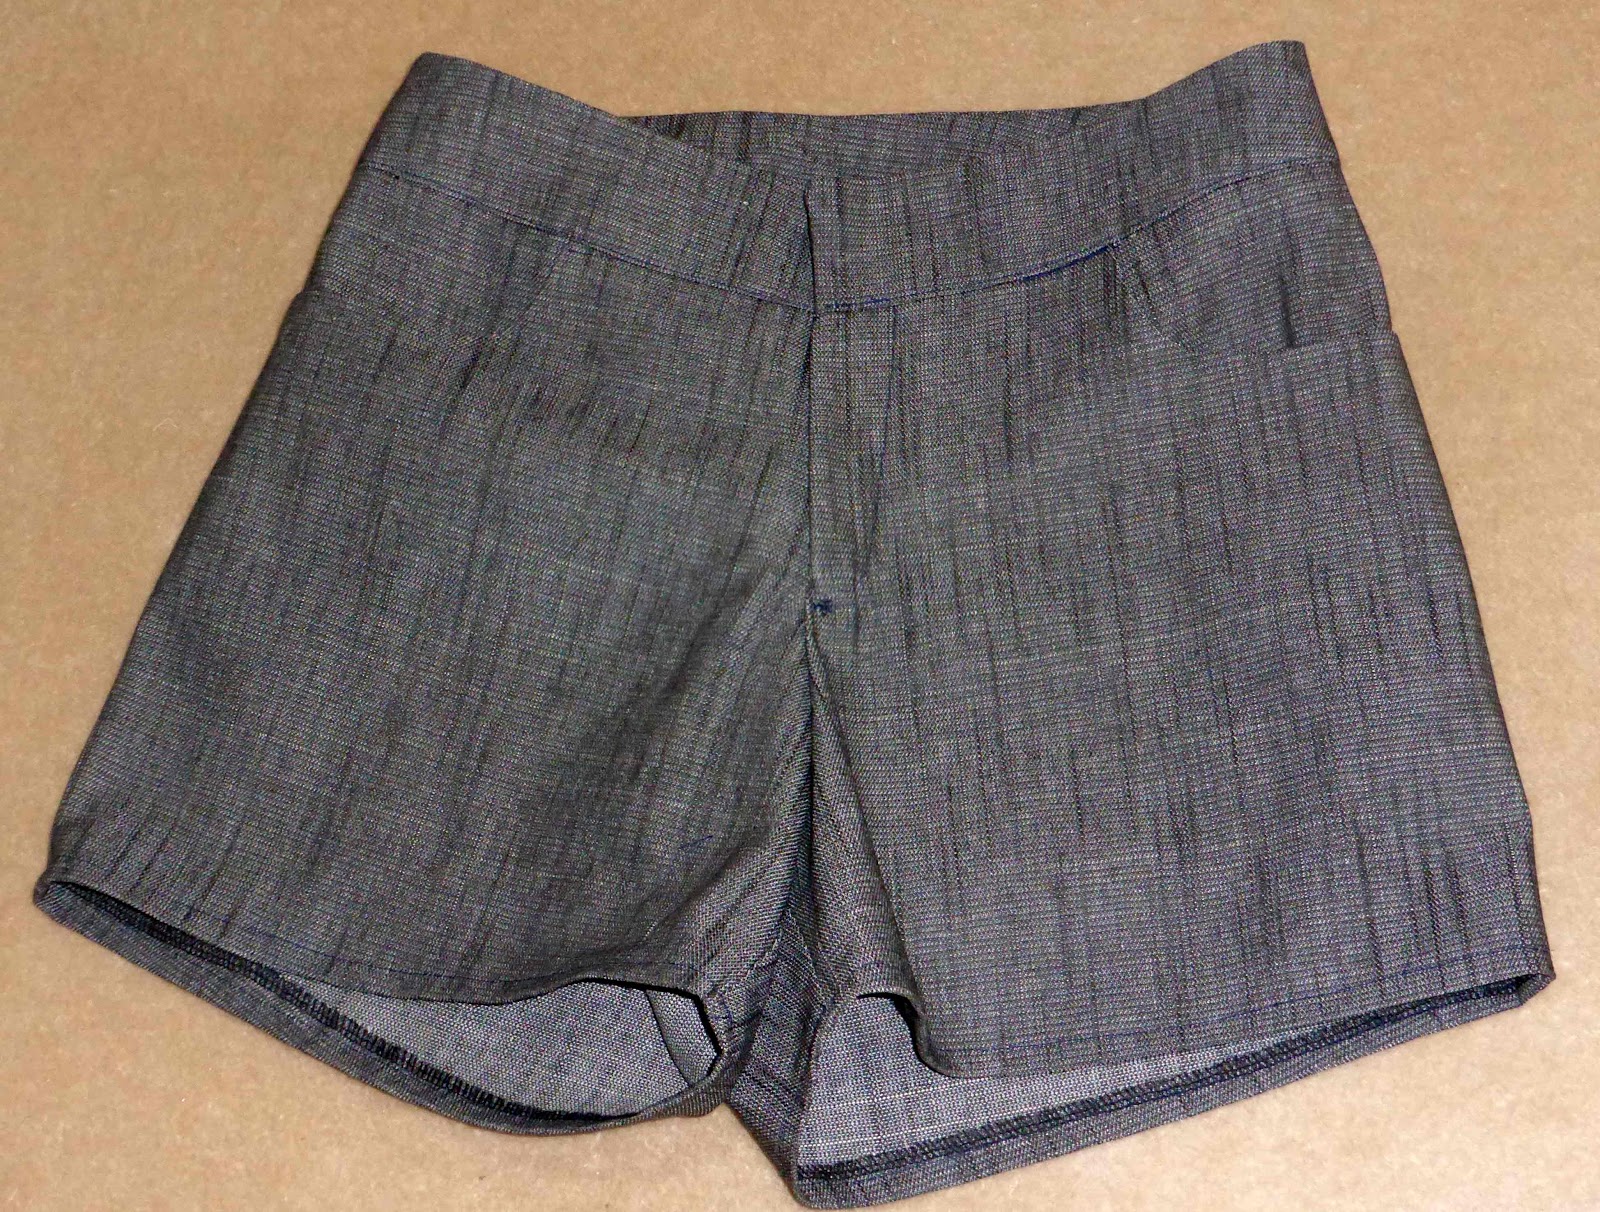
The fabric is quite firm so I added 2cm at the side seams.
The fabric sews up really nicely and the weave is something I love.
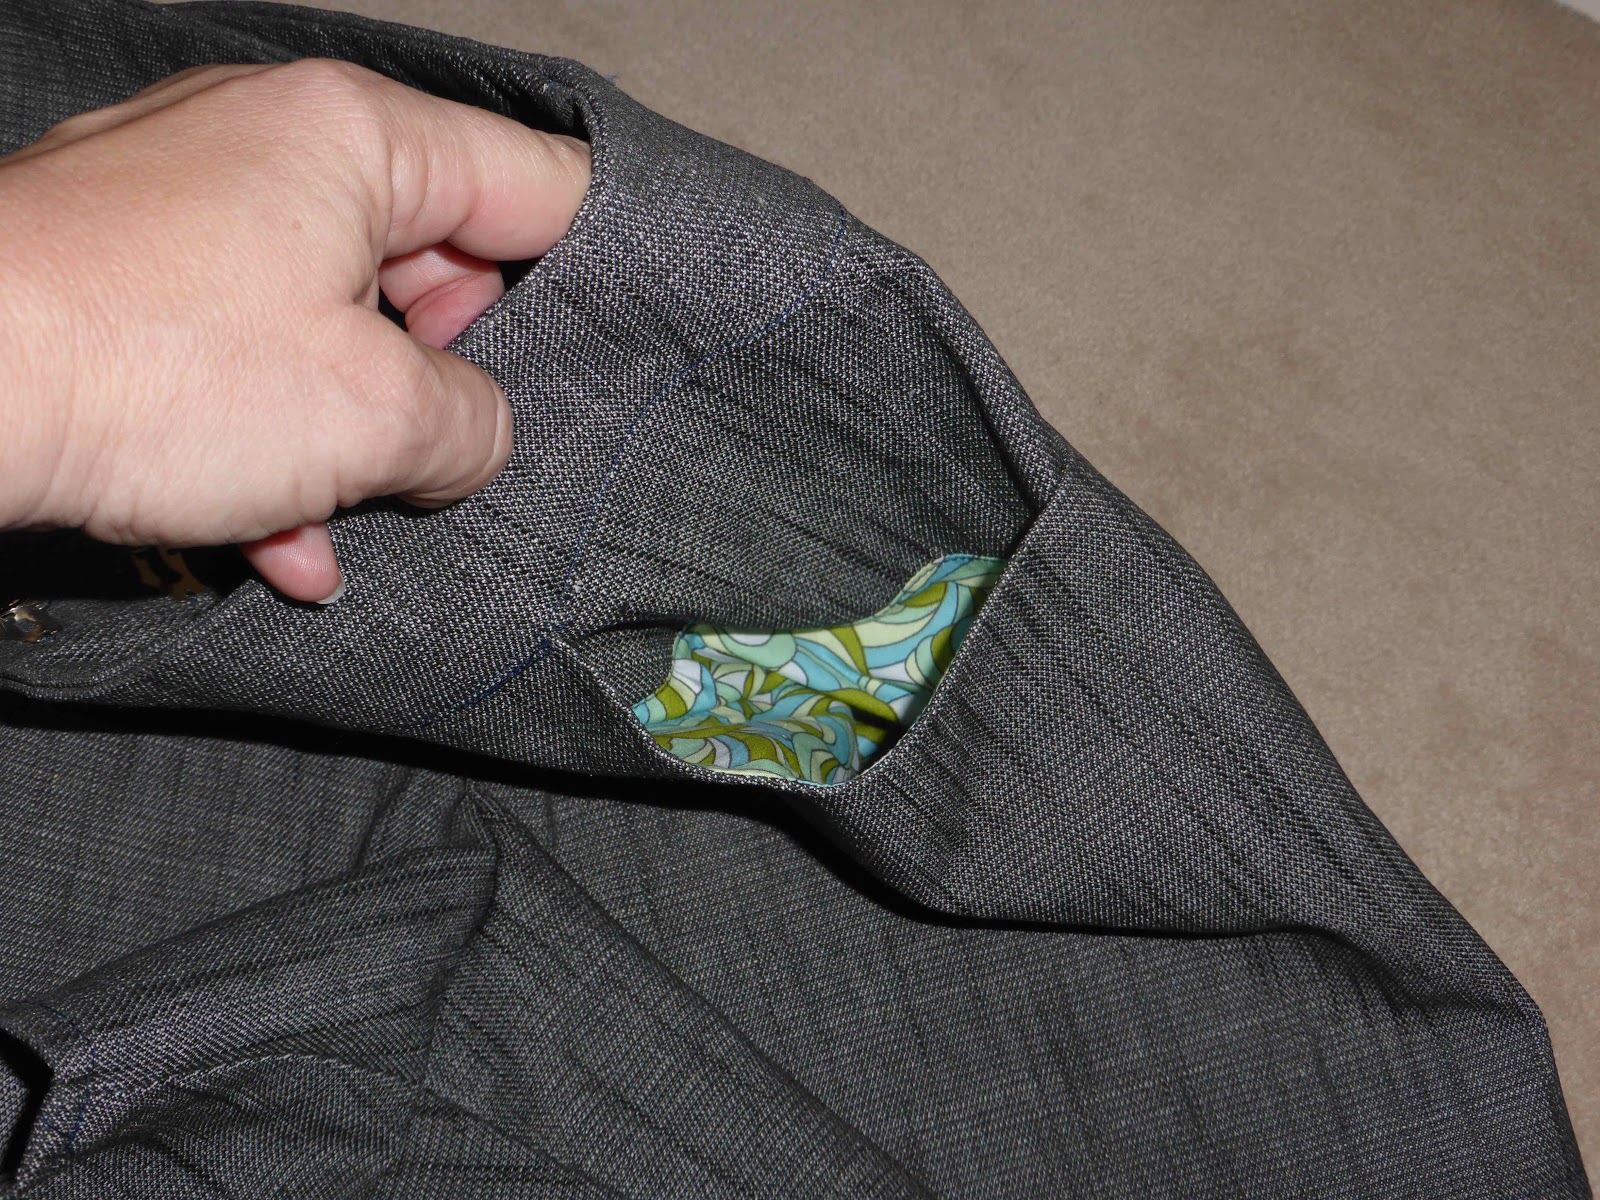
Again I stashed dived and found some more remnants from previous Minerva Crafts project for the pocket lining.
I used more stash notions for the closures.
When I ordered my fabric, I didn’t know if I would get time to make these shorts for this post but I’m glad they worked out this month.
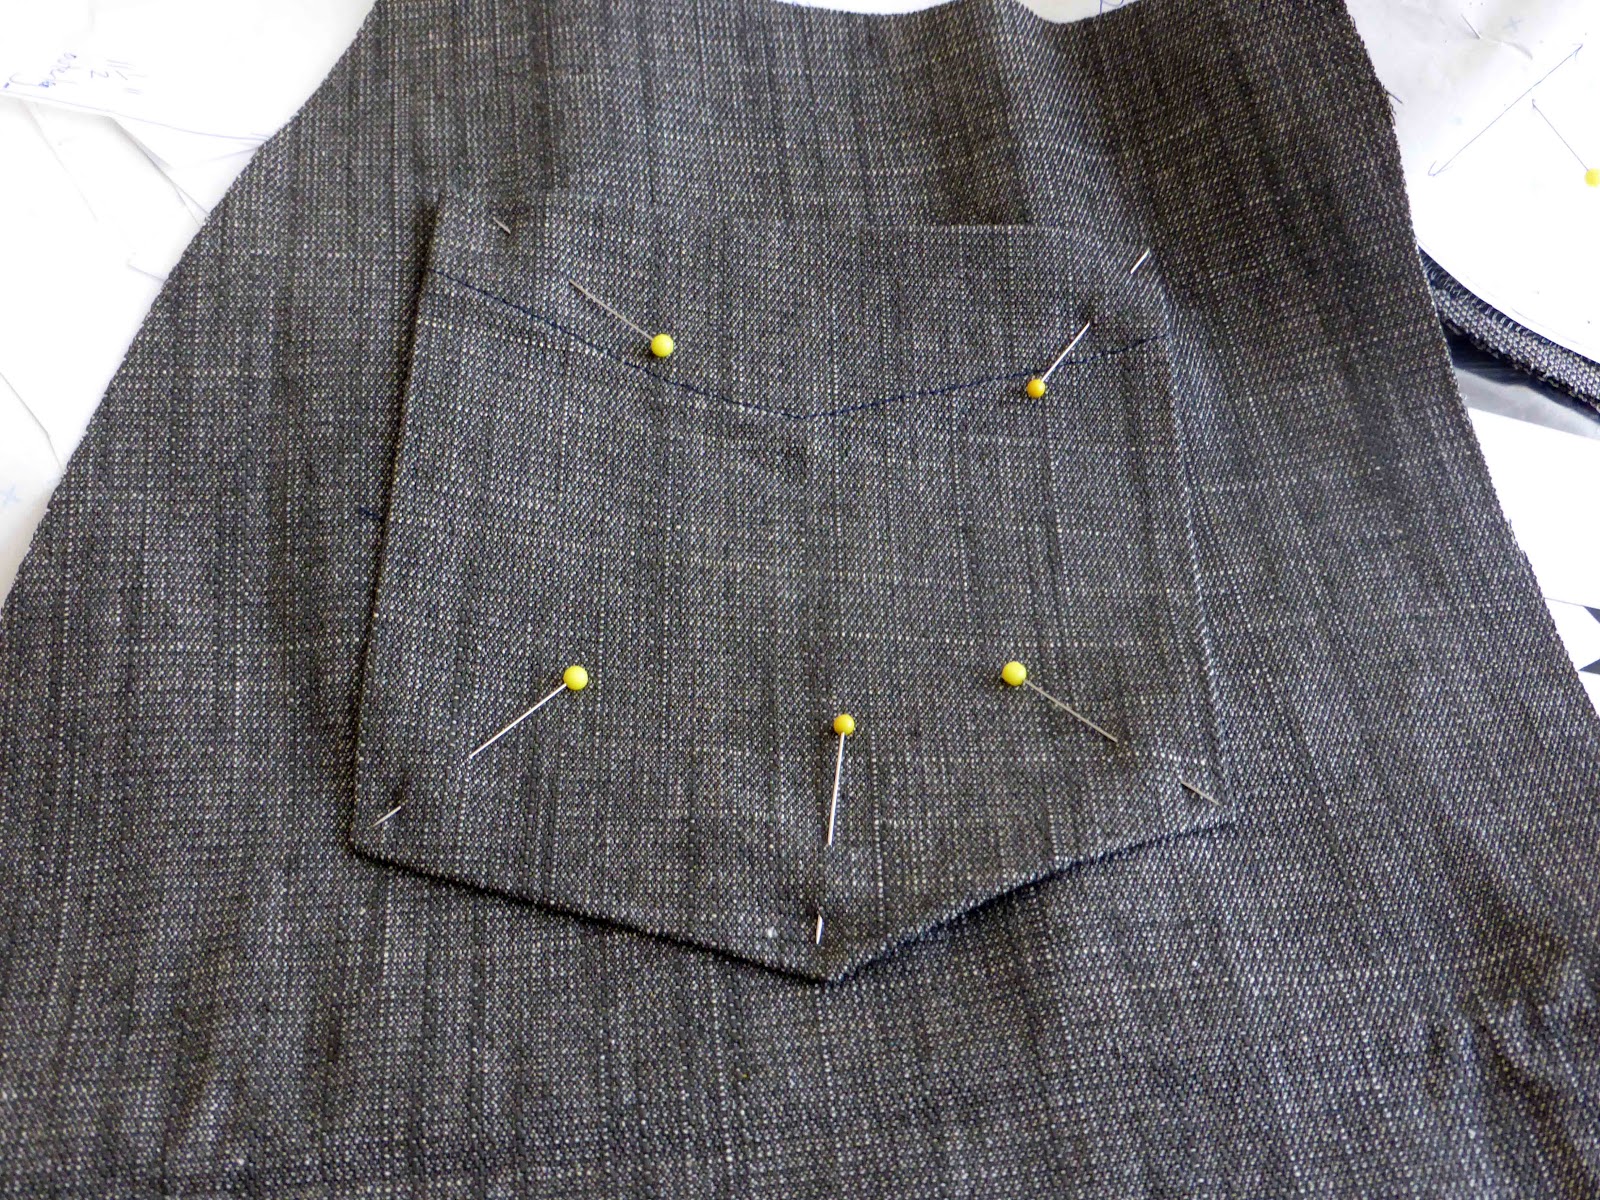
I love the pocket detailing of these shorts. When I sew pockets, I pin mark the turning points for a sharper finish.
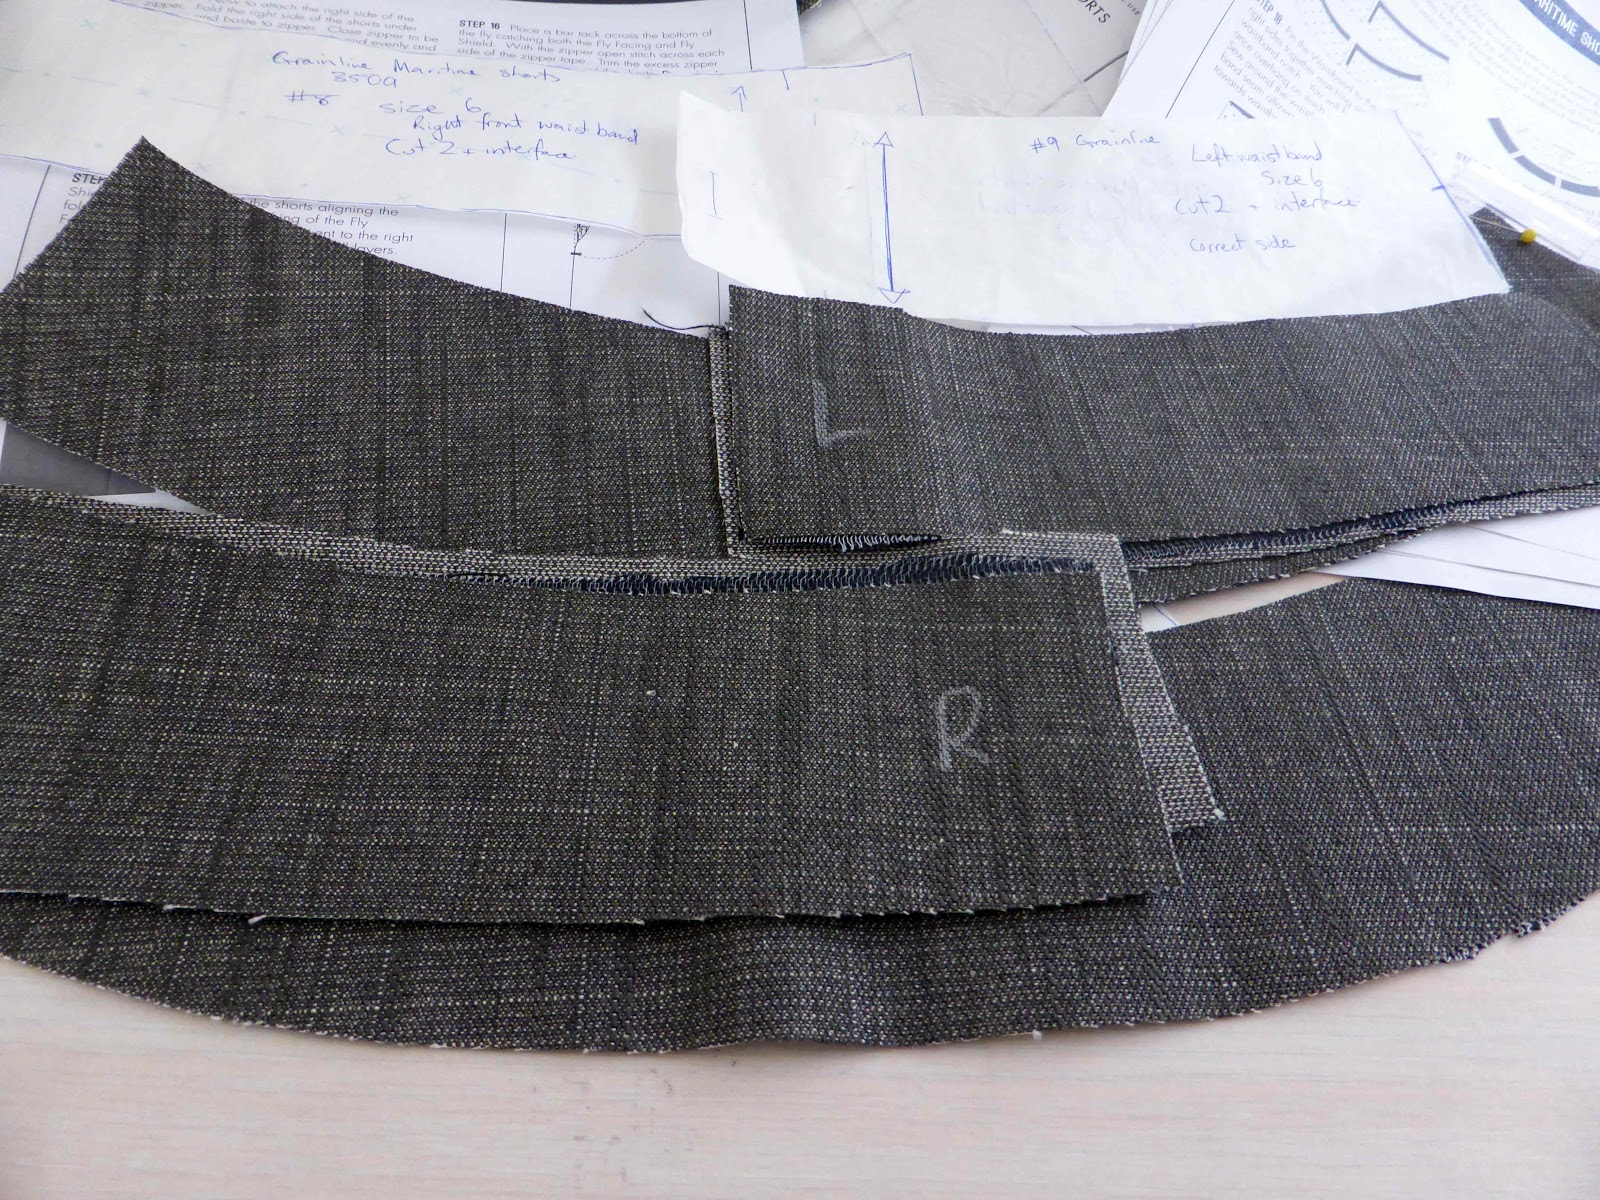
The waistband pieces are marked to line up these pieces.
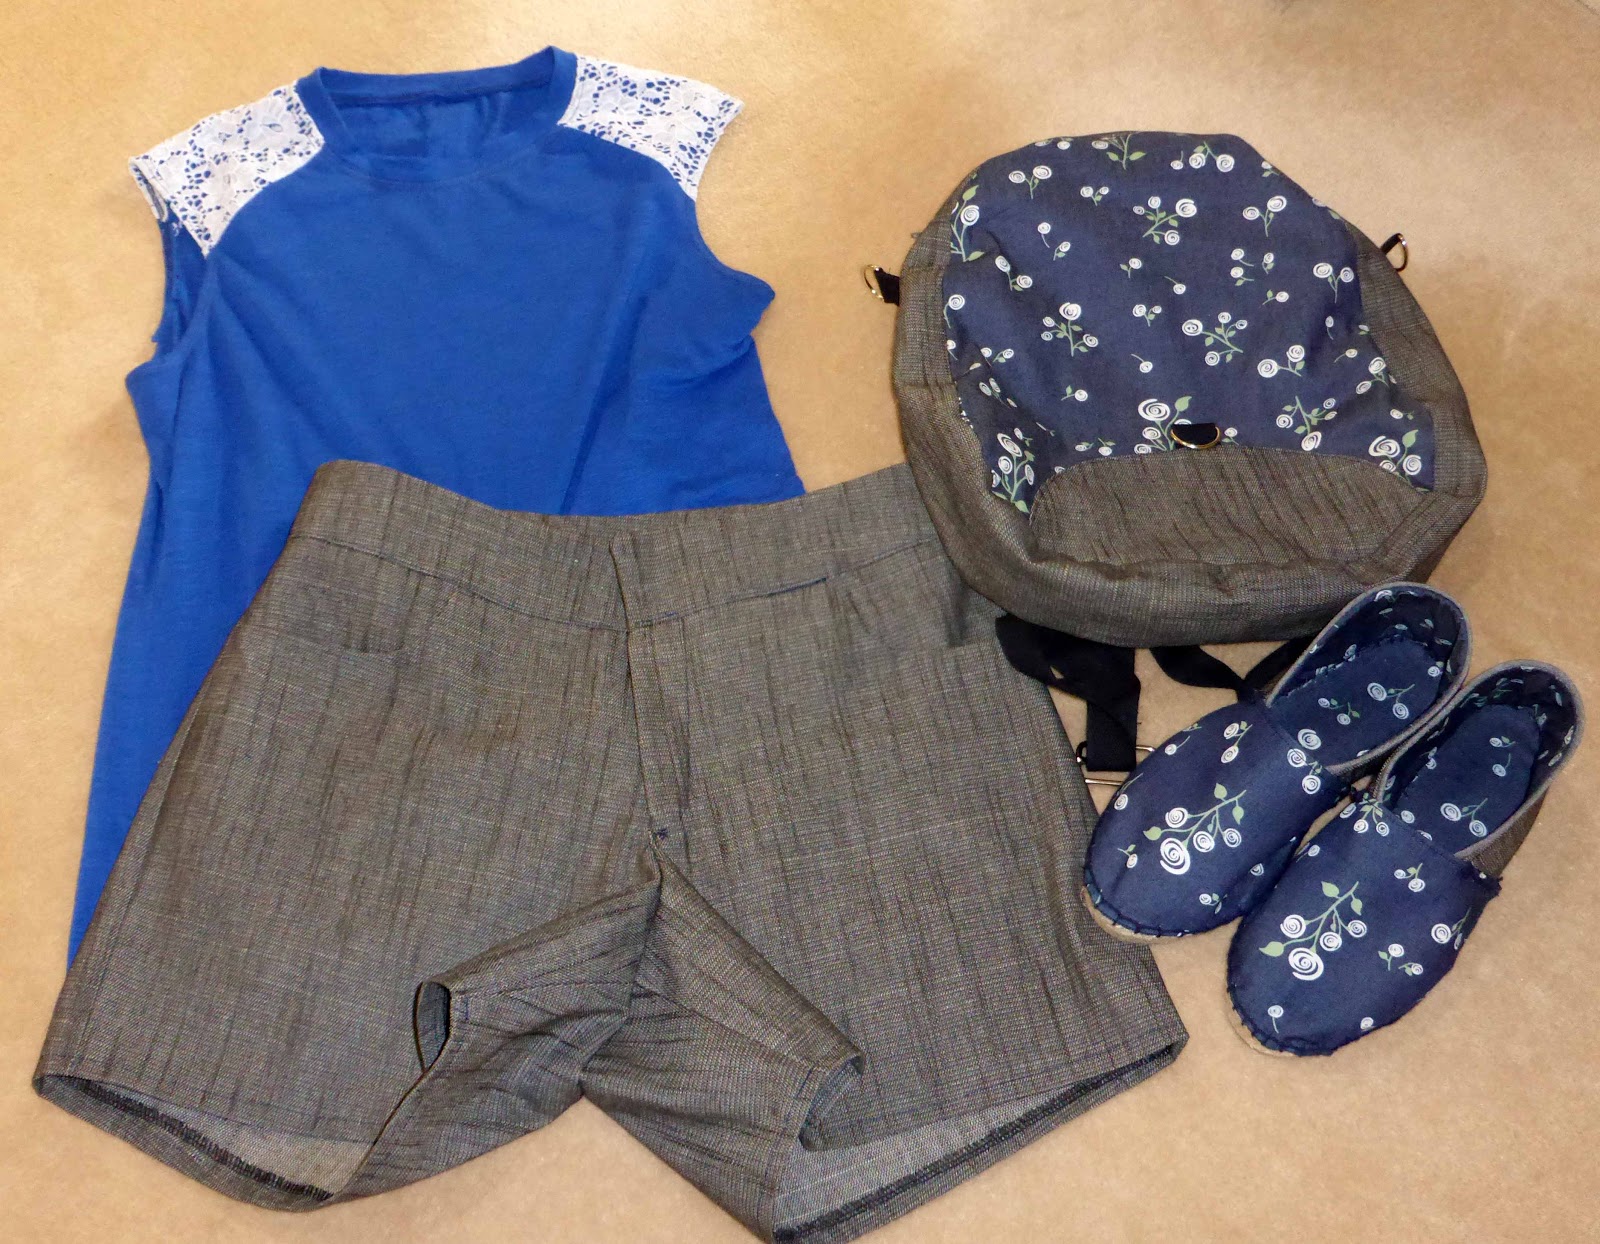
So now I can pair these three travel basics with any tee and be comfortable. I can wear the same bag three different ways, which is handy when you’re on the go.

Thanks Vicki for this month’s huge kit. You really know how to put together a kit for a shoe making novice like myself.

[…] page; Sacotin addicts facebook page; Sacotin pattern reviews on Pattern Review. Maria’s Limbo bag review;Maria’s Samba bag reviews; Threads and needle reviews, Odicoat […]
LikeLike