This was a workshop worth attending. For some of us, it was a revelation.
How much can you pick up from a single overlocker workshop when you’ve owned an overlocker for many years.
(This is kinda technical so if you’re not interested, ignore the rest of this post and see you next time.)
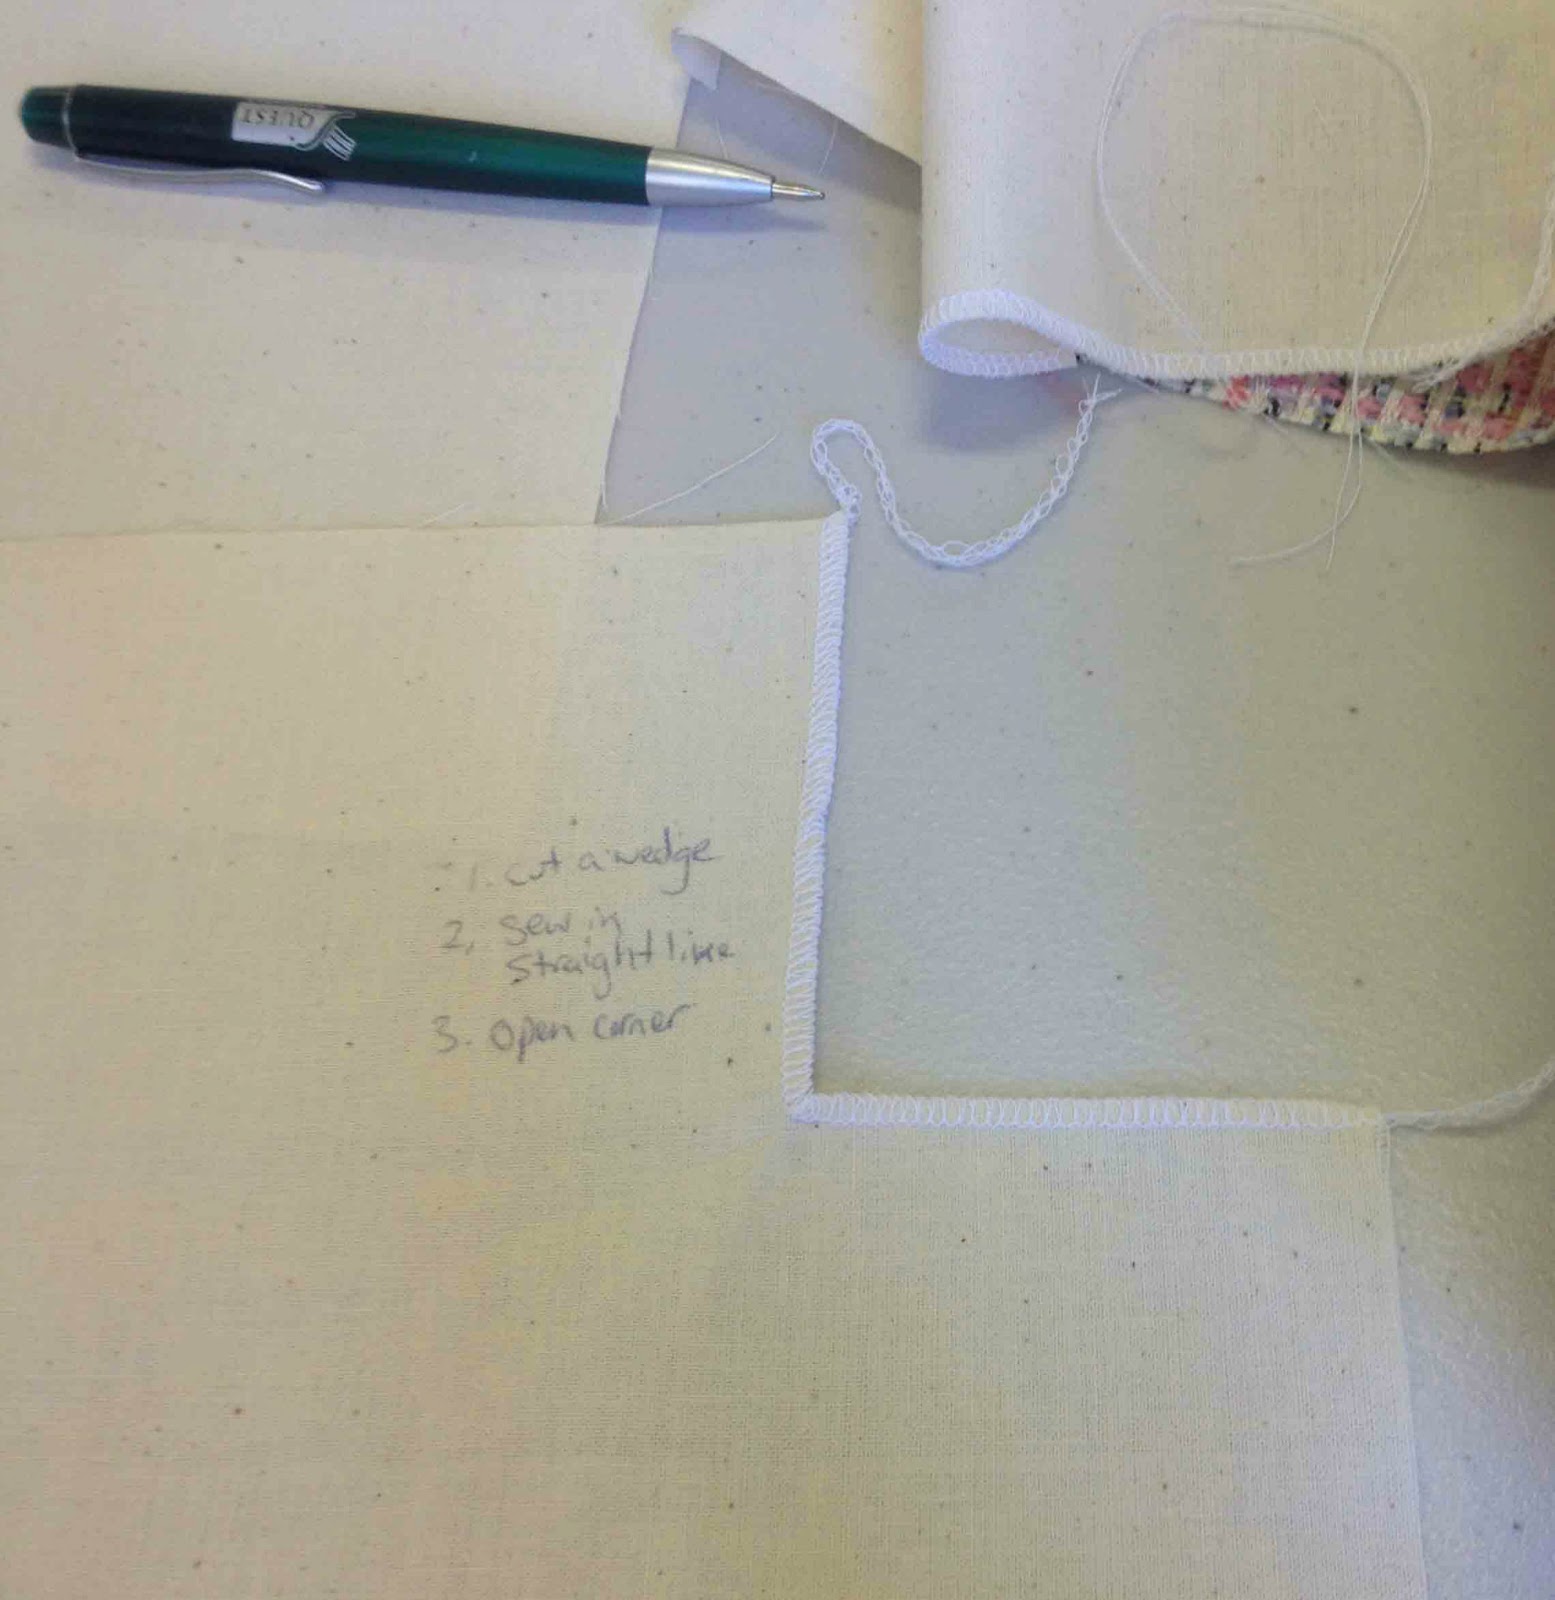
You know those inward corners that never seem to sew correctly? Well clip that inward corner for the depth of the seam allowance, open up the corner as shown on the left, sew it in a straight line and Voila – a nicely sewn inward corner.
Take that jeans zipper front seam!
 |
| Preparing the inwards corner with a small clipped corner the depth of the stitching and pulled straight, ready to sew. |
 |
| The finished inward corner – amazing!! |
What if you’re making a casual jacket that suggests a bias bound finish but you’d rather use an embroidery thread?
1. Finish the edge with an embroidery thread using a three-thread stitch and when you get to a 90 degree corner,
2. Continue sewing to the end of the fabric,
3. Loosen the top needle thread out to move the fabric,
4. Turn the fabric corner 90 degrees and when you place it under the overlocker foot to sew,
5. Tighten the needle thread back up to the reel and keep on sewing.
Want to make a ruffle but can’t afford a ruffler foot?
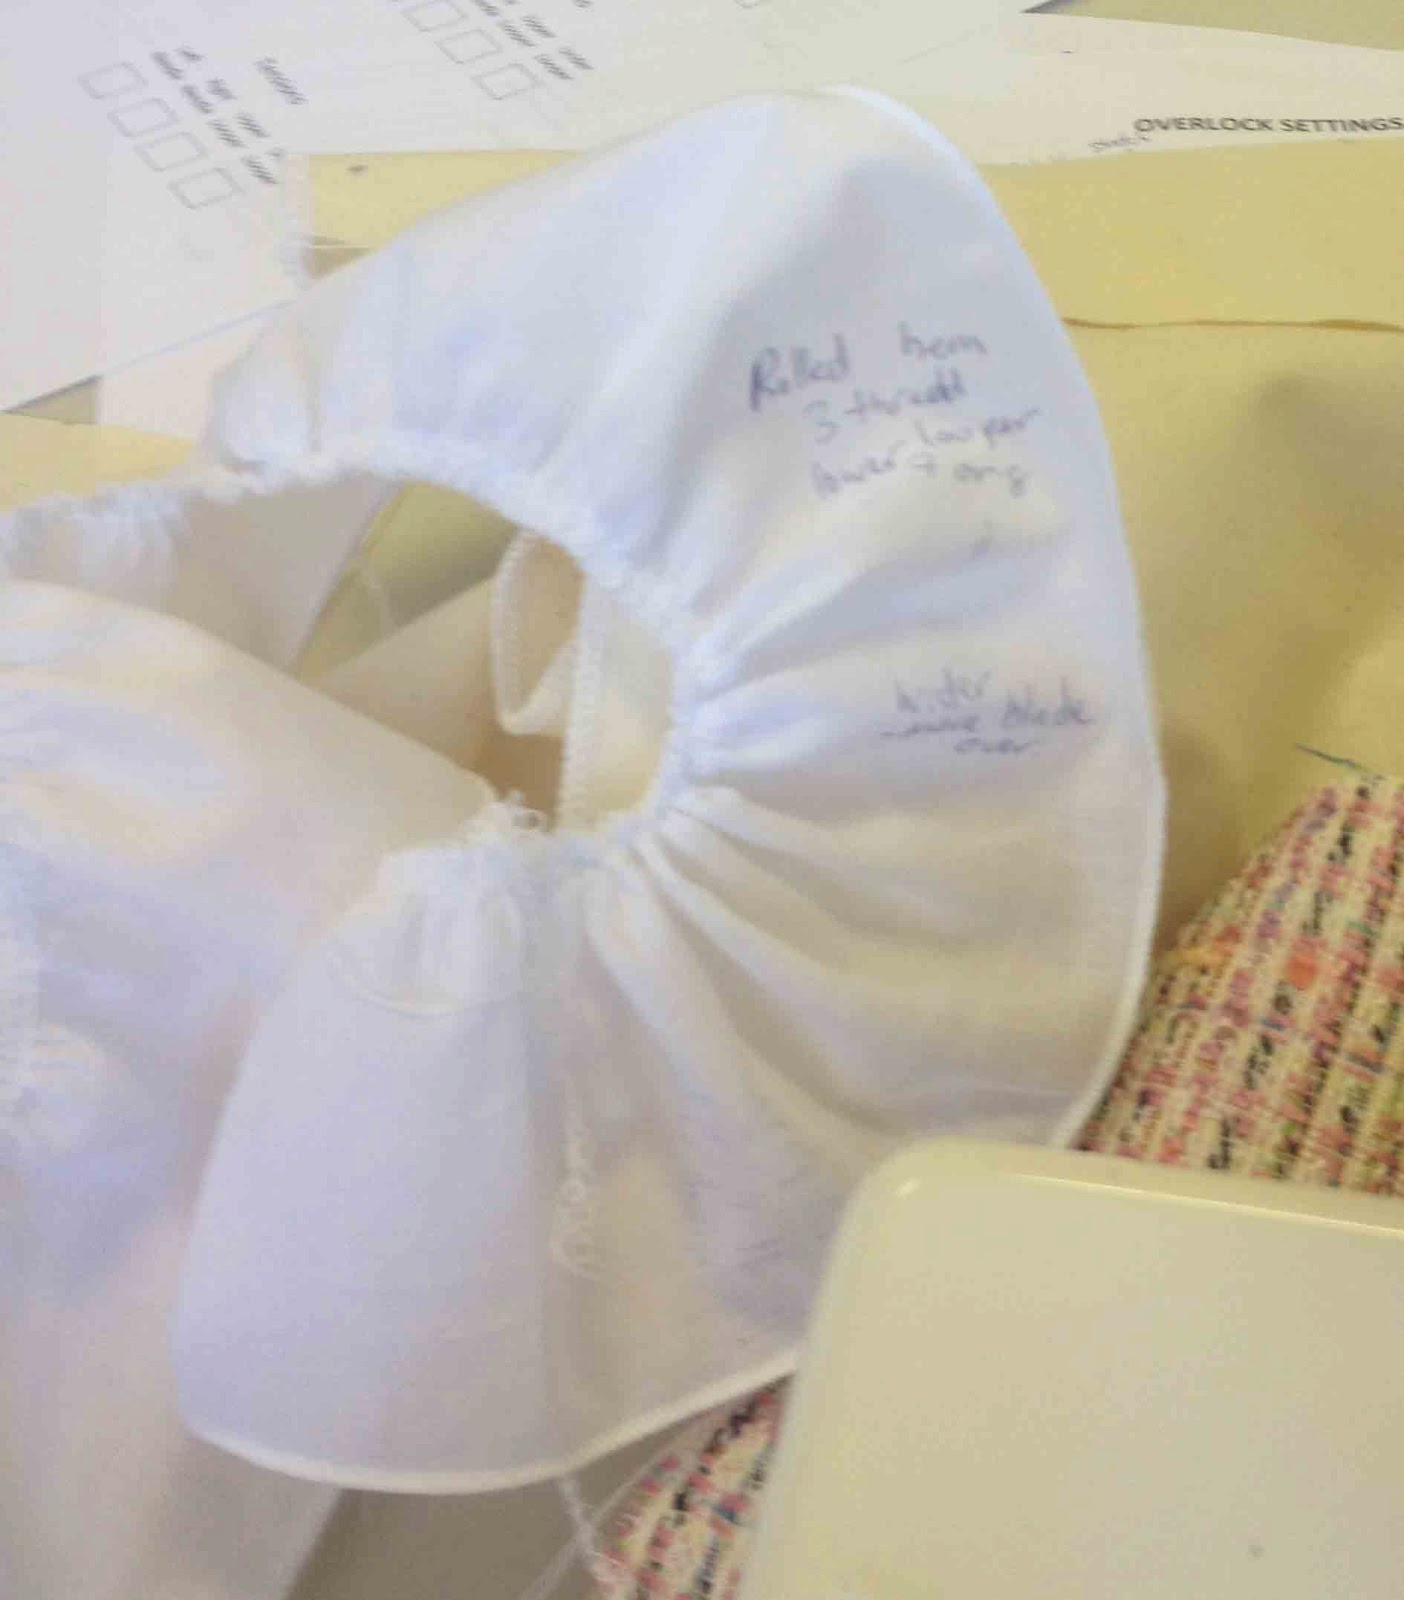
With a three-thread stitch (use the right needle and remove the left needle); use differential feed of 2 and watch the fabric ruffle.
No expensive ruffler foot needed. Why didn’t I just read my user guide all those years ago?
Pull the stitch thread along the top for a more ruffled ruffle.
Add a rolled-hem finish with a three-thread stitch and lower looper tension of 7 or 8.
If you want a wider rolled hem, move the cutting blade to the right. It’s that easy.
I think my littlest niece is about get a bunch of ruffled skirts from Aunty!
Well that was a lazy Saturday at a Rhodes arranged workshop with
Gail, Luci, Jenny, Wendy, Rebecca, BeaJay, Kristy in a class of 12 learning how much more we can do with our humble overlockers.
BeaJay has a fabo write up of what she learnt today including Beajay-made cording with embroidery thread and a cool as cucumber a lacey edge!
PS: I got to meet JudieL from Pattern Review today for the first time.


The workshop was absolutely fantastic, I learnt so much in such a short amount of time. And of course it was great to spend time with fellow bloggers and blog readers
LikeLike
Lucky lot – I would just love to meet fellow bloggers. Years ago I learnt some of these techniques = they are very good.
LikeLike
I love the ruffling via serger because it finishes the raw edge too while making the ruffle, all in one step.
Greetings from SF!
LikeLike
Great tips! Thanks for sharing.
LikeLike
Wow! I've only just bought an overlocker and I'm pretty impressed with the basic overlocking function because that's all very new and exciting to me. You describing all those amazing other things it can do only makes me hope I can learn these same things on my machine!
Thanks for sharing!
LikeLike
It was indeed a fantastic workshop. And there were things we didn't even get to (I remember seeing a black and white finish that turned from one side to the other – want to learn that!).
Great instructions in your post.
LikeLike
Thanks for sharing a few tips with us all – sometimes it is these little tips that make sewing soooo much easier…J
LikeLike
This is great. I am embarased to admit I have never bothered to try out using differential feed. I will now!
LikeLike
Very useful post! Not boring at all, this kind of thing fascinates me. I did a class like this at Hobbysew when I first got my overlocker and it was wonderful but unlike you I forgot to write the instructions on the muslin samples so of course I forgot. I am so pleased as this recaps just about everything I couldn't remember.
LikeLike
Thank you for the reminder of what our overlockers can do and even with my older singer I'm sure if I get out my manual I might be surprised at what I can achieve.
LikeLike
Sounds like a great workshop!! Thanks for sharing some of the tips with us. Love the inside corner tip and will be using that one for sure 🙂
LikeLike
I am absolutely green with envy. I read my overlocker manual occasionally, but it seems to go in one ear and out the other, in fact, I always sew with my real machine as well as the overlocker, because it just isn't trustworthy – or is that my sewing that isn't trustworthy? These are great tips, Thanks!
LikeLike
Fabulous. Like with any piece of technology, the results we get from said tech will only ever be as good as the knowledge of the user! And knowledge is power. Go forth and overlock!
LikeLike
It was a revelation! I can't believe what I didn't know and am putting it into action.
LikeLike
Thanks for the tips I love the corner ones especially. I went to an overlocker class last year – have been wanting to attend for years and finally got the chance. I learnt a bit and made some scarves using the rolled hem and fancy embroidery threads-they look very pretty .
LikeLike
I went to an overlock class a few weeks ago! I learned SO much. Loved the ruffle technique and the rolled hem!
LikeLike