At Newcastle Frocktails there were at least 4 people who wore their versions of Lois dress by Tessuti.
I was so impressed with their individuality that I ended up buying a hard copy of the pattern from Minerva’s Bower in the Blue Mountains.
What concerned me the most with this design was the neckline. It has a deep V and most people do something to raise it or cover their bust a bit more.
Next, I couldn’t see where the zipper would sit. I read that sewing in the zipper was also a challenge for many sewists.
Lastly there’s no line on the skirt part to help shorten the dress to knee length. I’m short so I could see the pattern would be a long dress as is. Once I get the final photos done, you’ll see this is a long dress for me.
Here’s what I’ve now done to the pattern so it fits me.

Here’s what I’ve done to the front bodice. I’ve raised the curve by 3 cm and extended the join so I can give myself some bra coverage.
What you can see below is the initial fabric check I did before I pinned the front bodice for sewing. I was wearing a v-neckline knit top at the time so I could figure out what neckline depth I was comfortable with.

You’re right if you’re thinking, ‘did she add piping to the neckline?’
I figured, the neckline is the key feature of this design so why not add piping to draw your eye to the neckline.
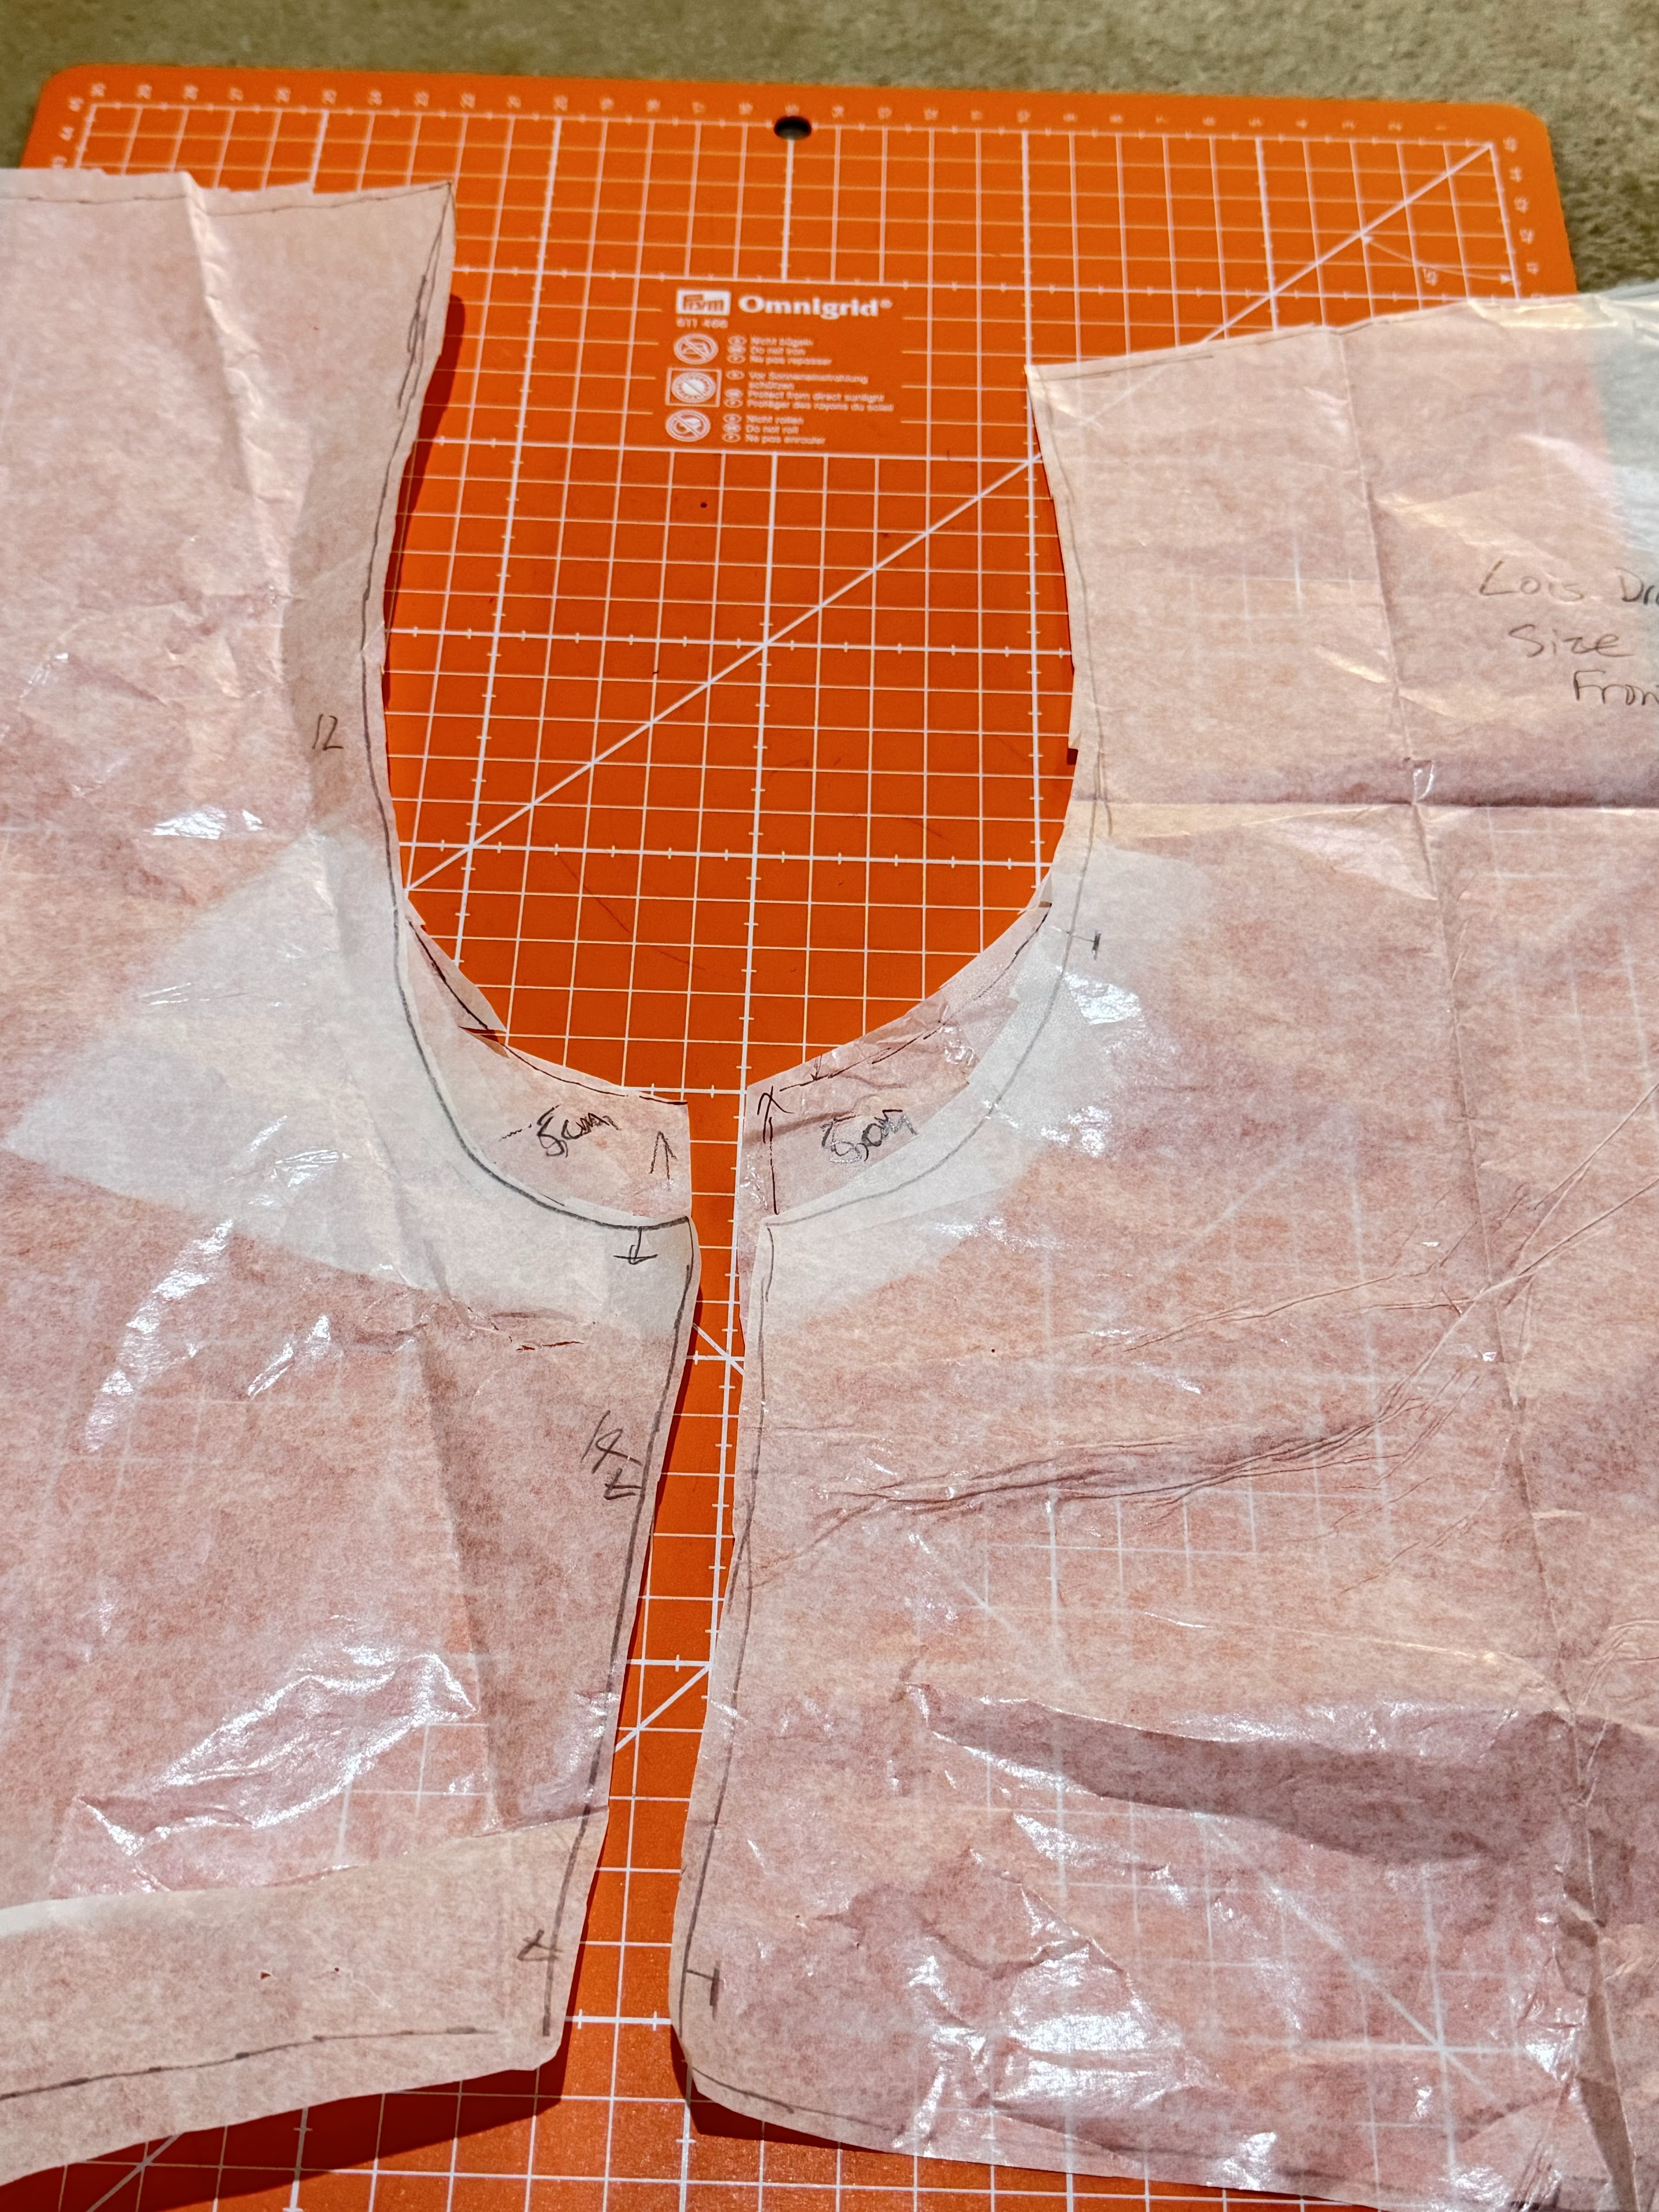
The other issue I checked was how low the armhole would be. As you can see above I’ve raised the armhole base by 5cm on both front and back side seams. Once I had sewn the side seams in the fabric, I measured how long the armhole is and I shortened the sleeve band to fit.

I checked the armhole after I cut out the fabric and compared it on the knit top I was wearing at the time. The sleeve band is 3cm wide so with the newly raised armhole, the next Lois dress will be perfect for my needs.
Lastly I’ve done a sway back adjustment to both the back skirt panel and on the back bodice. When I take those pictures I’ll post them to these tech notes.
The pattern guides you to use vilene tear away. I didn’t have any and stay stitching was my solution here. I didn’t have to buy more product that is not easy to find locally.
The pattern guide you to sew in an invisible zipper. From the drawings on this pattern, it didn’t show where the zipper should be sewn.
My pattern research showed that if you have a fairly block shape body, you don’t need a zipper. My waist is a block now so I’m happy to now have an easy to wear dress I don’t need to iron or zip close.
Final photos up soon.
